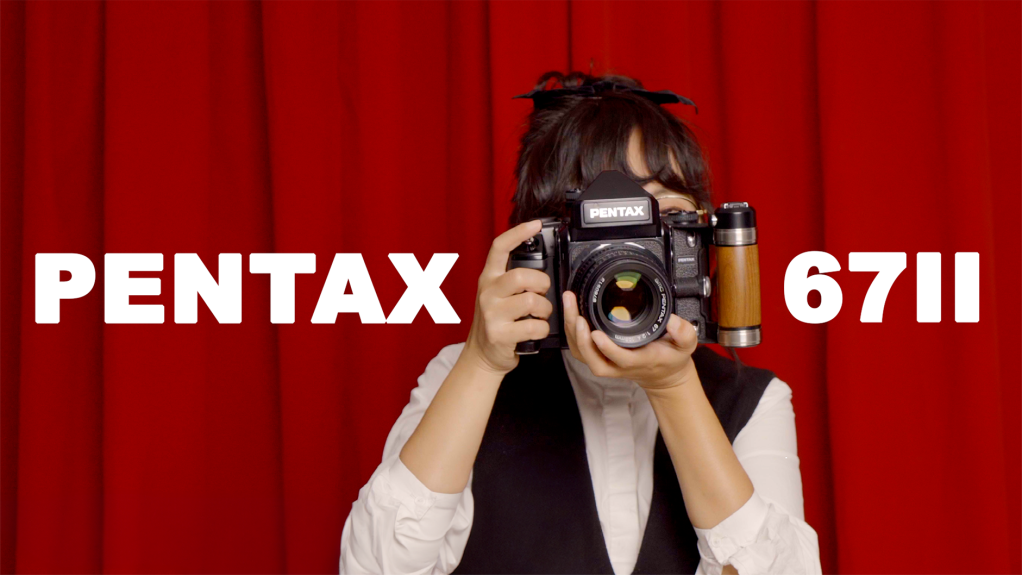
Hey guys, this is Sam, welcome back to another episode of “I just can’t stop smiling for the past whole week” AKA “I finally got my dream camera The Pentax 67II”.
I just received this camera about a week ago for my birthday. I’ve been saving up for it for a long time, so I am incredibly excited.
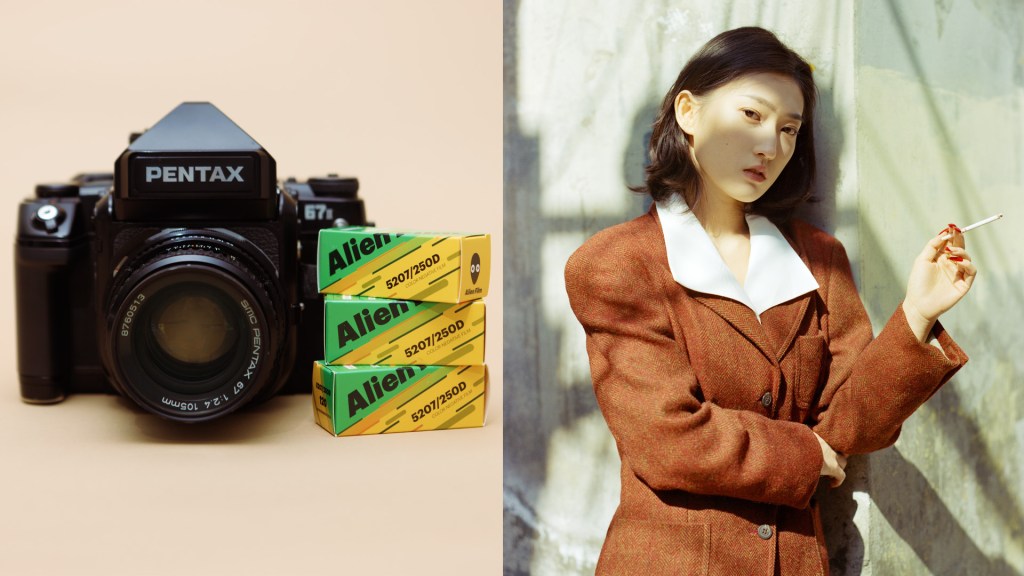
If you’ve been watching my videos, you know I’ve talked about wanting this camera for a long time, and I finally pulled the trigger. There are three models of the Pentax 67 format: the Original 6X7, the 67, and the 67II. I bought the latest 67II version, which comes with the 105mm 2.4f lens. Since I consider myself a portrait photographer, the 105mm is a no-brainer for me.
This is a basic how-to and first impression video. I will show you step by step how to use this camera, from loading to unloading. If you’re already familiar with this camera, you can skip this part using the timestamp as usual. Then, I will show you the first couple of rolls I shot with this camera. We will discuss what I like and dislike about it, though I don’t think there is anything I dislike about it… I said the exact same thing when I made my first Hasselblad video.
Let’s get started!
Before I got this camera, I had been using the Pentax 645NII for a long time. The transition to the Pentax 67II was pretty smooth, without reading the user manual or watching any tutorial videos, I was able to get it going pretty easily.
Now, I’m going to walk you through step by step, as if this is your first medium format camera. (Again, it’s easier to watch the video for better visual explanation.)
HOW TO USE IT
Unlike the first generation, the Pentax 67II is an electronic camera. It takes two CR123A batteries, and the battery compartment is located at the bottom right of the camera.
After putting the batteries in, let’s load up a roll of film. On the left side of the back cover, slide this pin down, then the cover will spring open. The film should sit on the left side, and the empty take-up spool on the right. Unfold the crank at the bottom, turn the knob, and pull it out. Then push the film and spool into the retainer, making sure they properly catch on the knobs. Then turn the crank back and lock both spools in.
Next, pull the film backing paper from left to right, ensuring the black side is always facing toward the lens so it will get exposed when the shutter curtain opens.
Stick the end of the paper into the take-up spool, then turn the winding lever, making sure the film paper properly catches on the spool. Continue turning the winding lever until you see the arrow coming up and aligning with the triangle mark on the camera body.
On the back, you’ll see there is a 120 and 220 option. You can also check on the back of the camera to make sure you choose the right format. Nowadays, there are very few 220 films left that you can purchase, so I’ll just leave this at 120 at all times.
Then you can close the back. Now, turn the camera on. On the LCD screen, you will see the number 120, which is your film type. Keep turning the wind lever until the counting number shows 1. Then you are good to go.
Before you start shooting, don’t forget to set your ISO. While pressing the ISO button next to the viewfinder window, move this lever up and down to change the ISO until the LCD screen shows the correct film speed number. Then everything else is pretty self-explanatory.
On the top of the camera, you have your shutter speed dial. You have A for aperture priority AE mode, X as the flash sync speed, and B for bulb, for shooting long exposure. The highest shutter speed goes up to 1/1000 of a second.
Next, you set your aperture by turning the aperture ring on the lens. The lens I have for this camera is the 105mm f2.4 lens, which is very rare for medium format cameras.
Next to the shutter speed dial, you have your 3 metering modes: spot, center-weighted, and multi-segment metering.
On the other side, you have the exposure compensation dial, the LCD screen indicating the film speed and frame number, and the large wind lever to advance the film.
There is also a multi-exposure lever next to the wind lever, allowing you to shoot double or multiple exposure photos.
Then you have the on/off switch and the shutter release button.
On one side of the body, there is a viewfinder lock that you can use to switch viewfinders. There are 4 types of viewfinders you can use on this camera. I have the AE finder, and I don’t think I’m going to change to other finders, but you have the option.
Last but not least, you also have a mirror lock-up lever and a self-timer mode. I haven’t really used a lot of these functions on this camera yet, besides just the basic manual shooting mode. We will talk about the AE mode and the multiple exposure stuff in the future when we get to it.
Now let’s look at the inside of the viewfinder. When I first saw it, I was surprised by how big and bright it is. Because of the size of the mirror, I sometimes feel like I can’t see the full frame, especially the bottom part of it. Maybe it’s because I wear glasses?
Anyway, at the very bottom of the screen, you can see your shutter speed, the metering mode, and the frame counter. Half-press the shutter button, and you will see the light meter light up. Then you can adjust your settings according to the readout the internal light meter gives you.
Pretty easy, right?!
With 120 film, the 67 format will give you 10 shots. That’s not a lot of shots! After the 10 shots are done, the LCD screen will show “FILM” with an arrow and a blinking dash. Keep winding the film until “END” appears on the screen. You will also feel it; the wind lever will become very light after the whole roll is rolled up. Then you can open the back, unfold the crank, and take the film out.
Fold the end of the paper back in, then seal the roll. Ta-da! Now you can send your film to the lab or start developing at home.
THE PHOTOS
Alright, let’s dive into the photos. As usual, I went to Santa Monica to shoot the test rolls. I like going there because of the vibrant colors, the crowds, and because I’ve shot there with other cameras, I can compare the photos for learning purposes.
It was a beautiful and sunny afternoon, around 4 p.m. This is the first photo I took, and when I saw the scan, I was amazed. If you’re watching this on your phone, it might not look as impressive, but on my 27-inch monitor, the detail, color, and depth were stunning.
One thing that surprised me was the size of the camera. It’s quite large and not easy to be discreet with. I felt like a lot of people passing by took a second look at the camera.
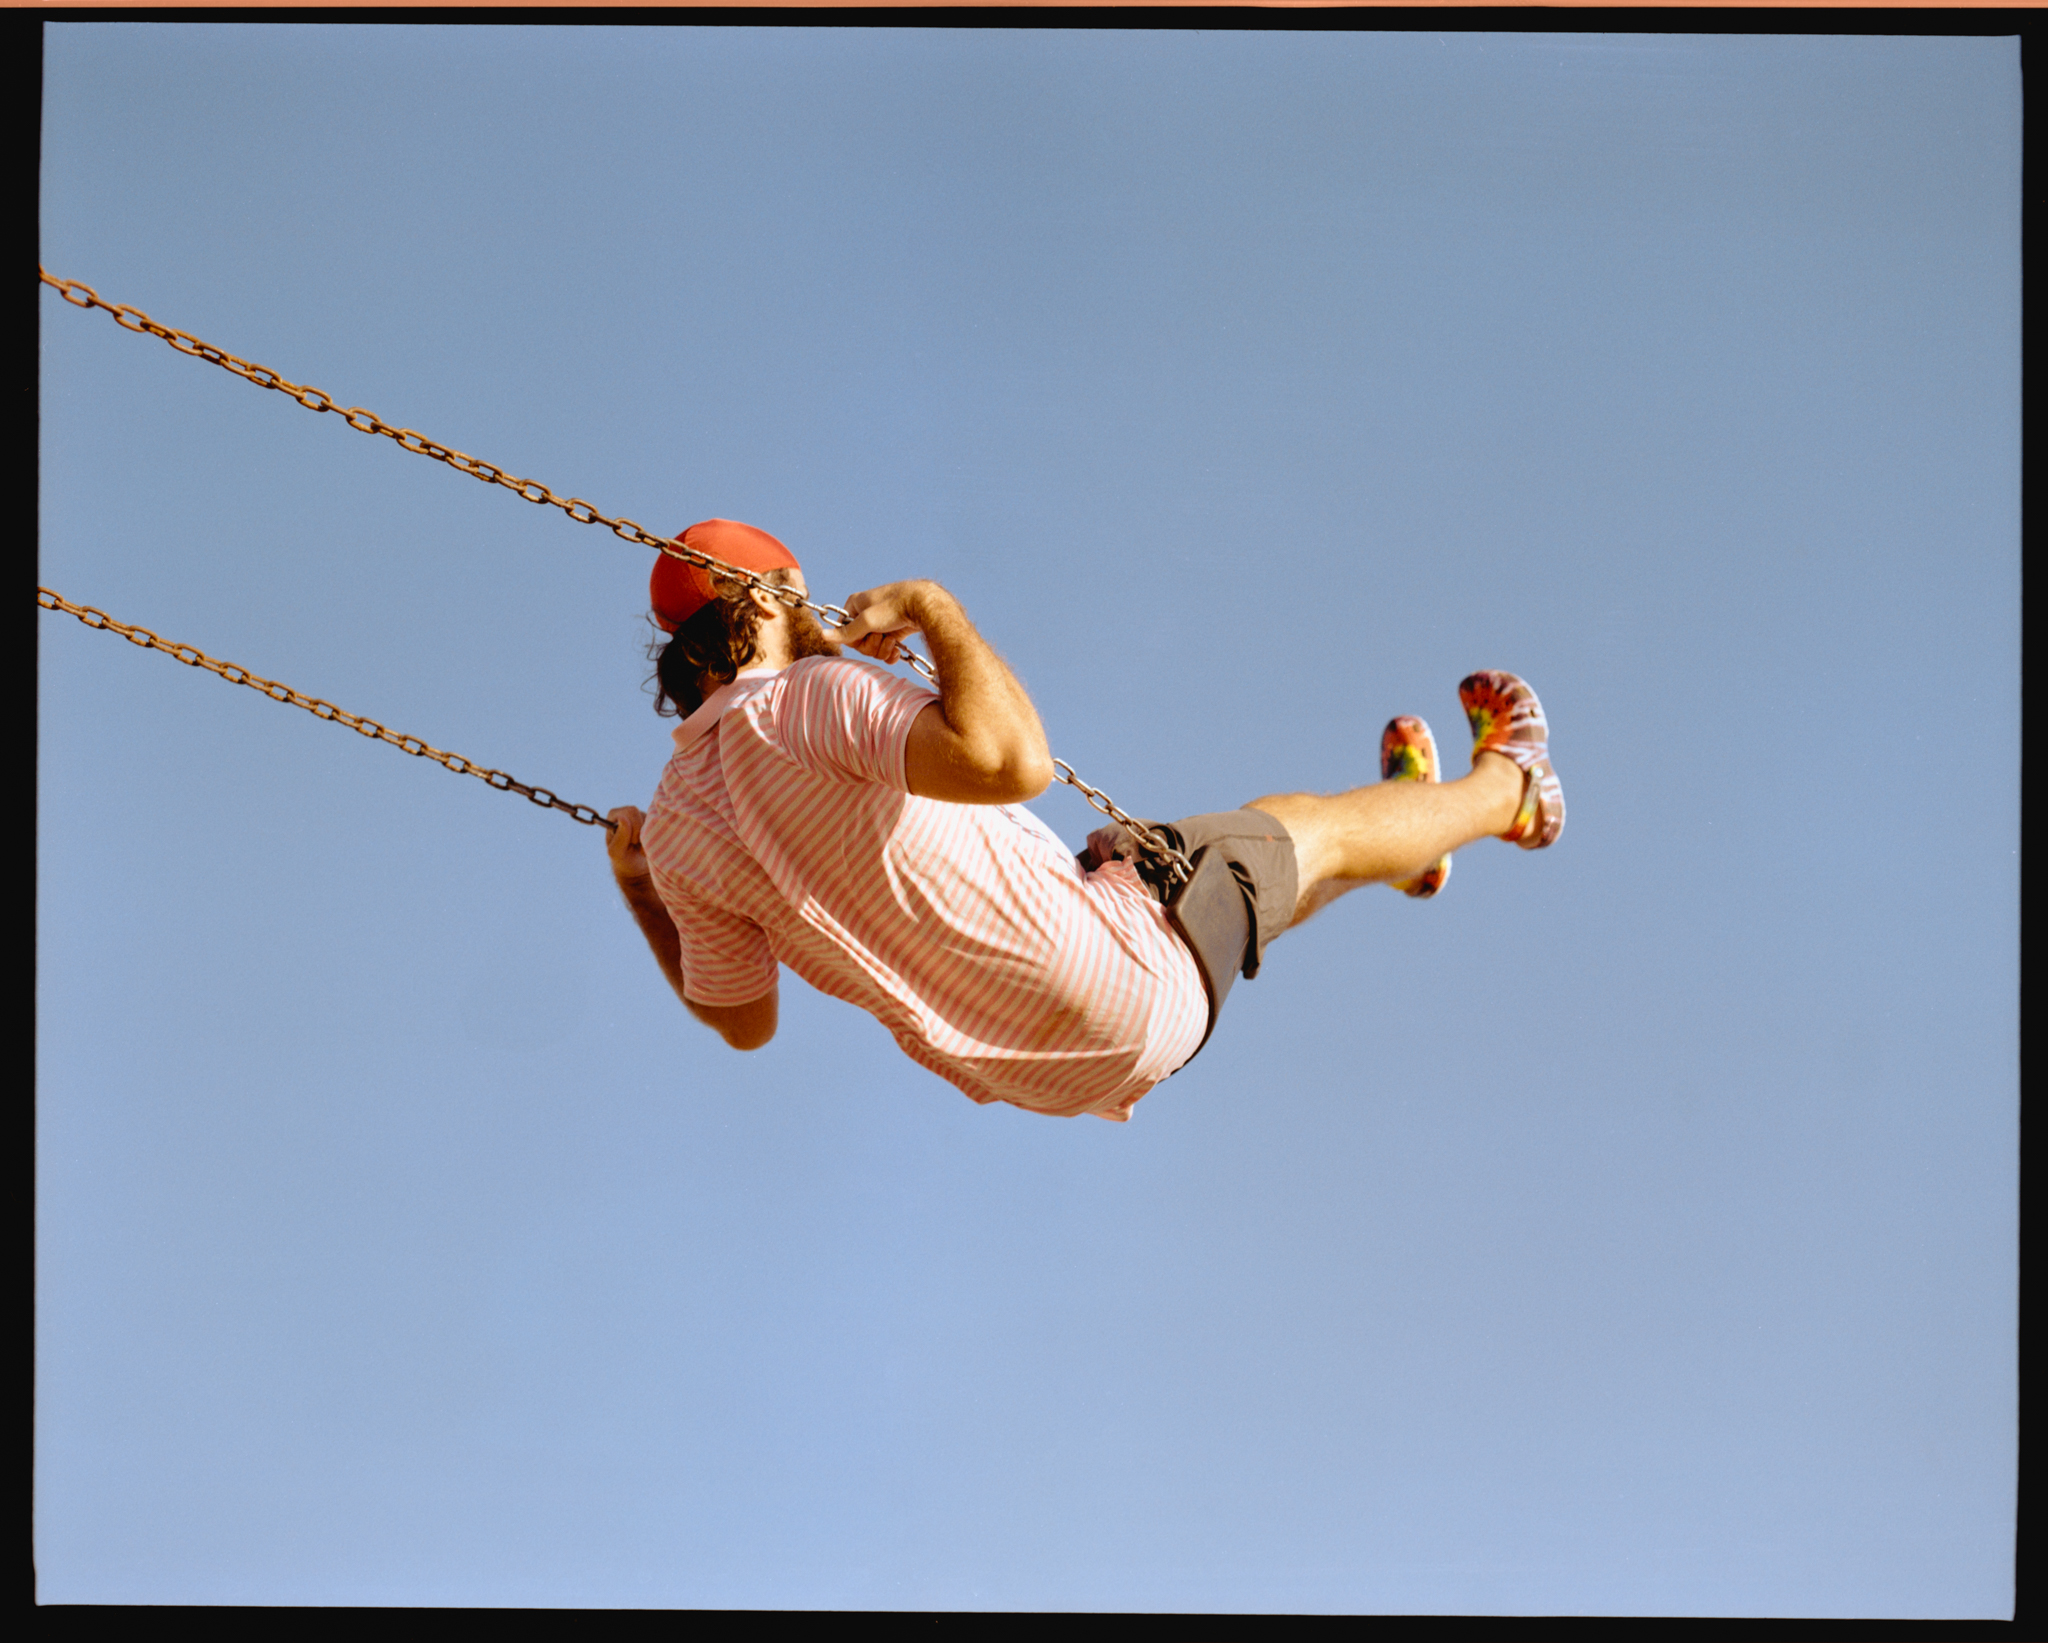
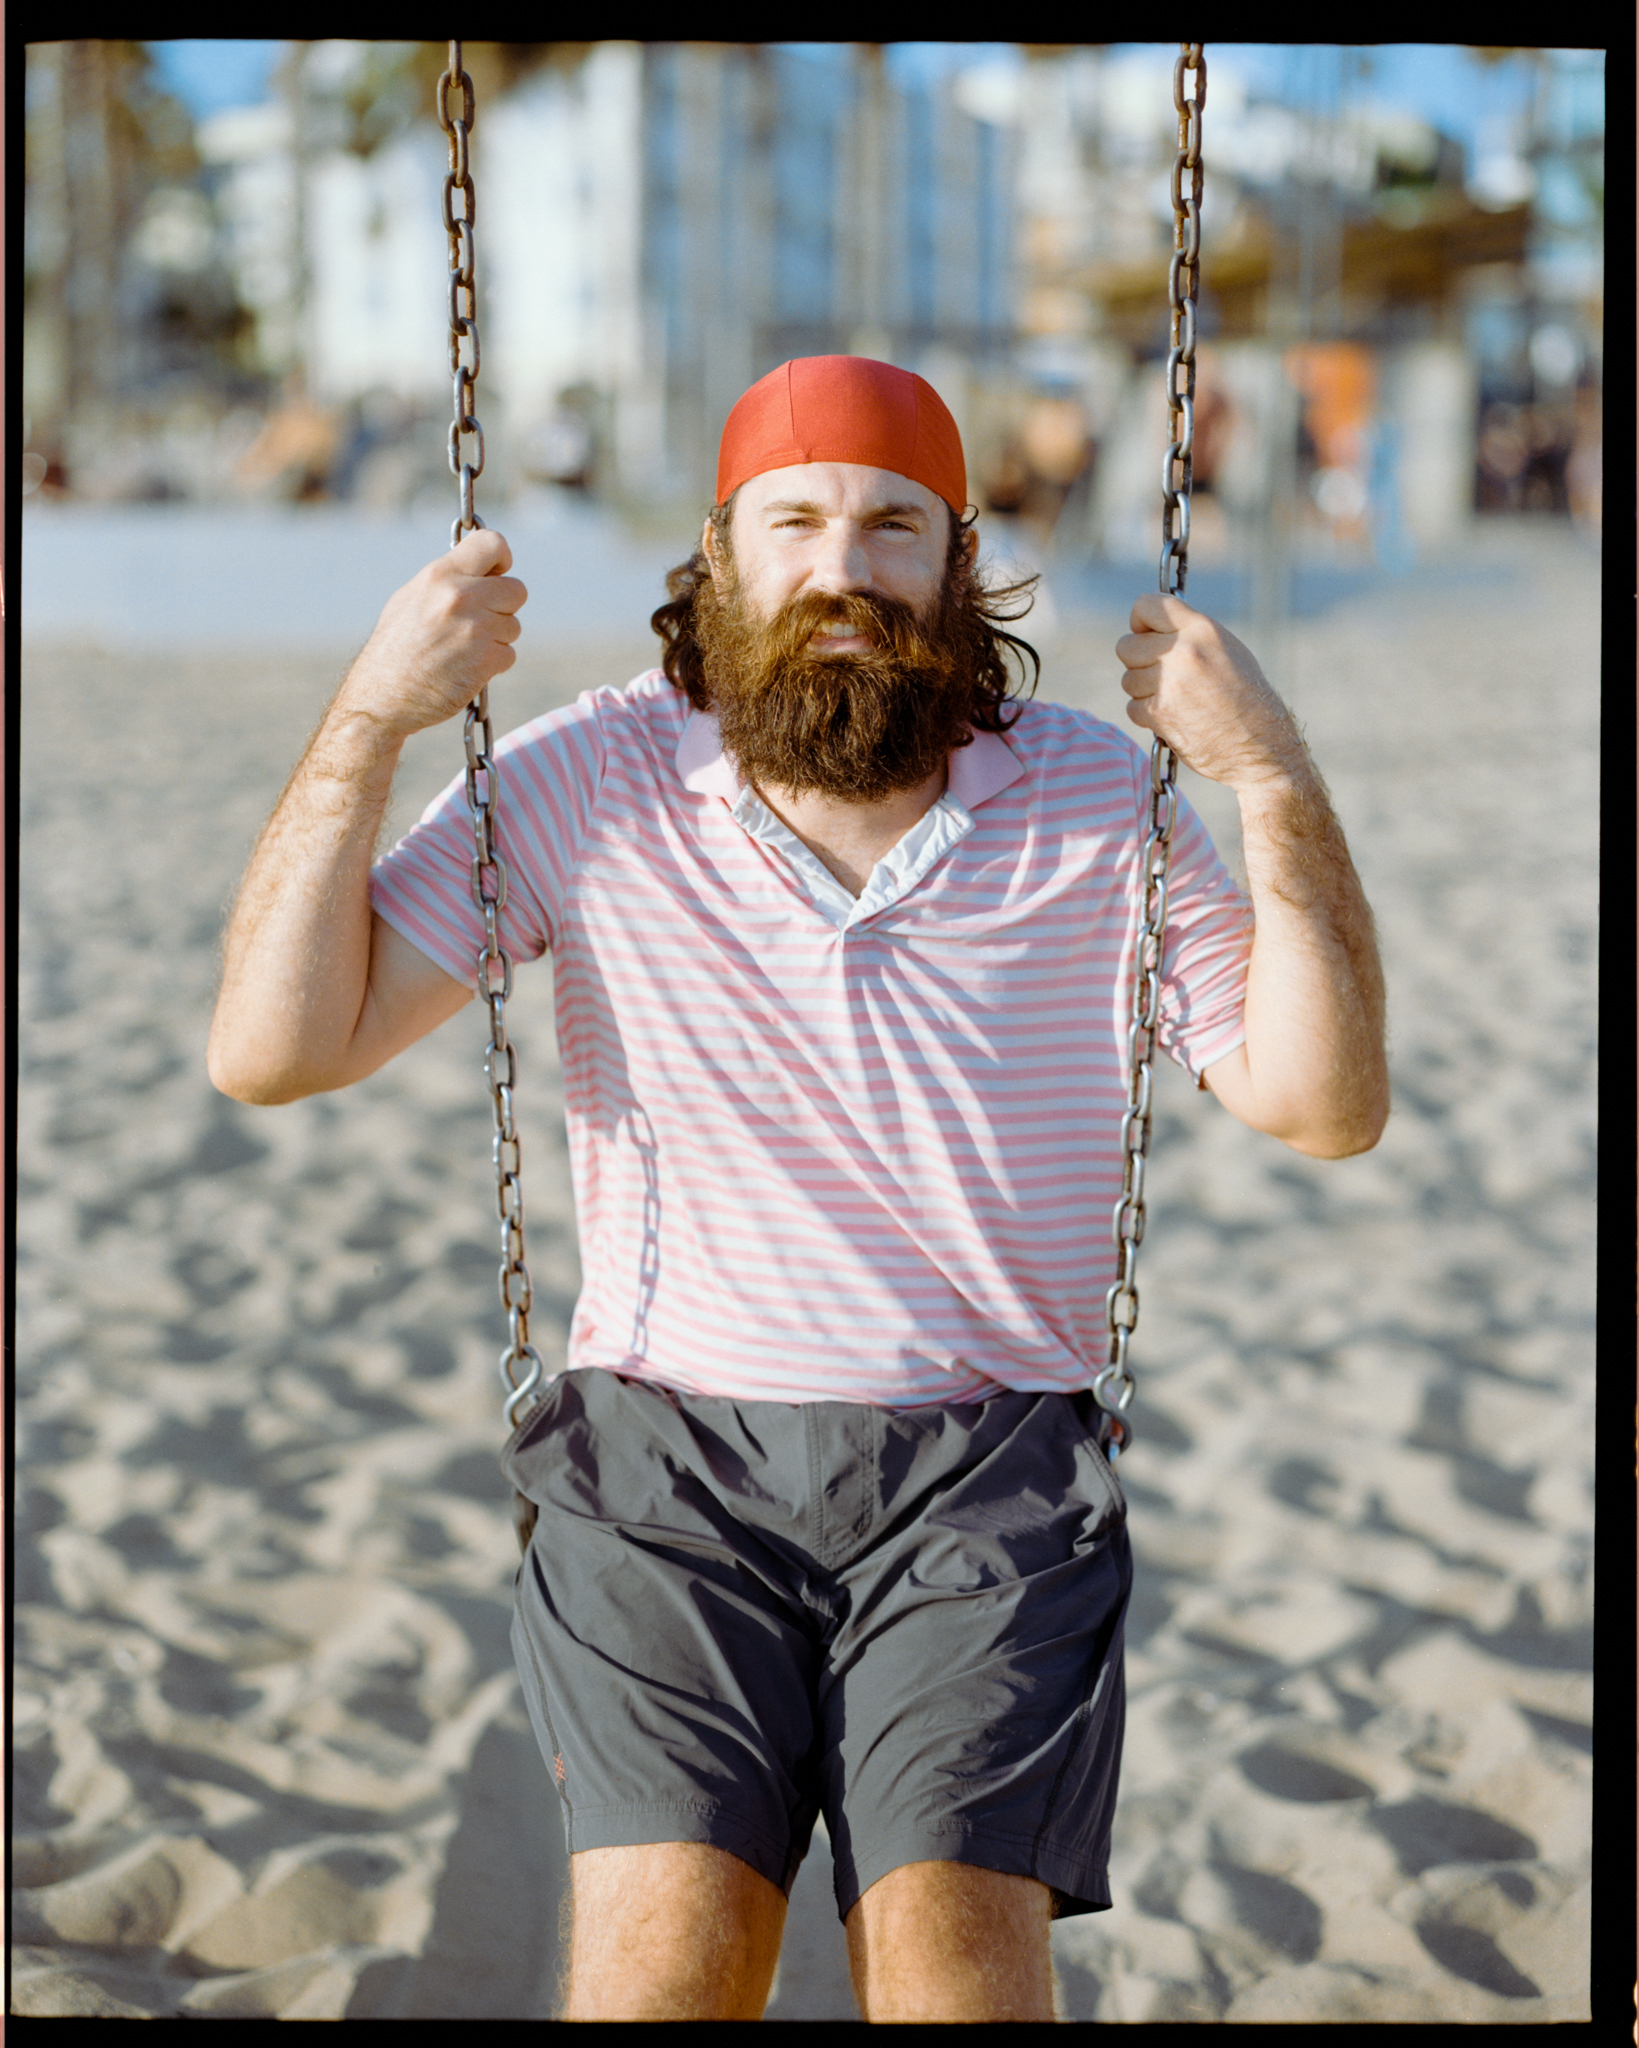
Then I noticed this guy on the swing, his name is Stetson. I liked his red hat, beard, and striped polo shirt; he looked like a character from a Peter Pan movie. I watched him swing higher and higher, took the first shot when he was in mid-air, and then waited until he slowed down and finally stopped. I asked if I could take a photo of him.
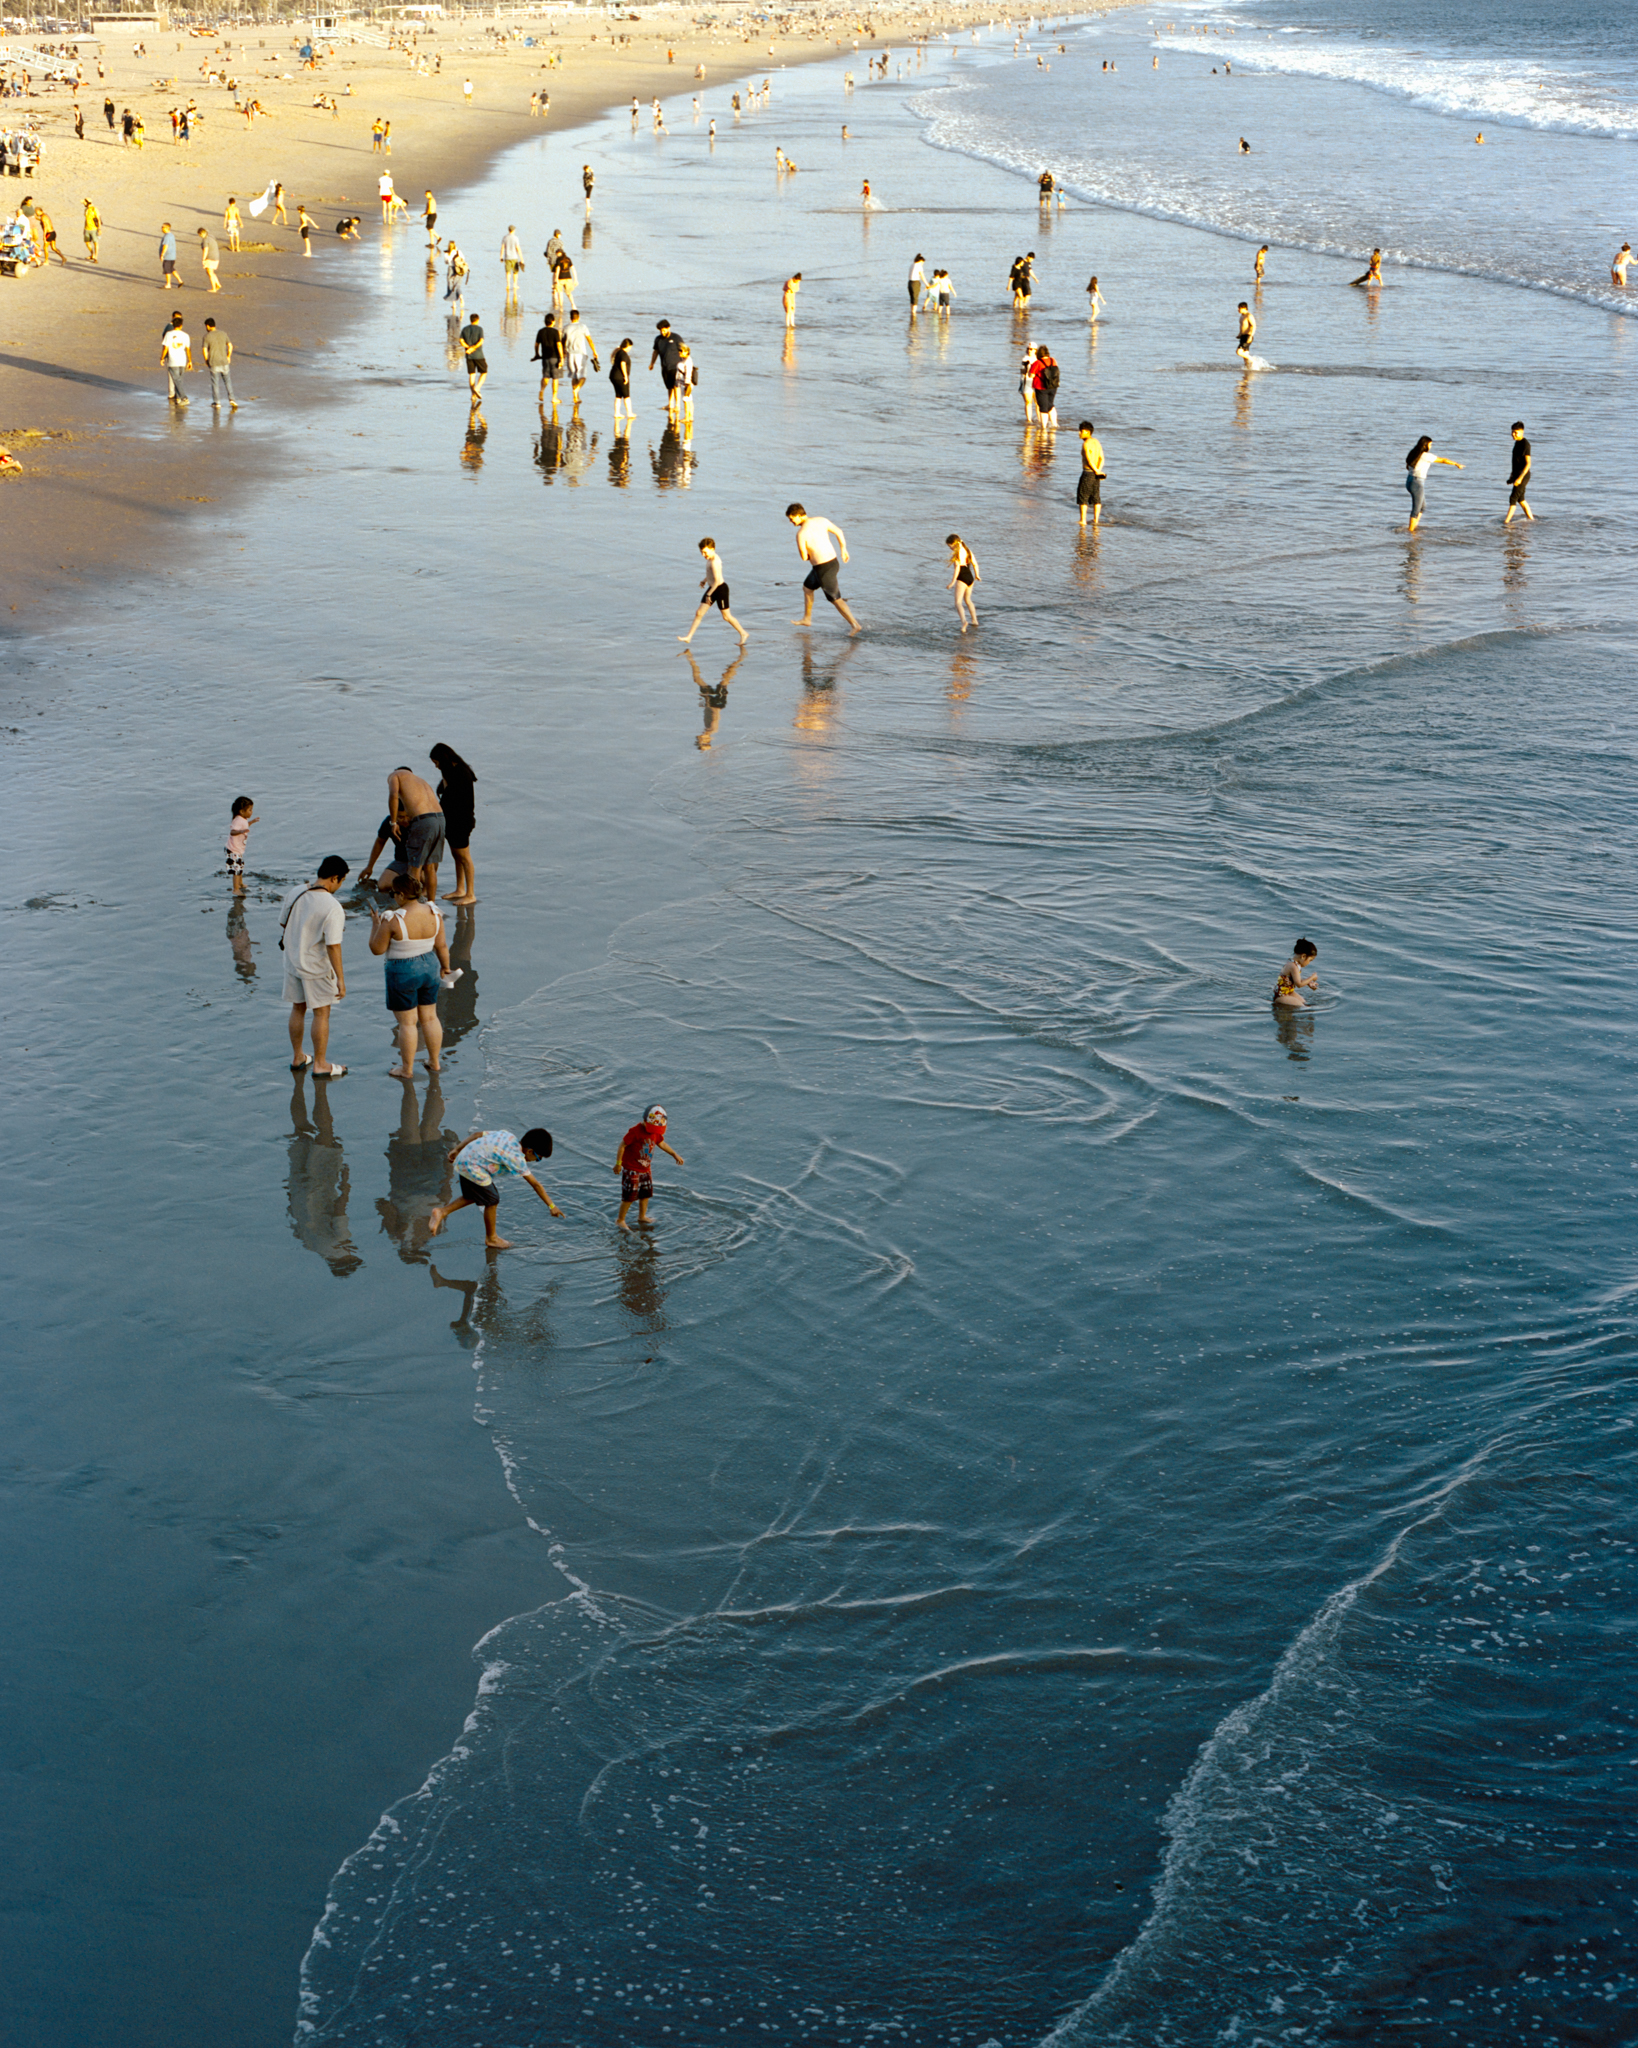
I’ve taken photos from the pier looking down at the beach before with my Canon 1v. Even without comparing them side by side, I can see a huge difference, not just in sharpness, but in clarity. The 67 shot is sharper, clearer, and you can feel the spatial differences, the depth. I don’t know if that makes sense.
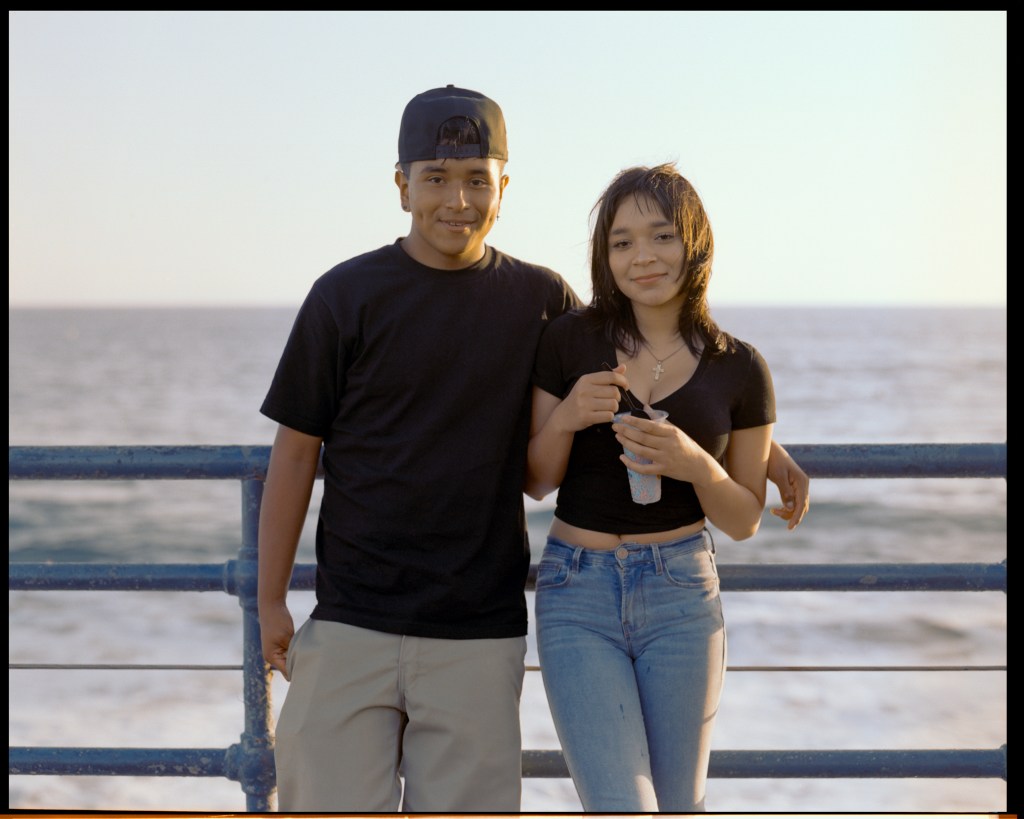
“She’s gonna be my girlfriend,” he said. She was a bit shy, but they looked cute together. I like this shot; it was busy and loud on the pier that day, but this photo just quiets everything down.
It’s funny how some of these photos turned out exactly how I envisioned them when I pressed the shutter. I might have messed up the color a bit when I developed the film, or missed critical focus, but the character, space, and depth—the texture of the photo—turned out almost exactly as I saw it before I took it.
This is a very strange feeling. I don’t know if it’s because I’m getting more familiar with the equivalent 50mm focal length, or because many photos I like from other photographers were shot on this camera, so I’m familiar with the look it produces.
For the first time, I feel like what I see in my mind mostly matched how the photo turned out. I felt like Arya Stark with Needle, like King Arthur pulling out the Sword in the Stone. Well, more like Guts finding the Dragon Slayer—judging by the size of it. I feel like this is MY camera.
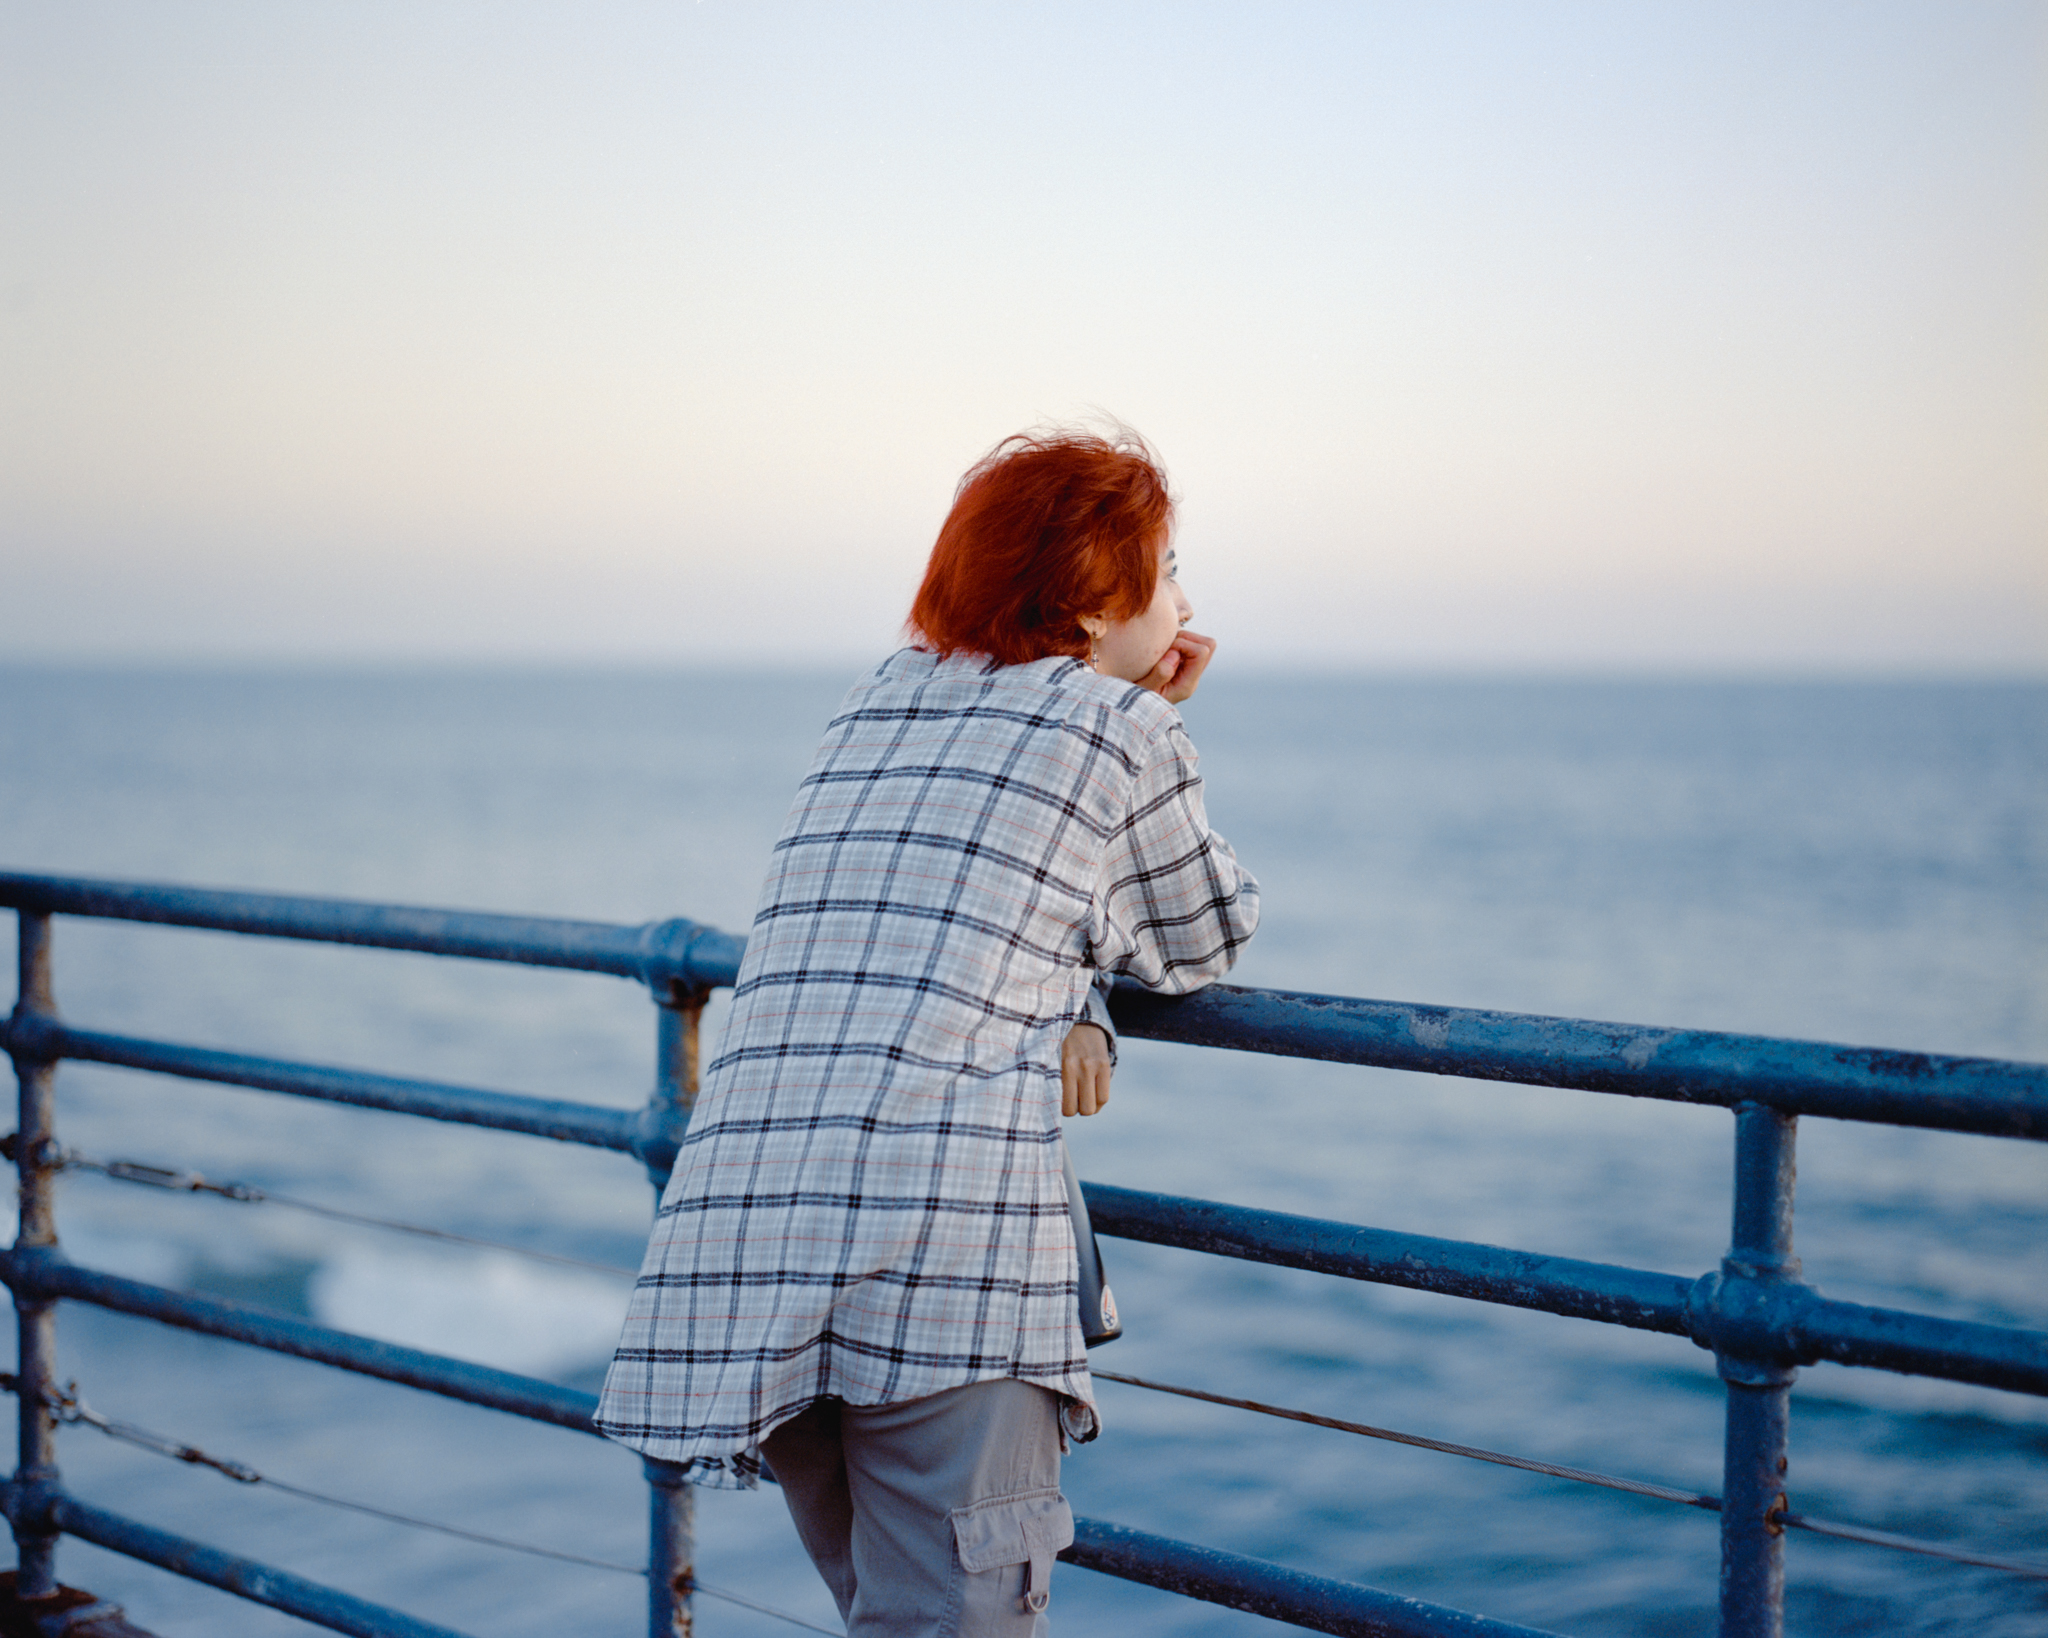
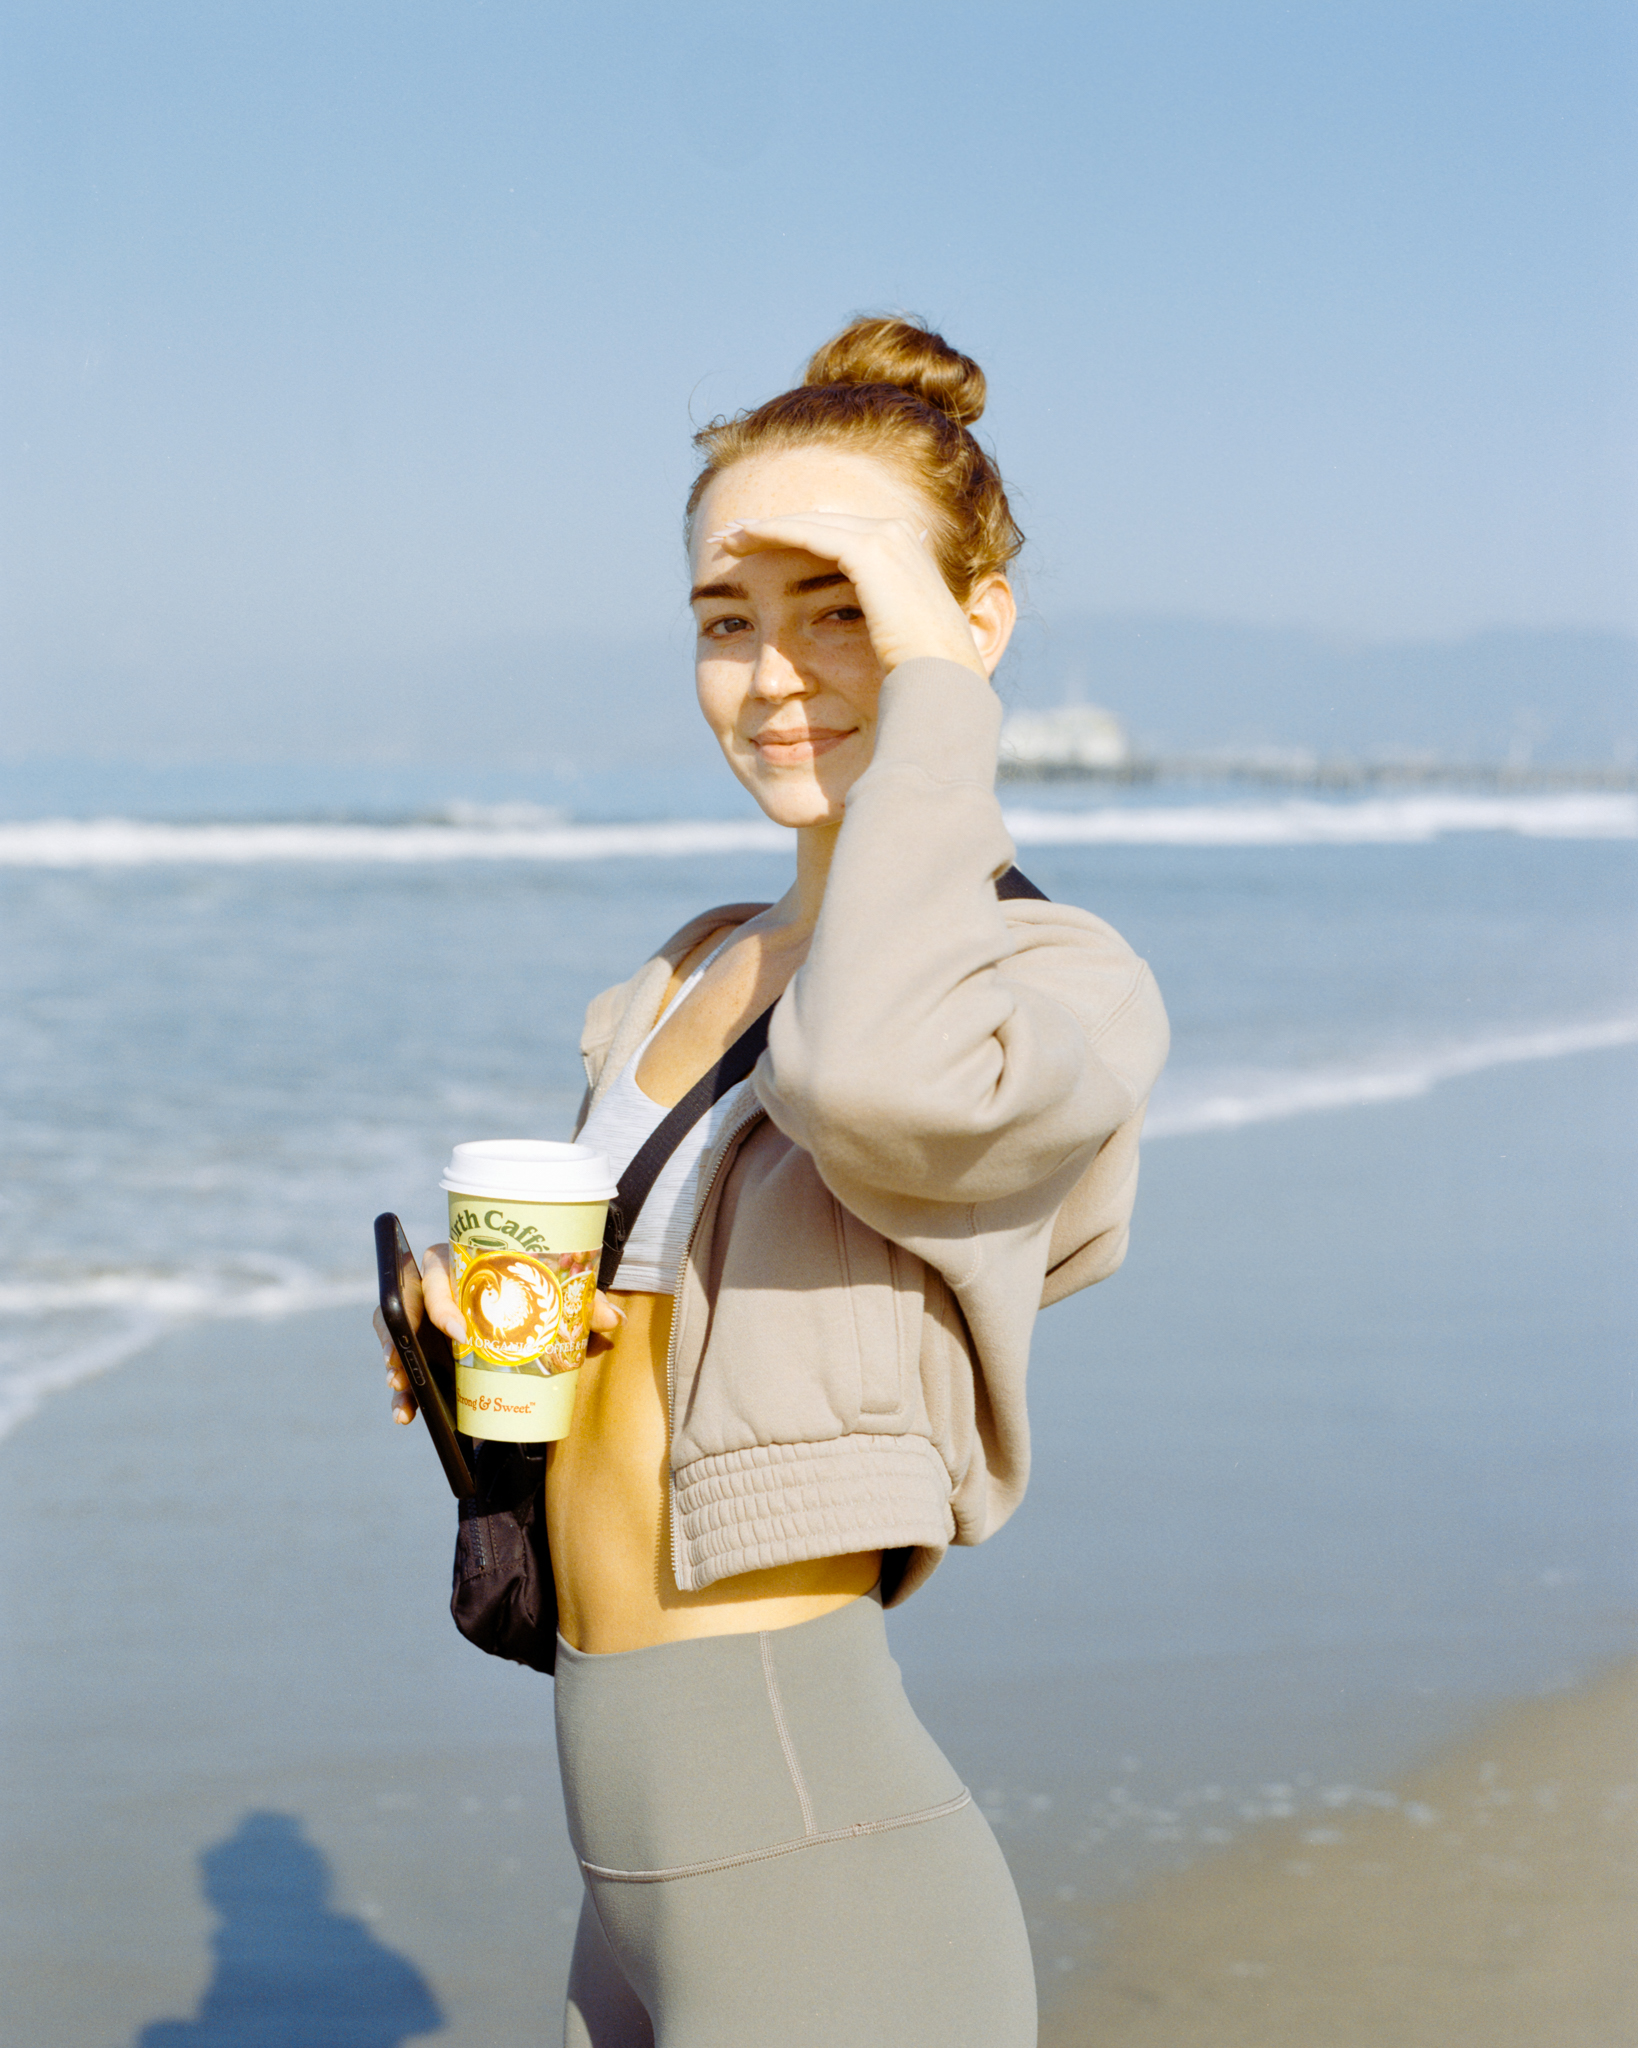
As the sun was setting, I saw a girl standing there, looking at the ocean. Her hair was as red as fire, and she was quietly watching the sunset. You probably can’t see from this photo, but her palm was also red; she clearly dyed her hair very recently, if not just before she came to the pier. I wanted to walk up to her and ask if I could take a proper portrait of her, but I ended up not bothering her.


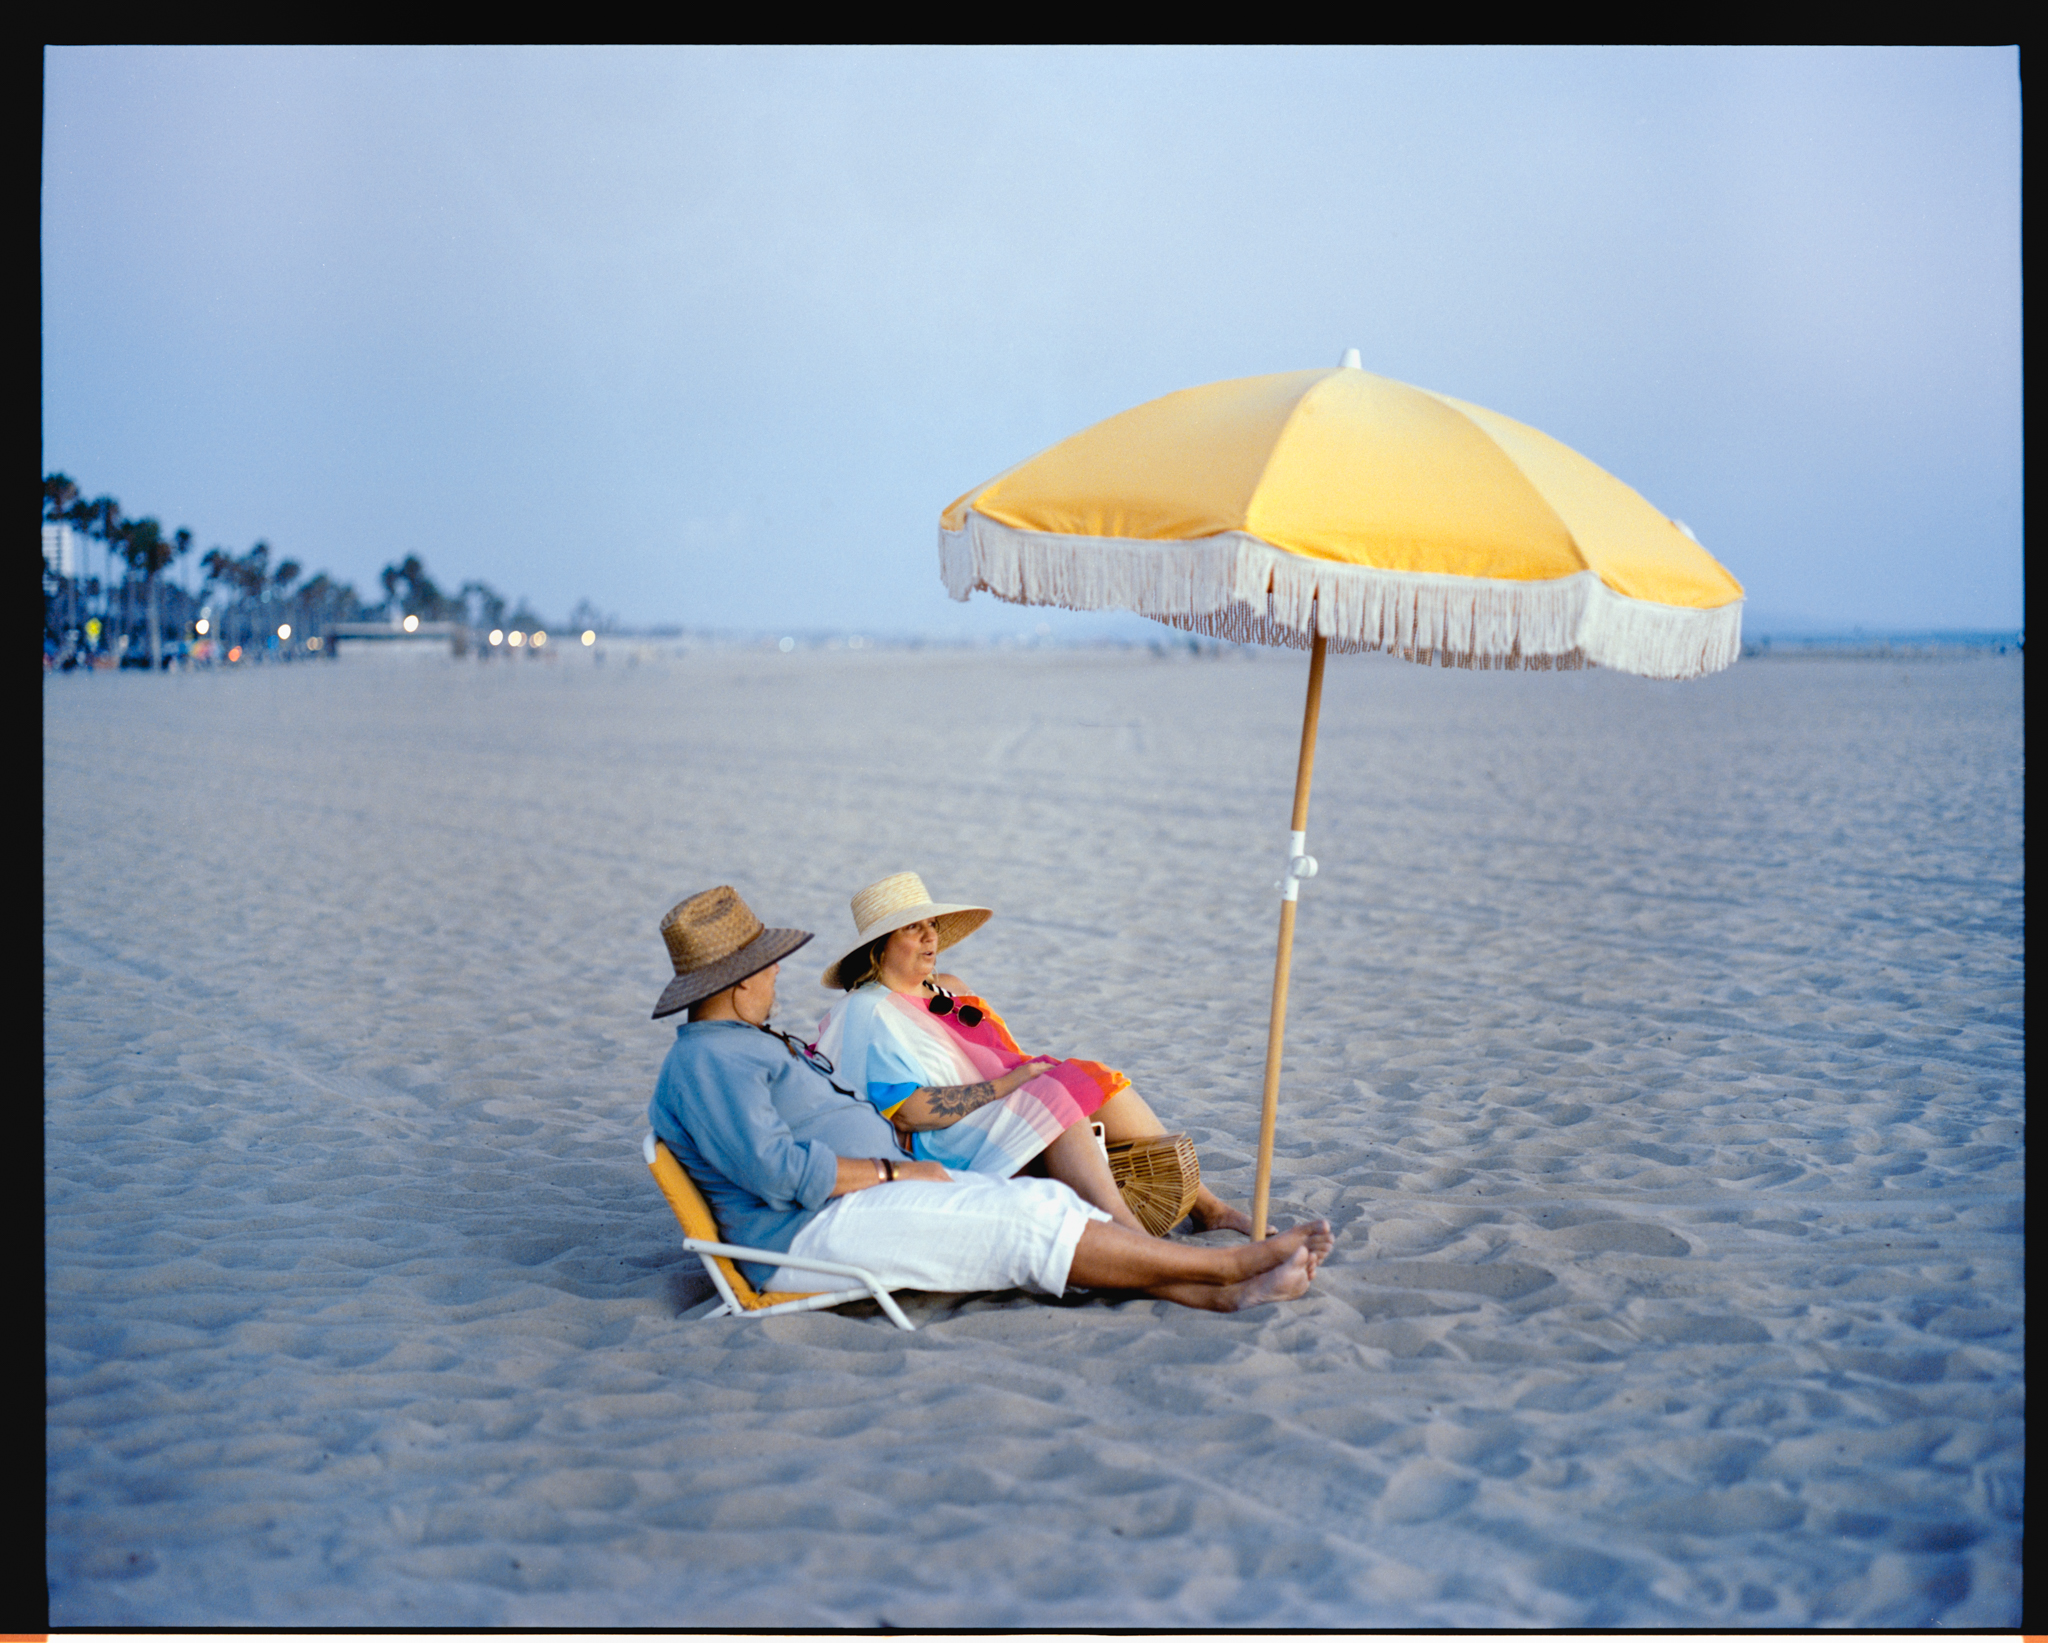
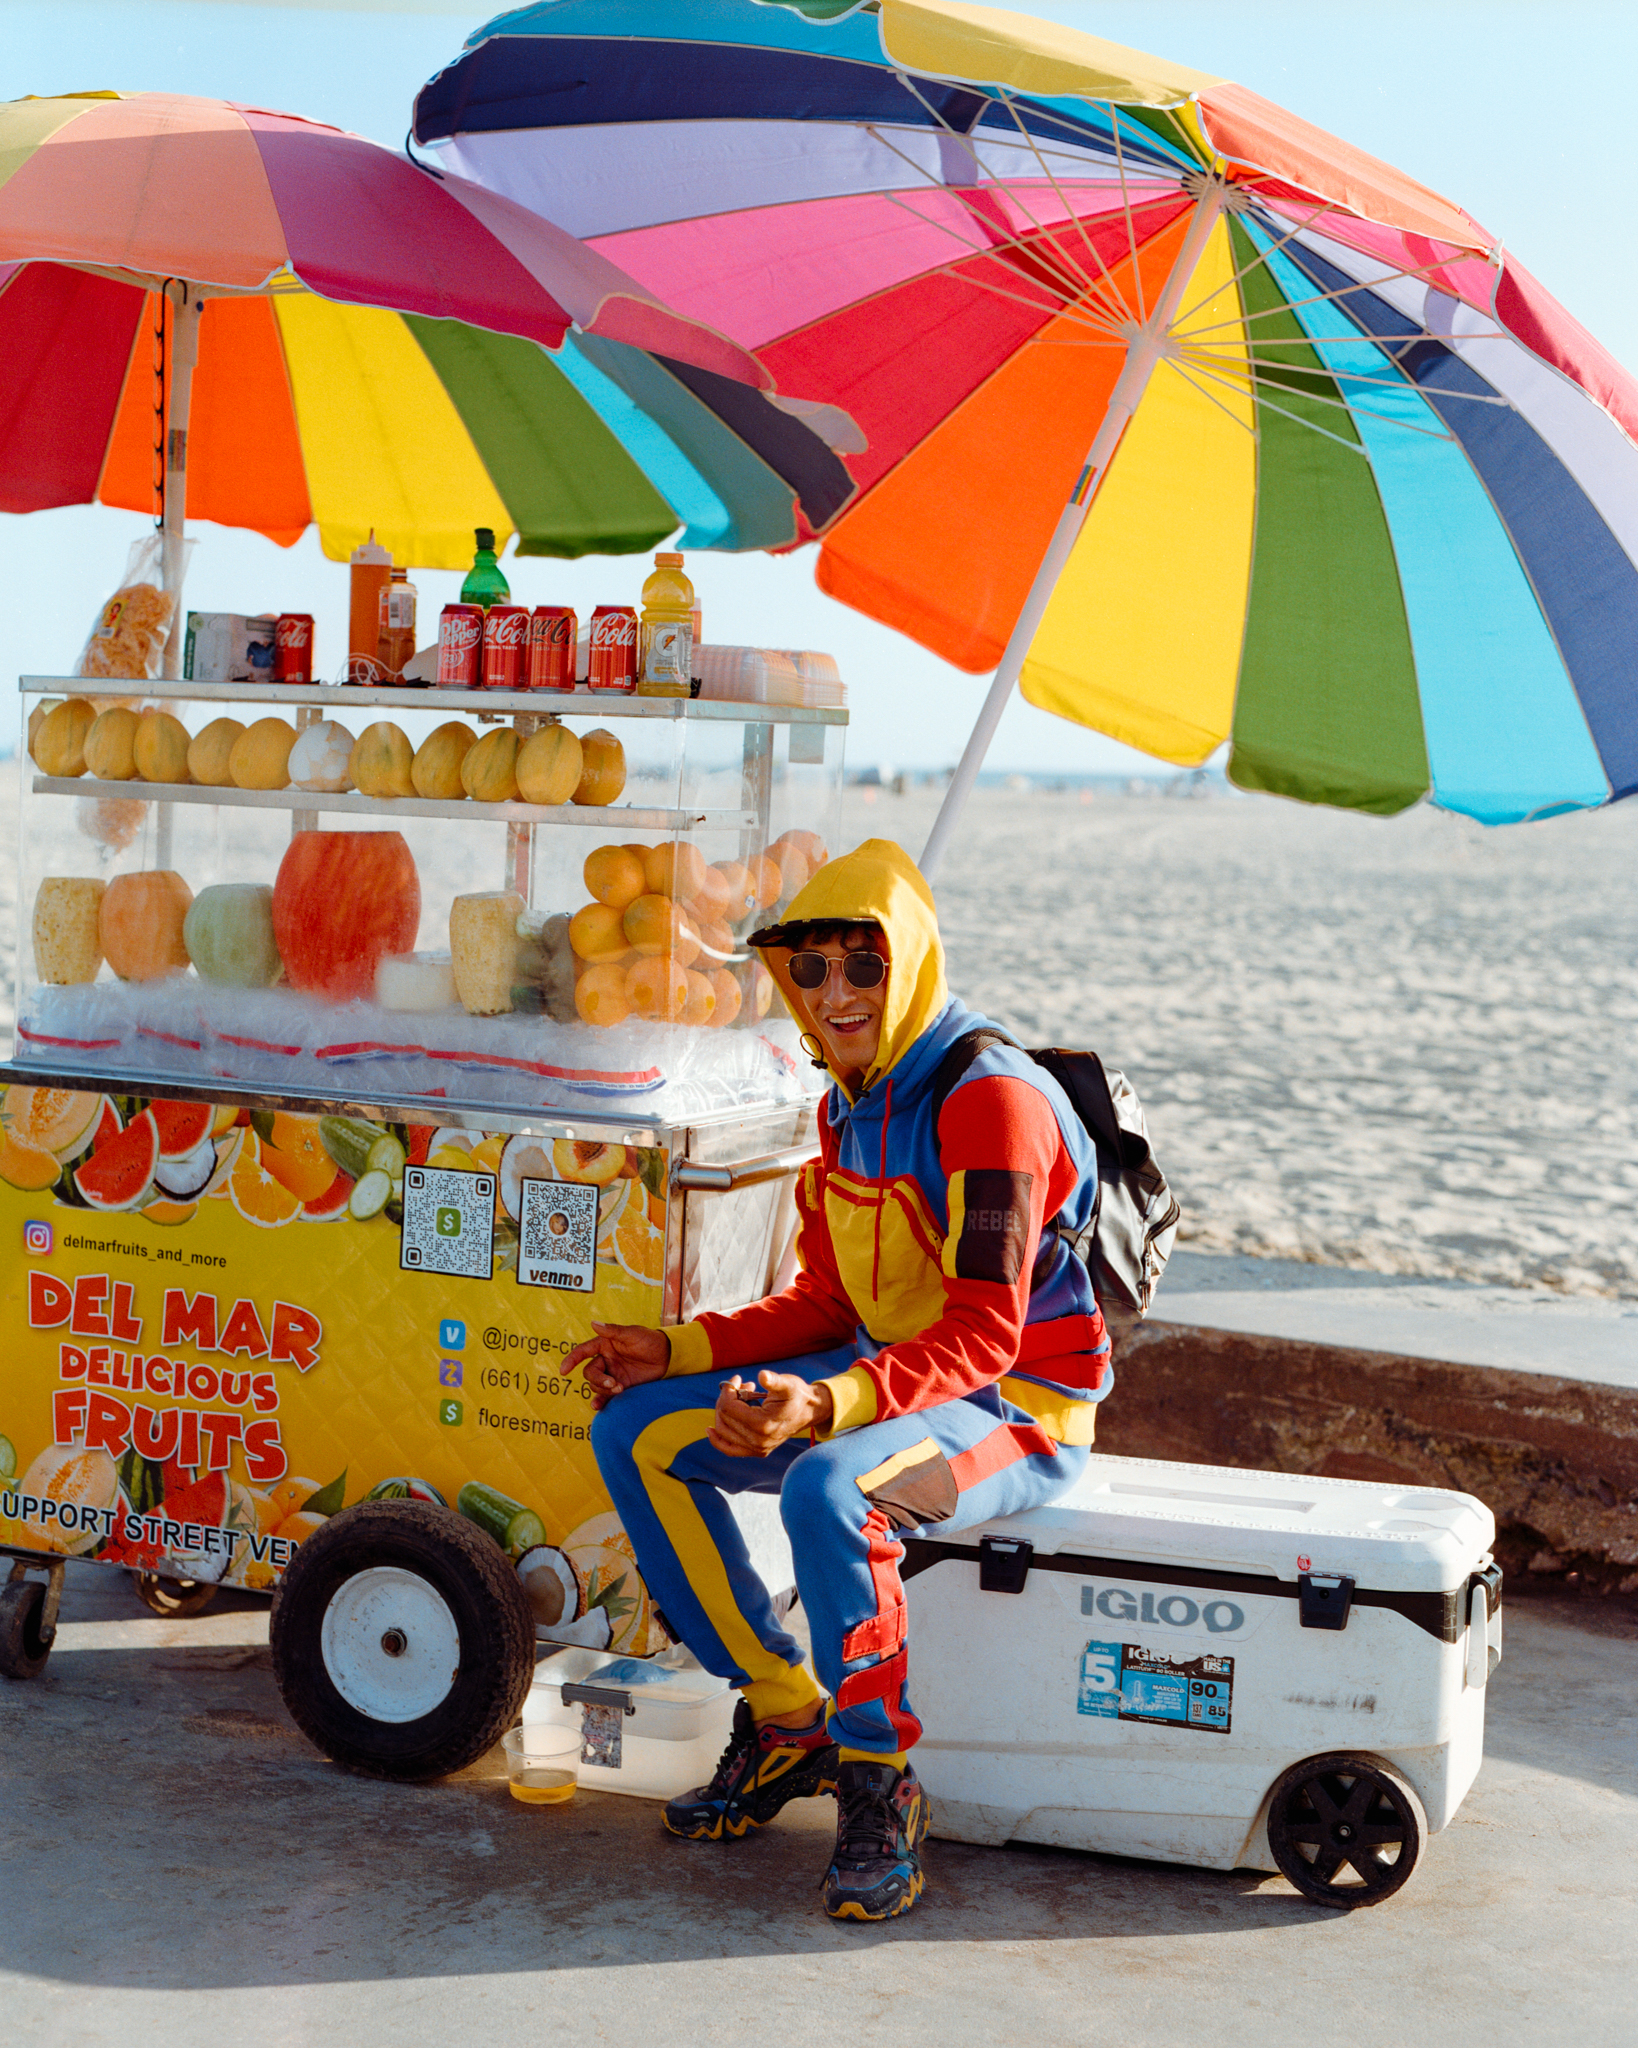
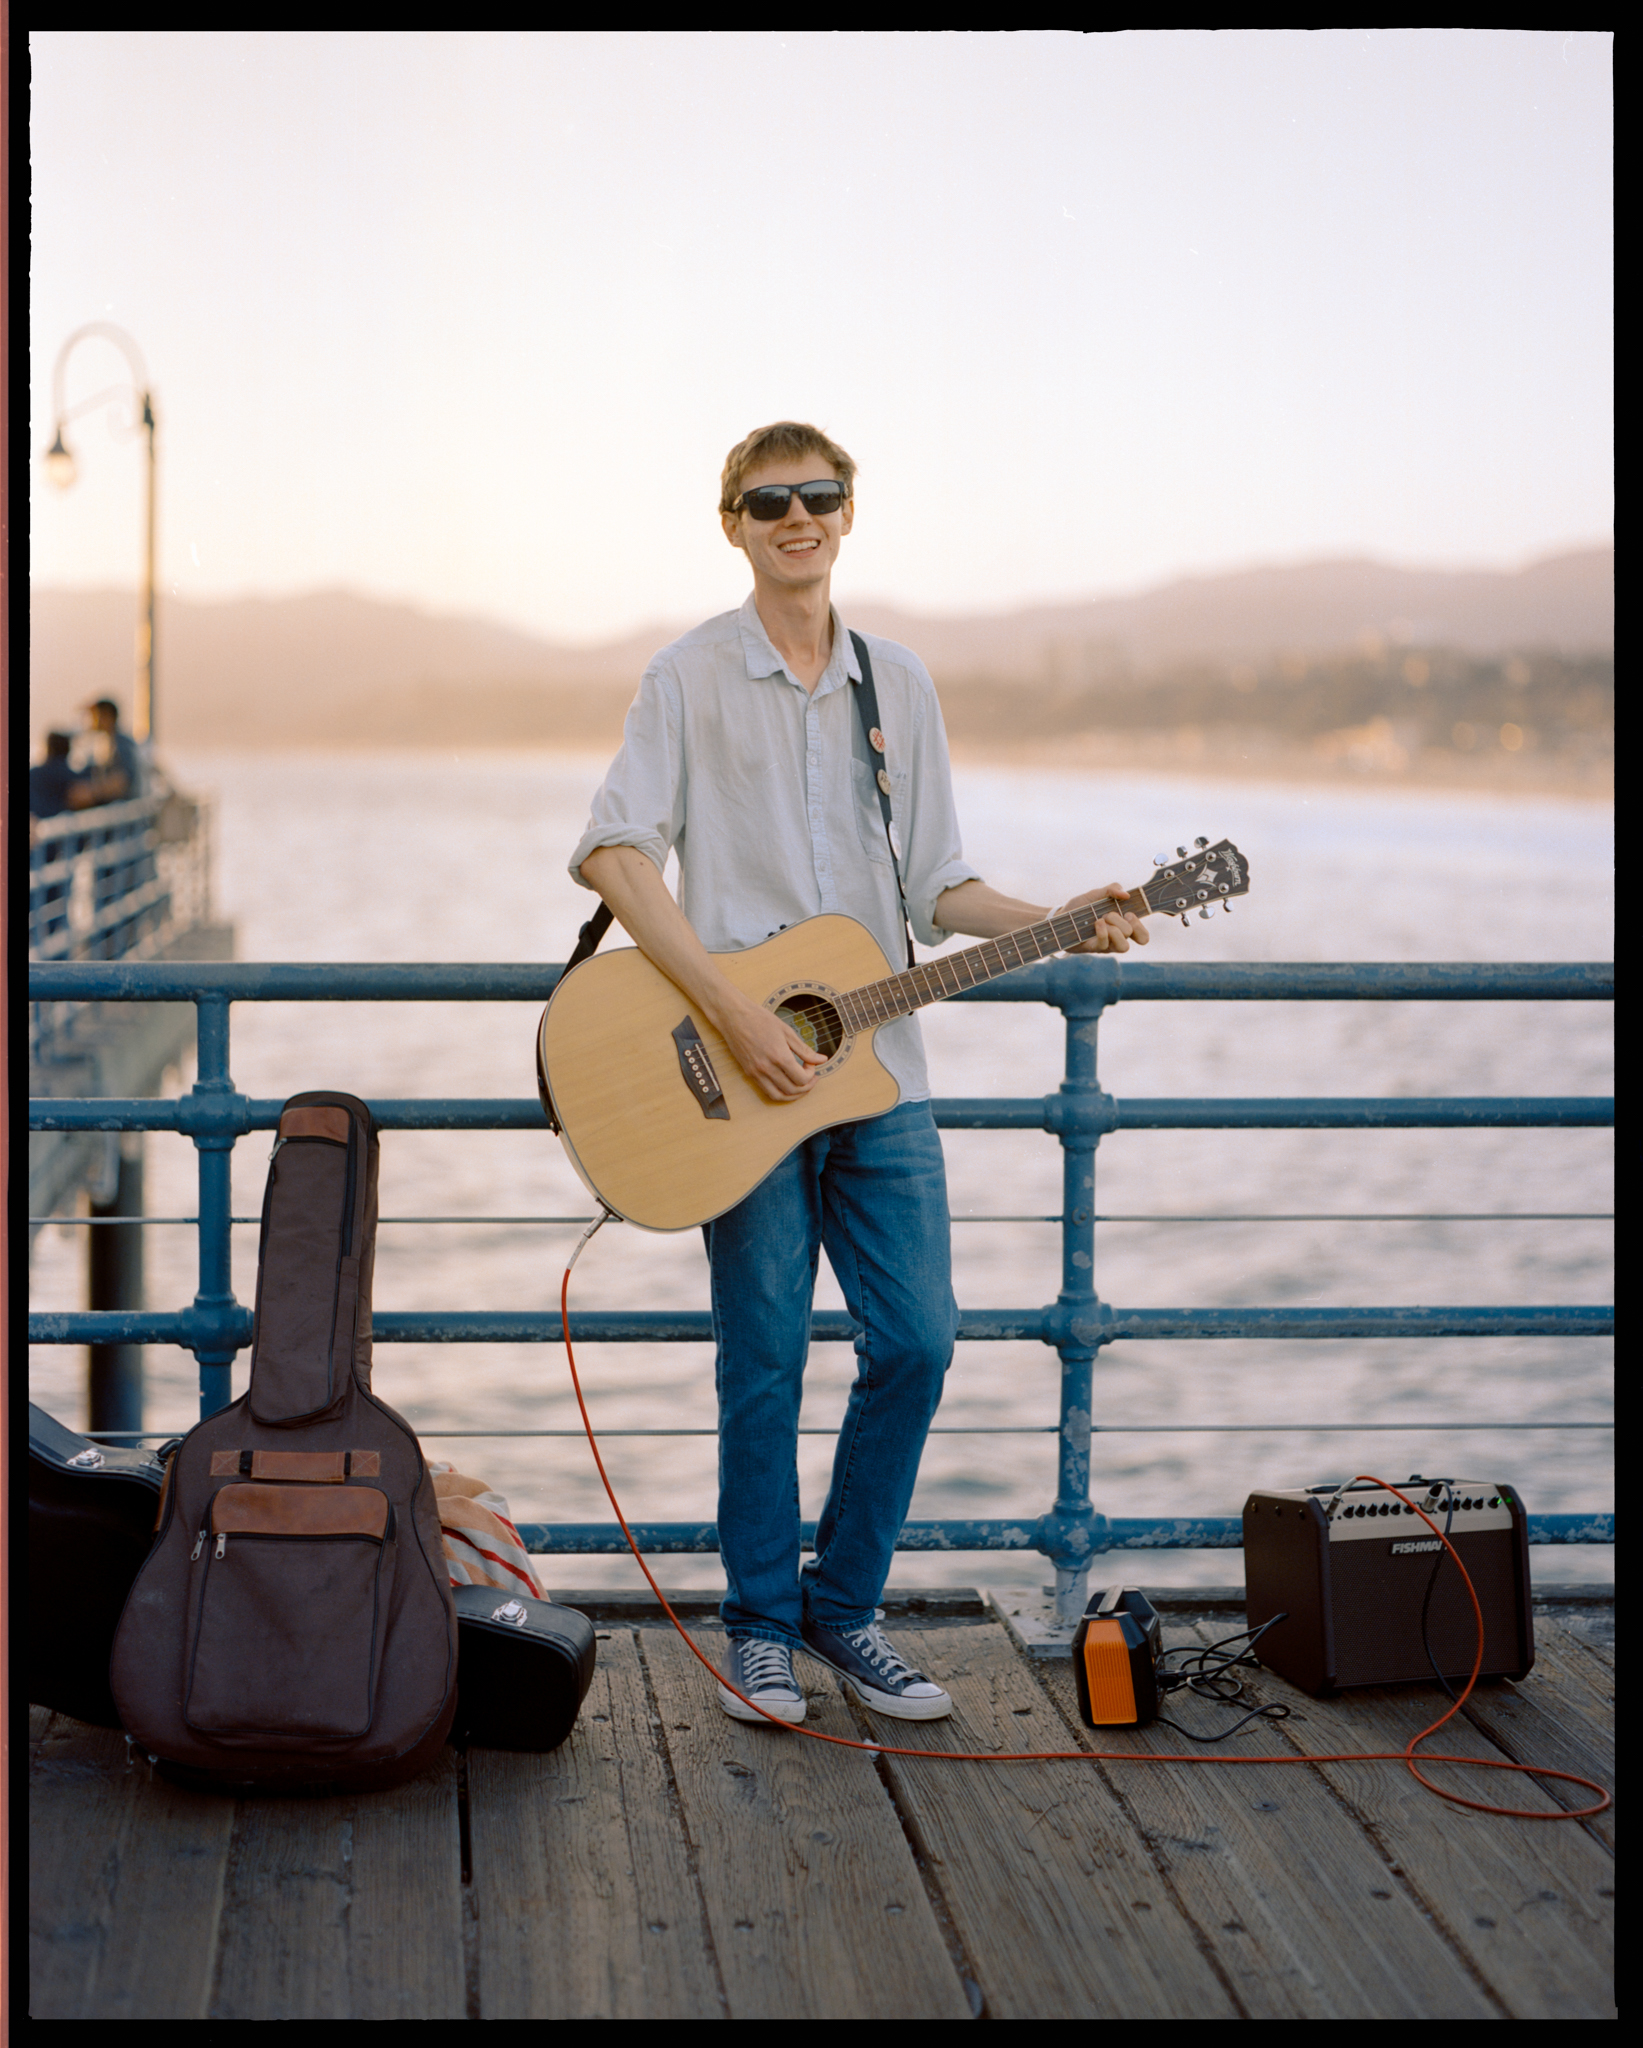
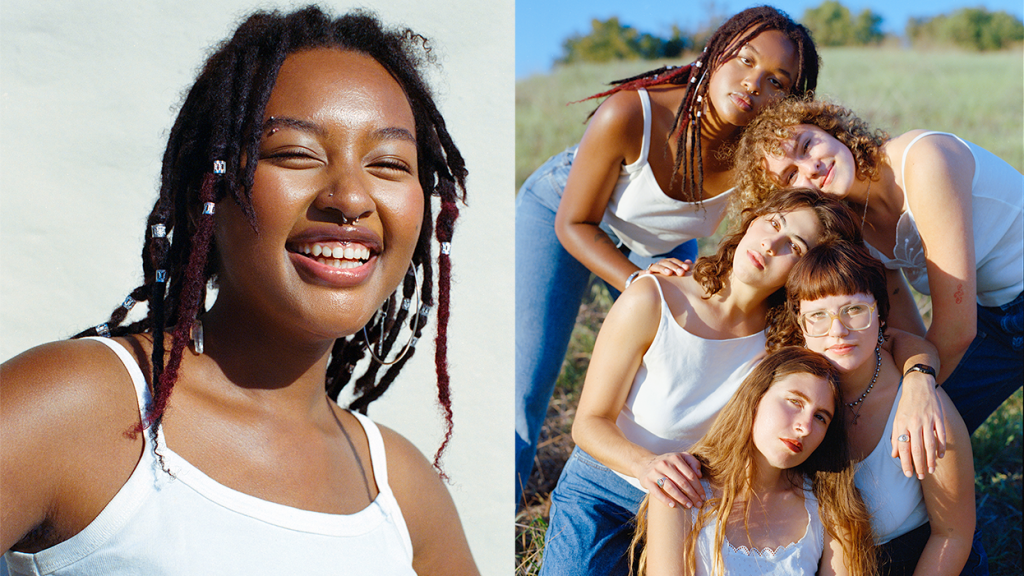
Then I saw these two girls having fun, taking photos of each other. I really liked their energy. At this point, I was losing light very quickly, so I decided to wrap it up. On the way back to the car, I saw this couple sitting on the beach with a really cute yellow umbrella. This was shot at a very low shutter speed, so it wasn’t crystal clear, but I still really liked the vibe.
The next morning, I went right back out to Santa Monica Pier again to try to shoot more at sunrise. But by the time I got there, the sun was already up.

The light was really nice at this point. I really liked how the first photo turned out. The close-up shot missed focus a bit; with the 67 format, when I open up the aperture to f/2.4, the depth of field can be really shallow. And unlike the Pentax 645NII I’ve been using, this is a manually focused camera, so I need to be more careful with my focusing point.
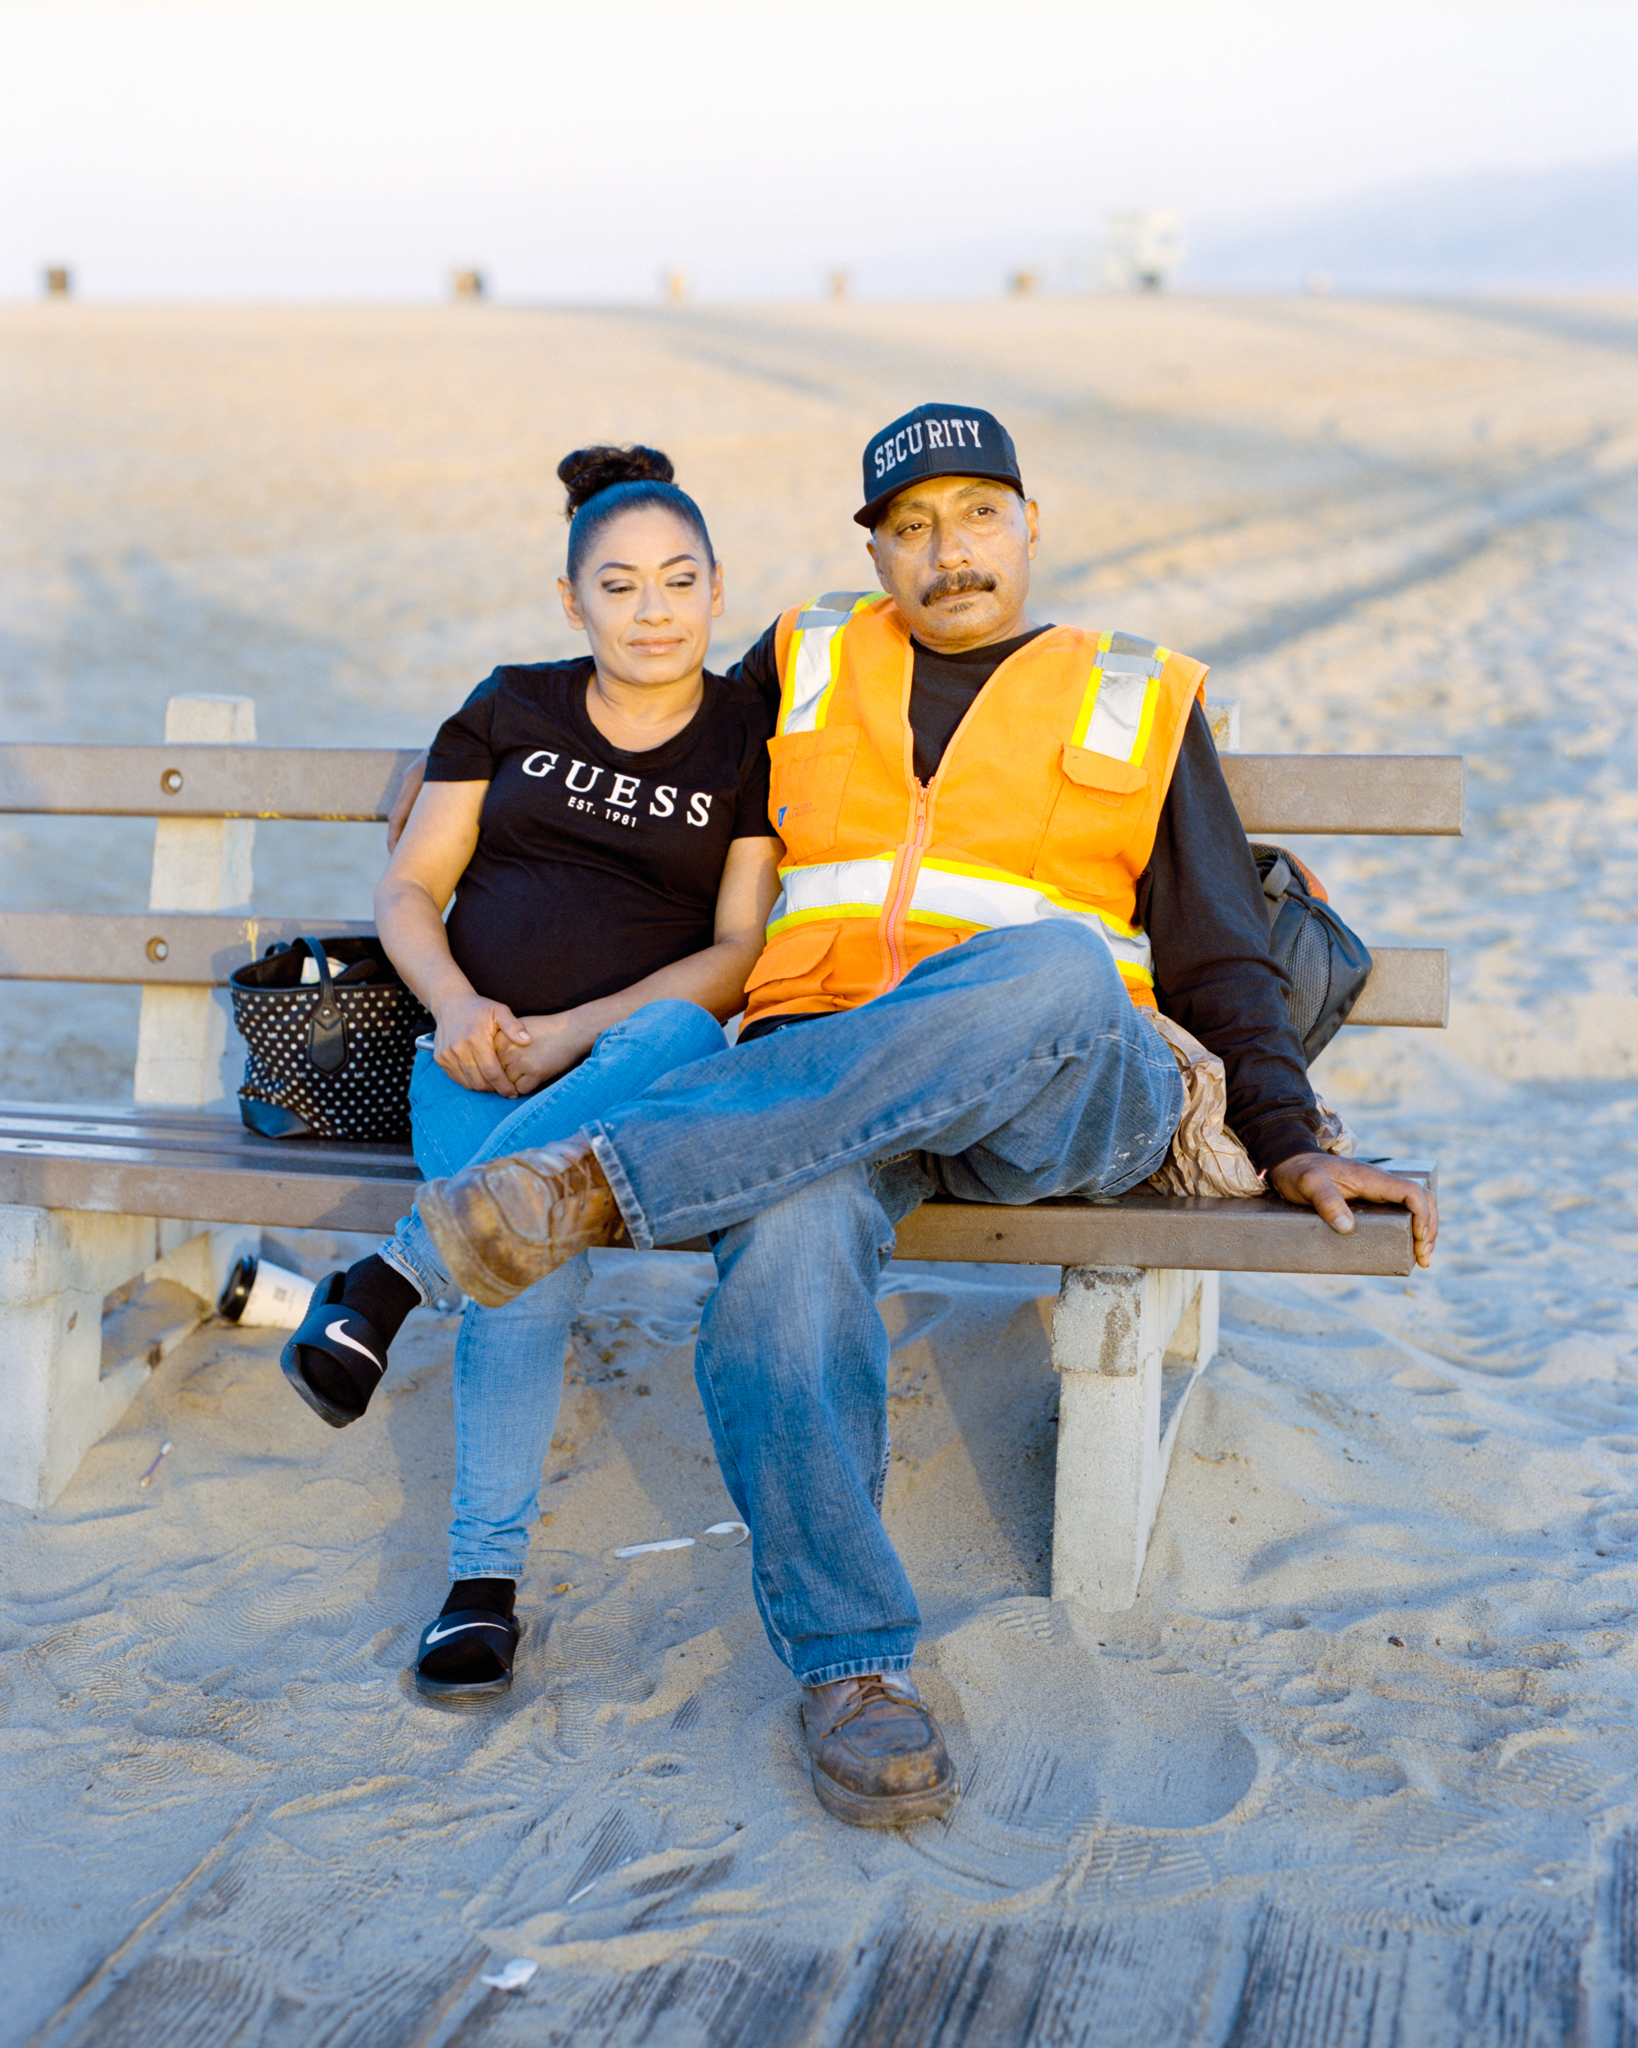
Then I met this couple sitting on a bench, looking at the sunrise. I asked if I could take a photo of them; the lady said she wanted to finish putting on makeup first. Then I waited. While waiting, we chatted a little; they have been together for 15 years, he told me, and they just came there to see the sunrise.
There is something I really like about this photo; he was looking at the sunrise, and she slightly looked down. The vibrant orange vest, the spoon and coffee cup in the sand, the empty beach in the background—it almost looks staged.
I mean, in some way, it is staged, these portraits I took. Especially in the early morning, there are not many people around, so I feel like I have more time to frame each shot.
And since it’s early morning, it’s much quieter and easier to have a conversation with people. I feel like morning people are more likely in a good mood, I’d assume?


Even though I like how sharp and clean the first shot looks, it feels a bit rushed, so I took another one. I think the second one looks much more natural, but I should have kept the vertical frame and framed more of his legs in, with less headroom too, it would look more balanced, maybe.
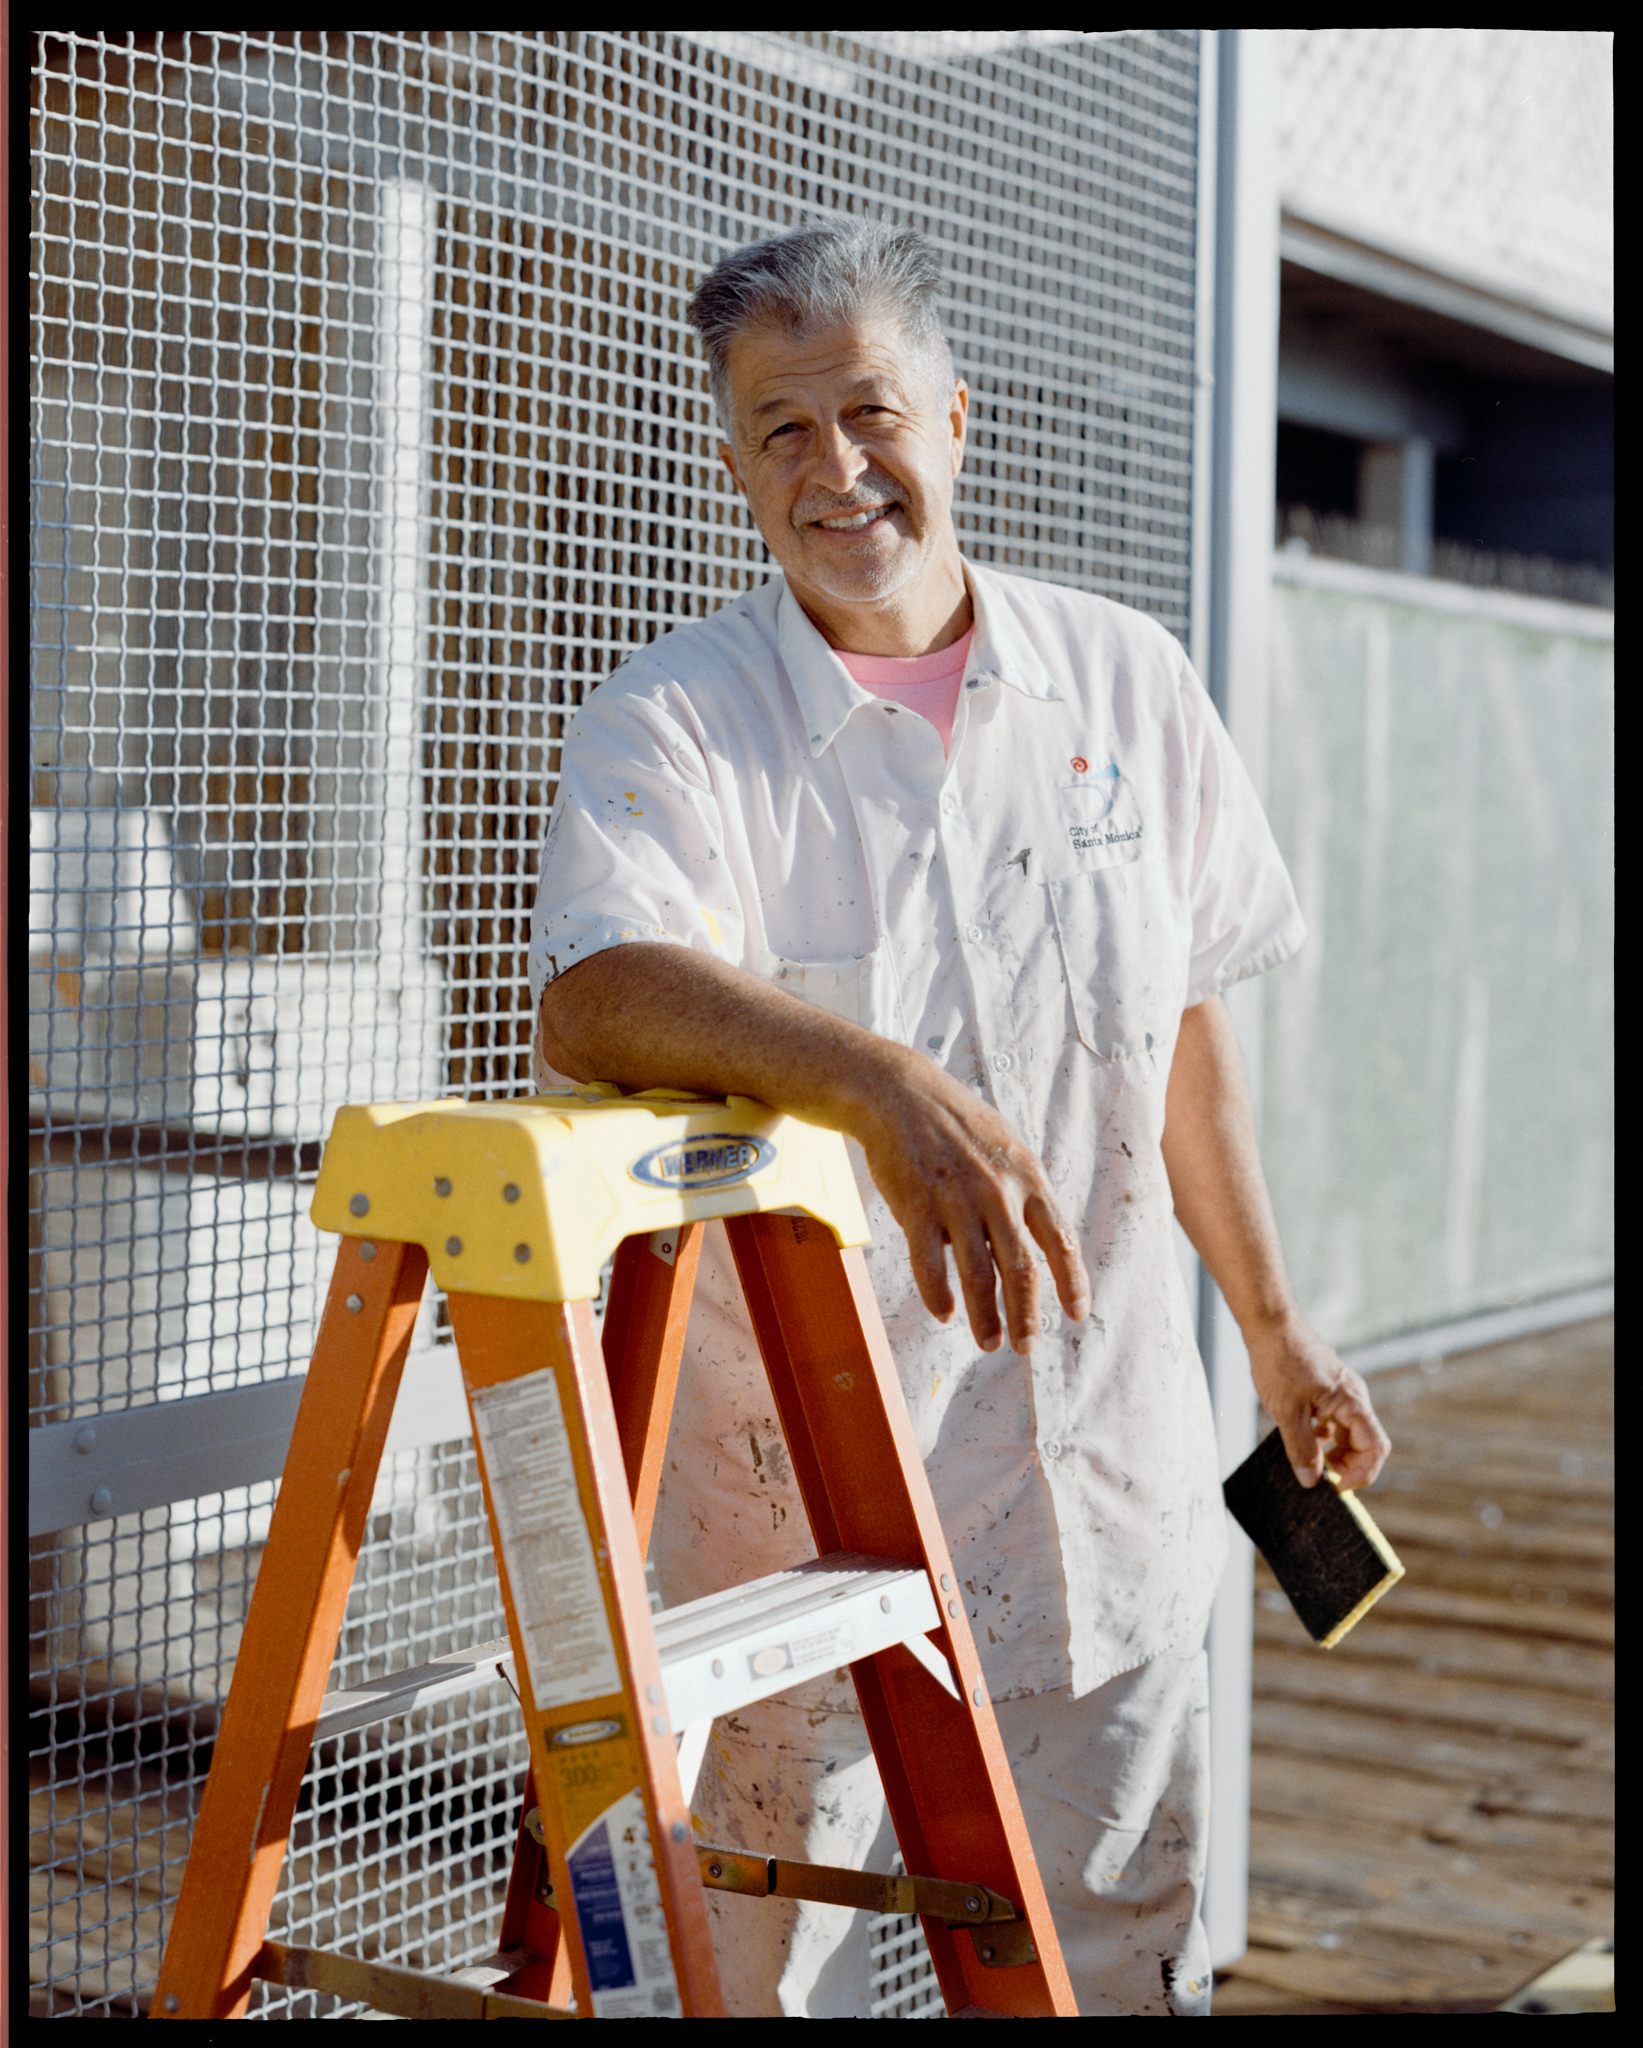

When I saw him, he was cleaning the wire fence. I asked if I could take a photo of him. He said sure, while continuing to clean. I tried to capture him in action, but couldn’t find the right shot. So I asked if he could stop for a second. Then I said, “Can we move the ladder in as well, can you put your arm on the ladder?” After the first shot, I felt the pose looked a bit odd, so I asked if he could put both arms on the ladder. Now this feels much more balanced to me. He’s very friendly; he was smiling, you can see the City of Santa Monica logo on his shirt, and you can see the small details of the yellow paint, which looks nice with the yellow ladder. In a perfect world, I’d probably add a bounce board to the left side so we have more catchlight in his eyes, but this is just me walking around having a two-minute interaction with a stranger on the street… So… yeah…

I like the color contrast in this photo, and I like the way he looks at the camera. But the framing is a little messy; I couldn’t decide how much of the tool cart I wanted to frame in. Maybe if I stepped a little closer or a little further, it would make the photo look better. Or maybe not… and now I feel like I’m starting to overanalyze everything…

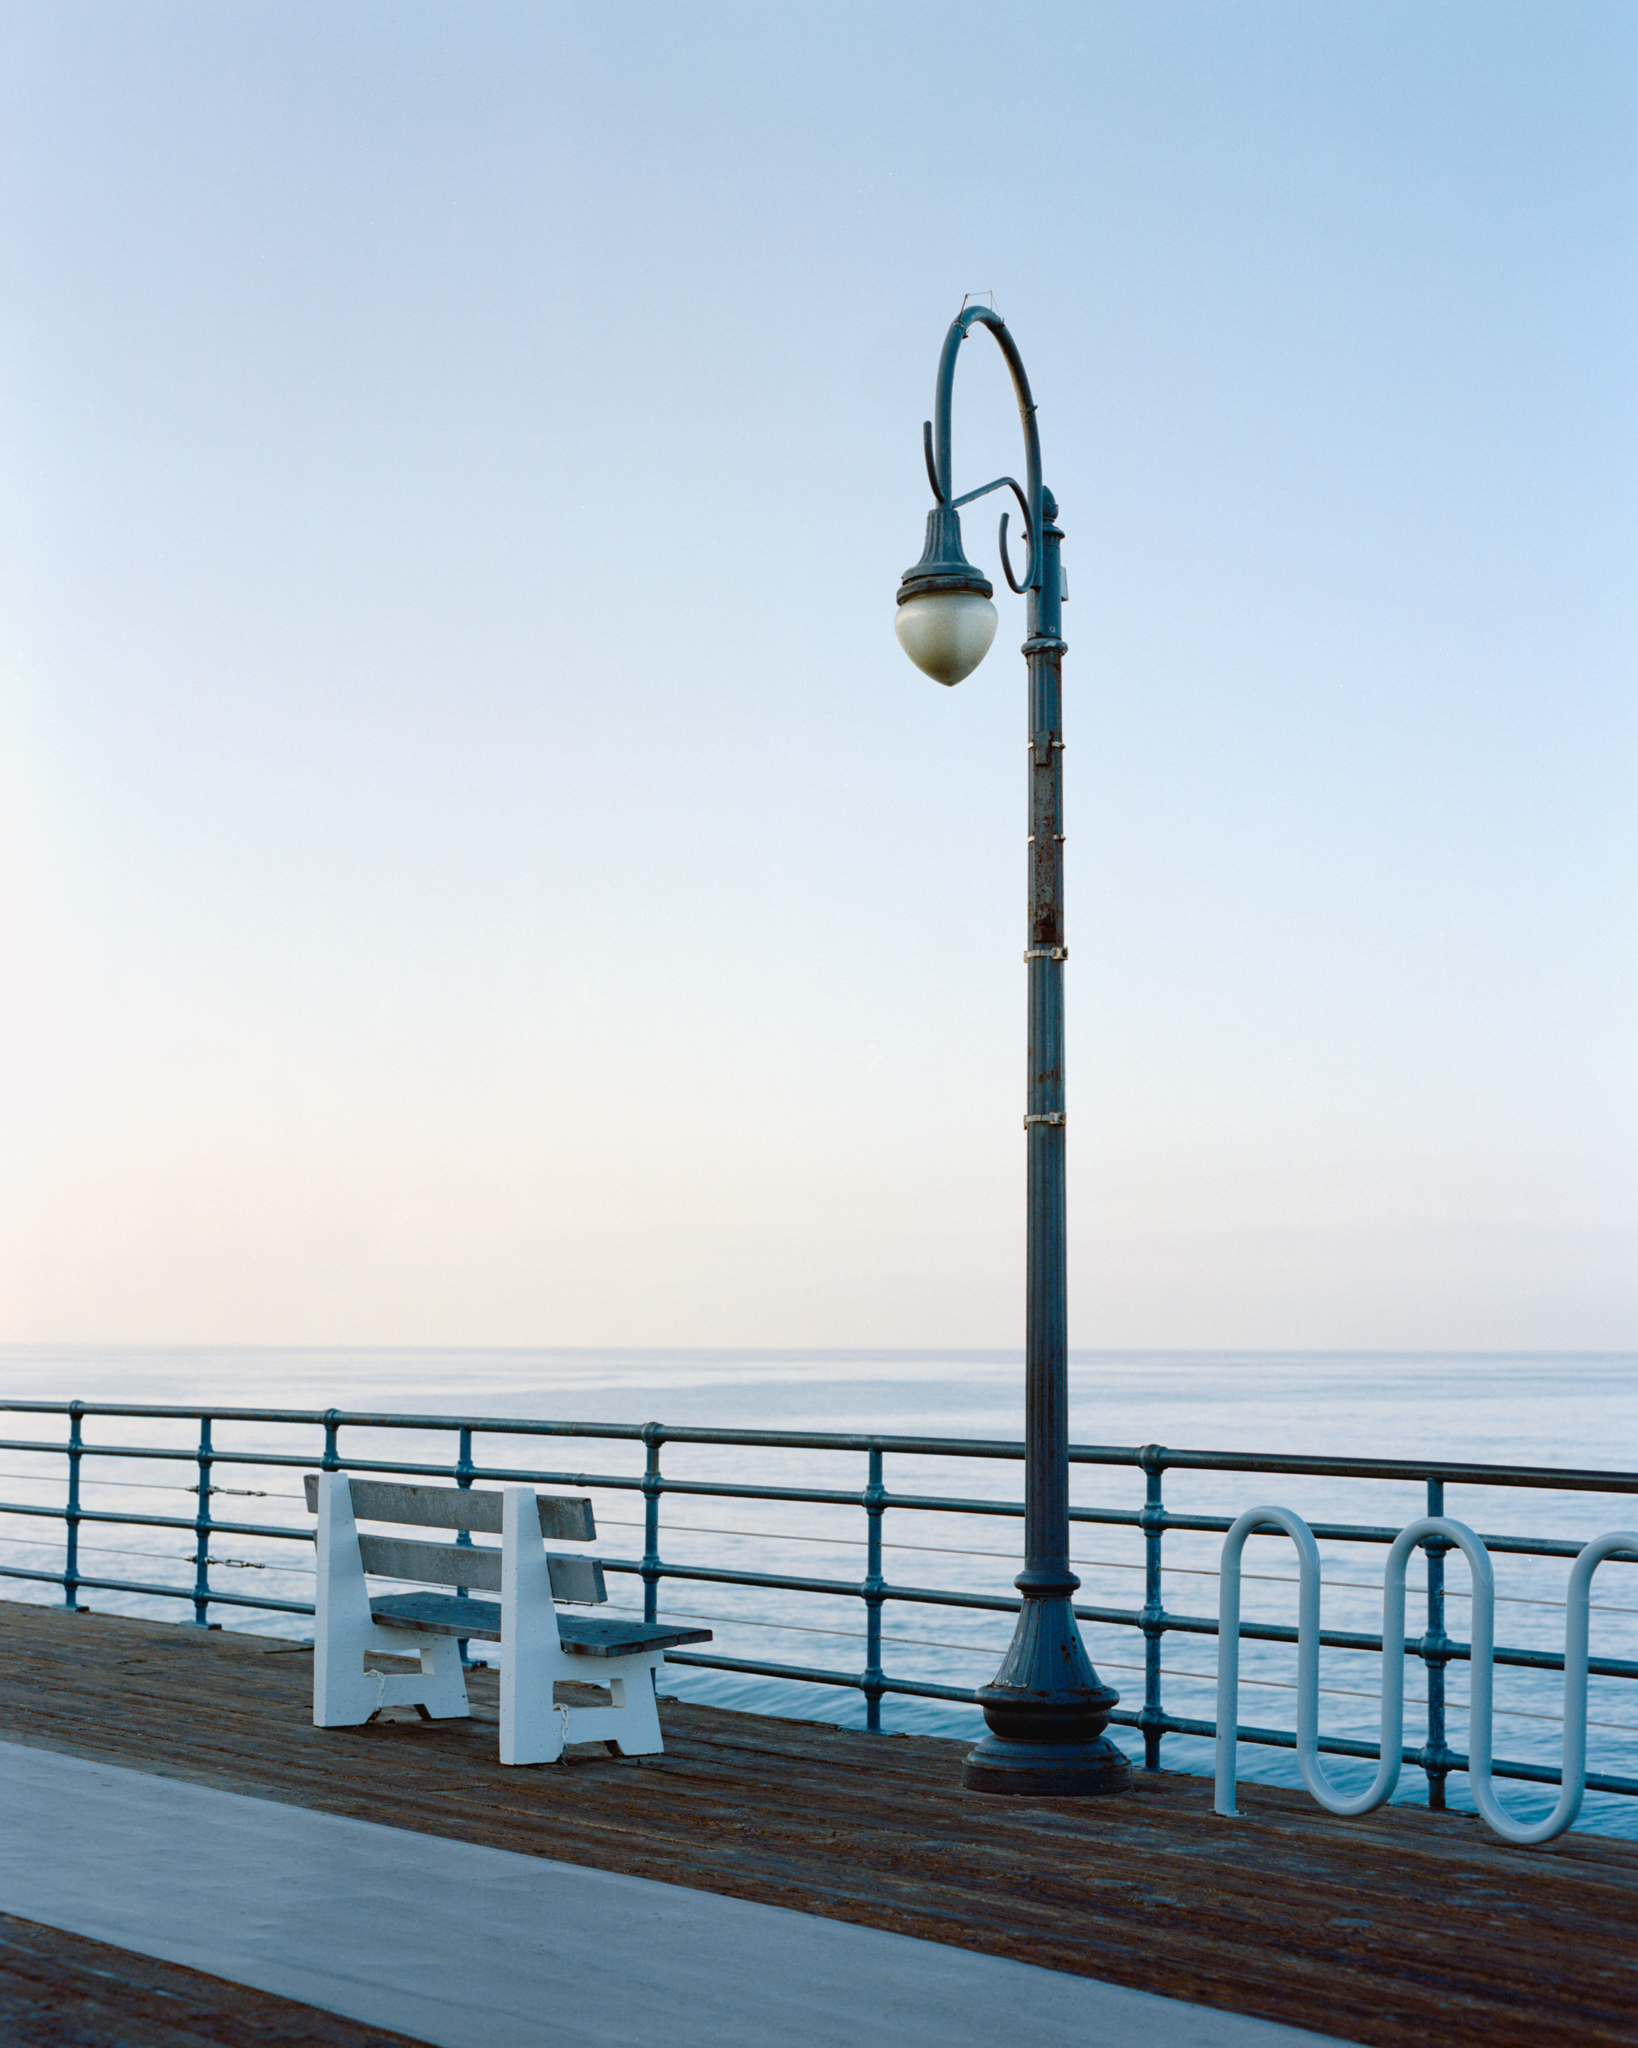
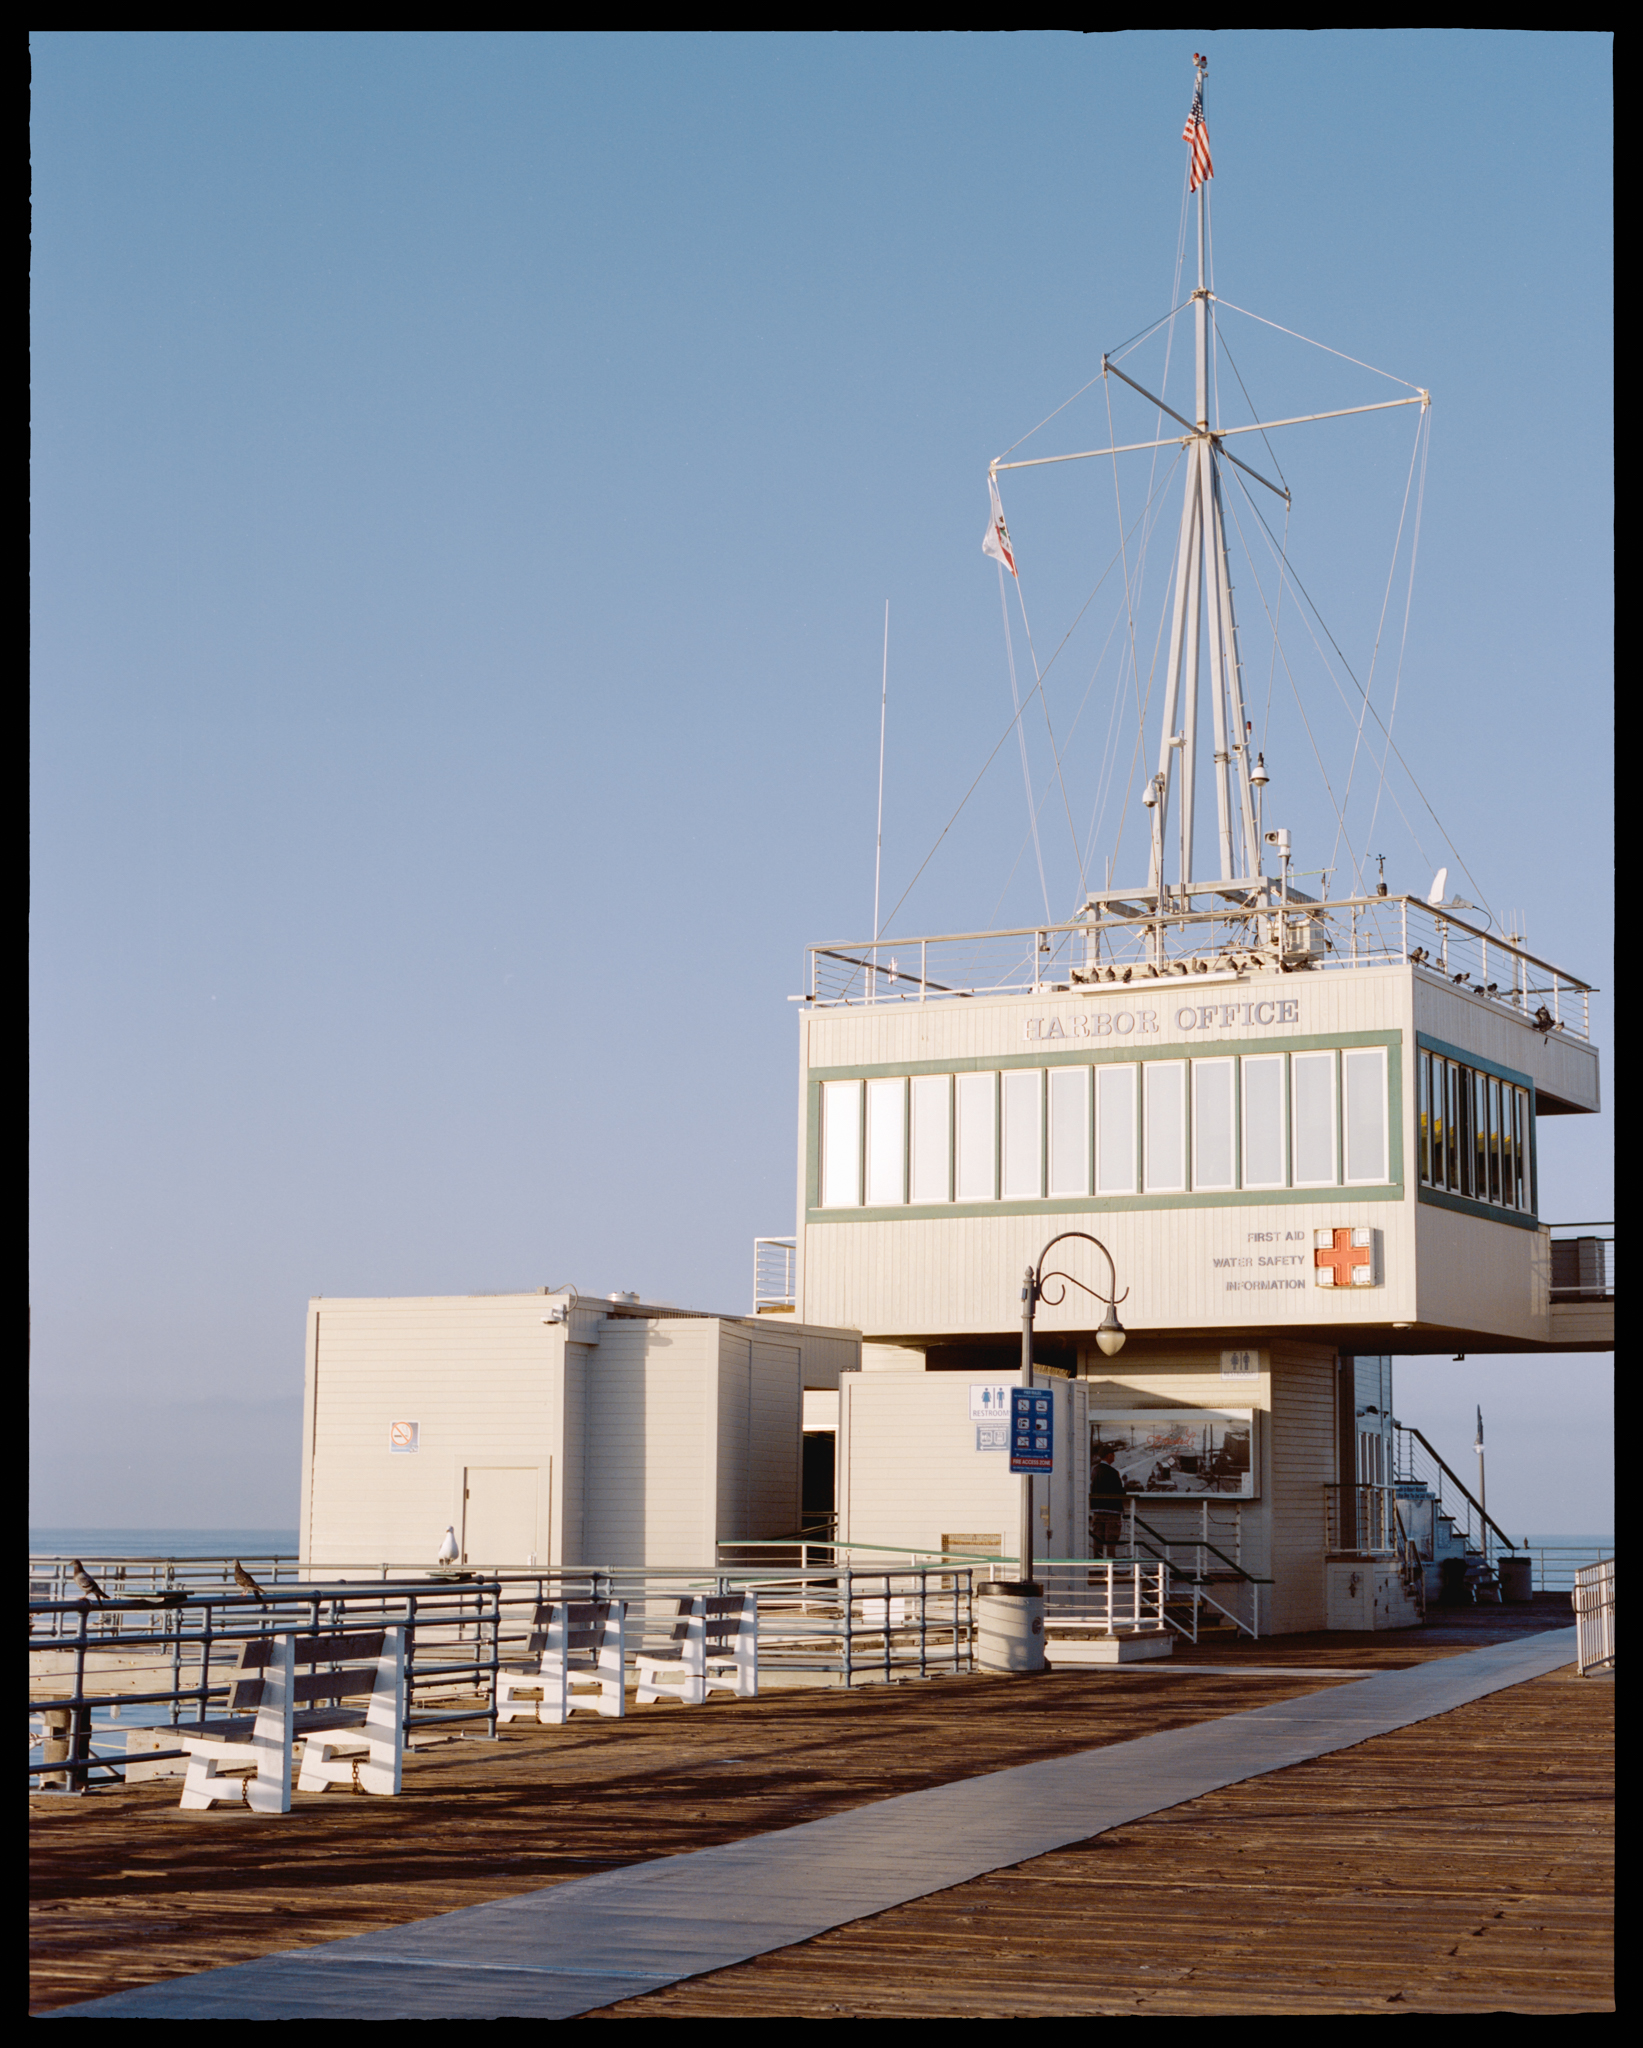
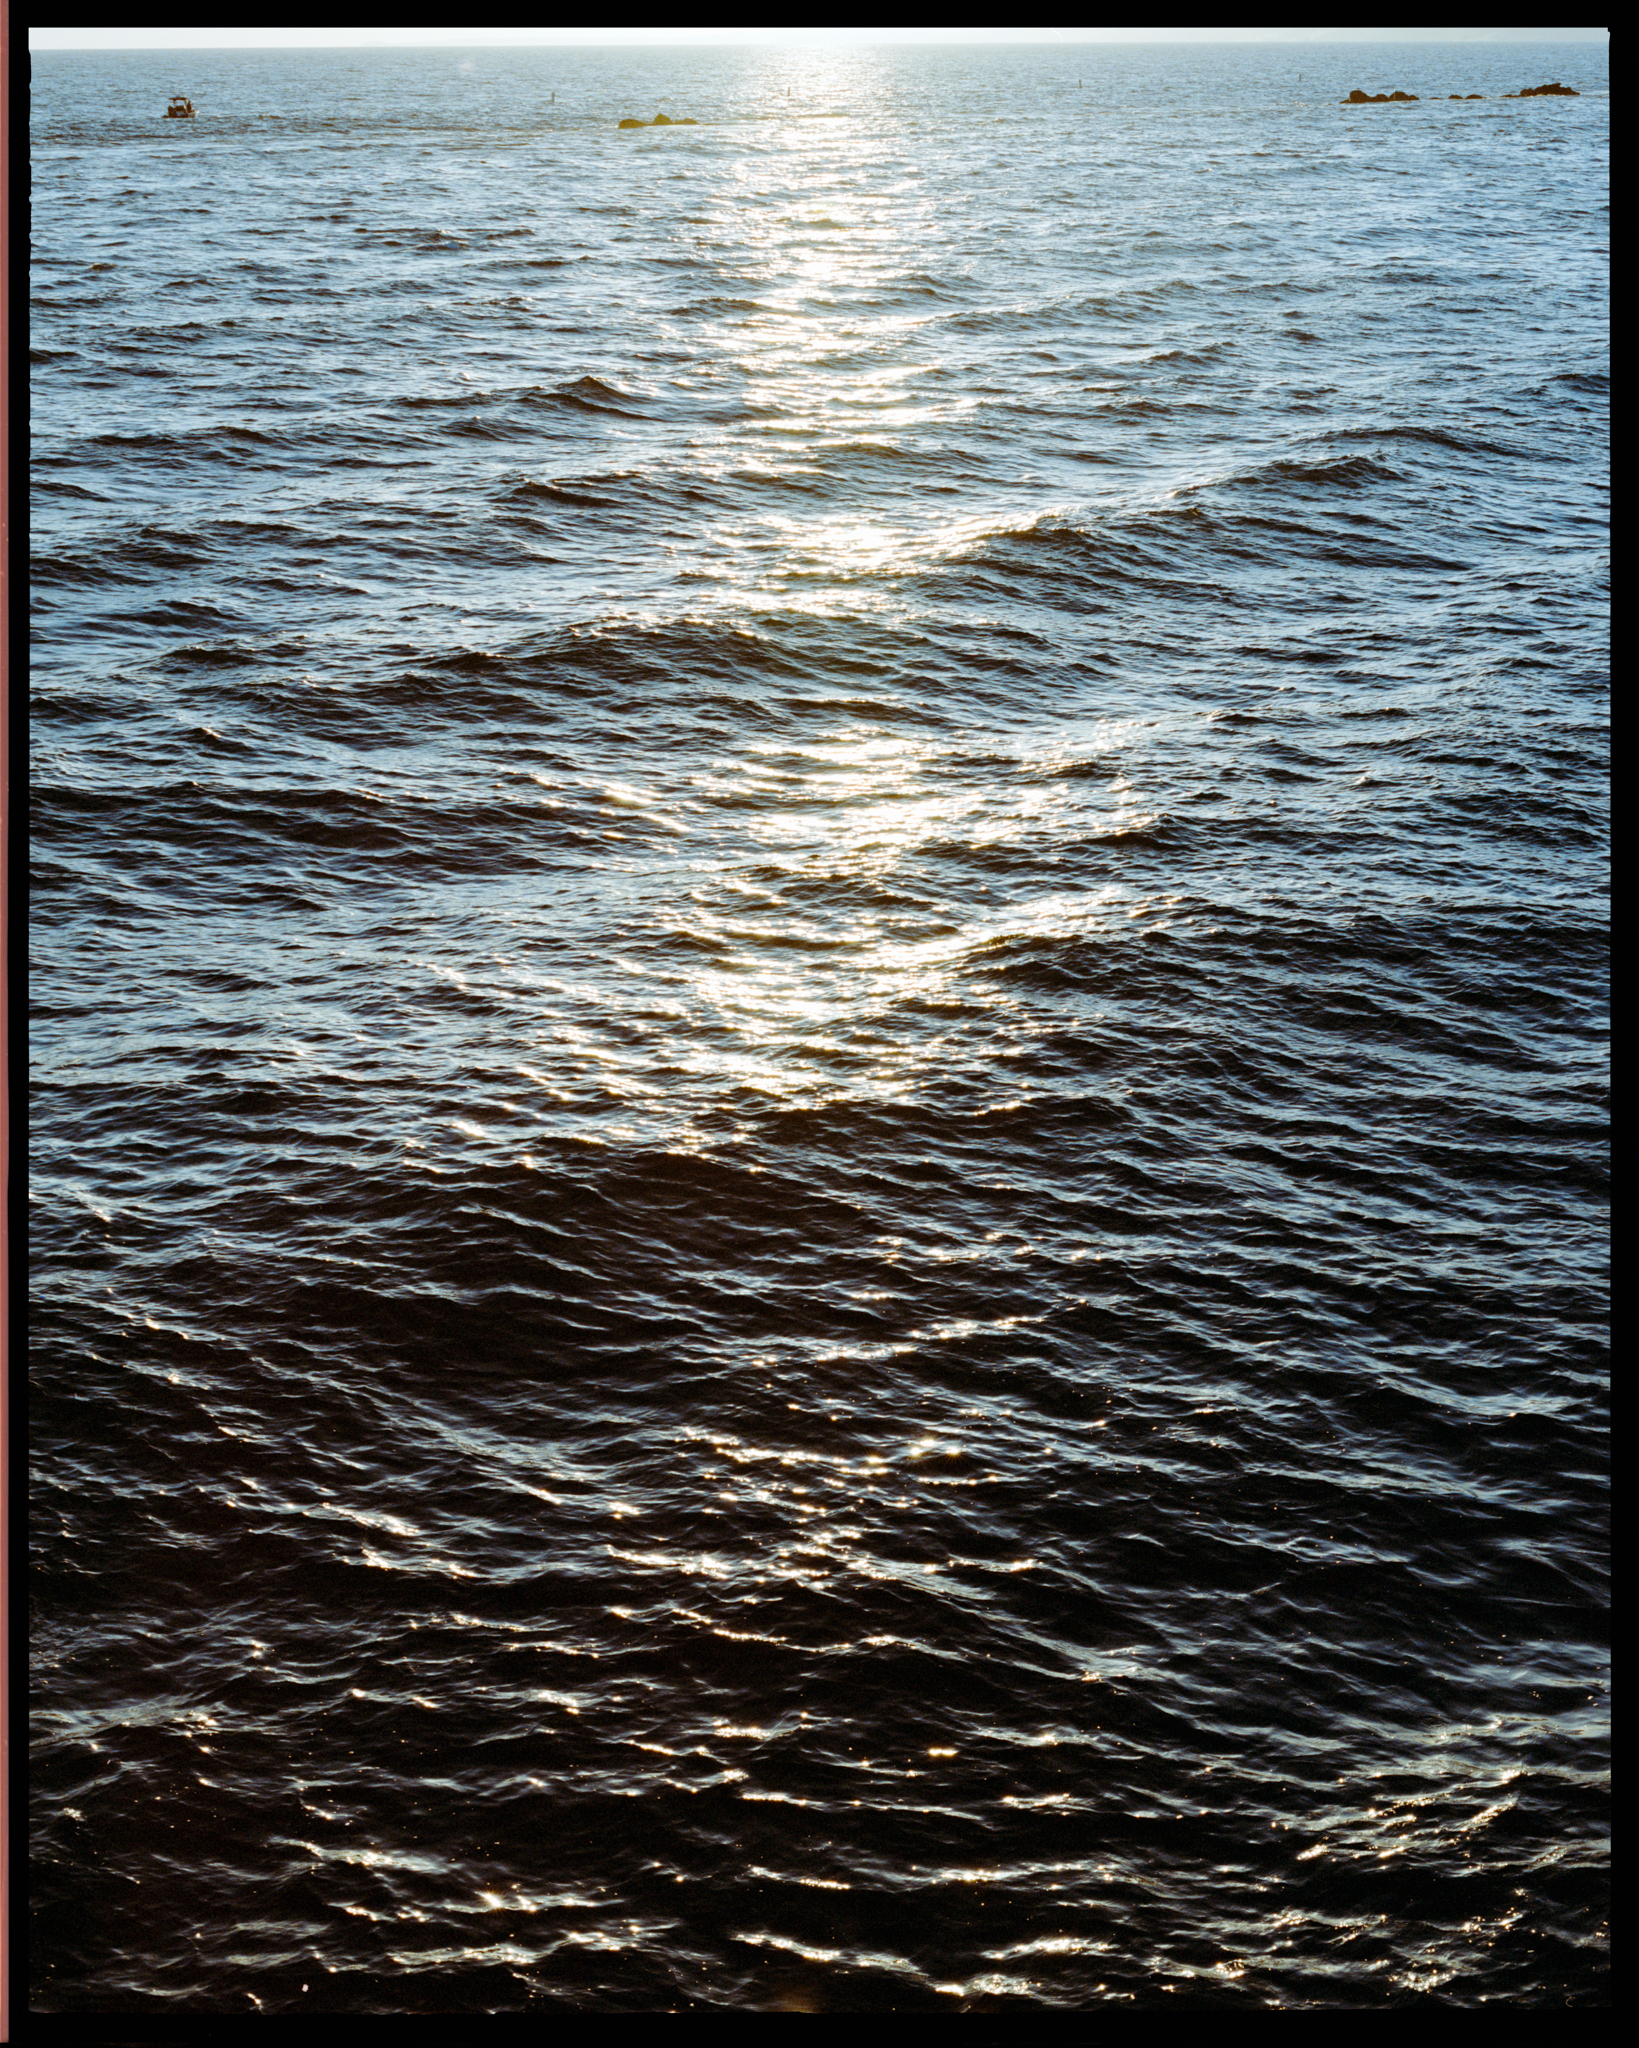
I often feel like the 50mm focal length is designed for portraits. When I’m taking scenery photos, I feel like I’m taking a portrait of the building, the bench, and the streetlight, the lifeguard tower… it’s just not wide enough to call any of these landscapes… And to me, this is a portrait of morning sunlight falling on the waves. Yeah, I’m just crazy like that…
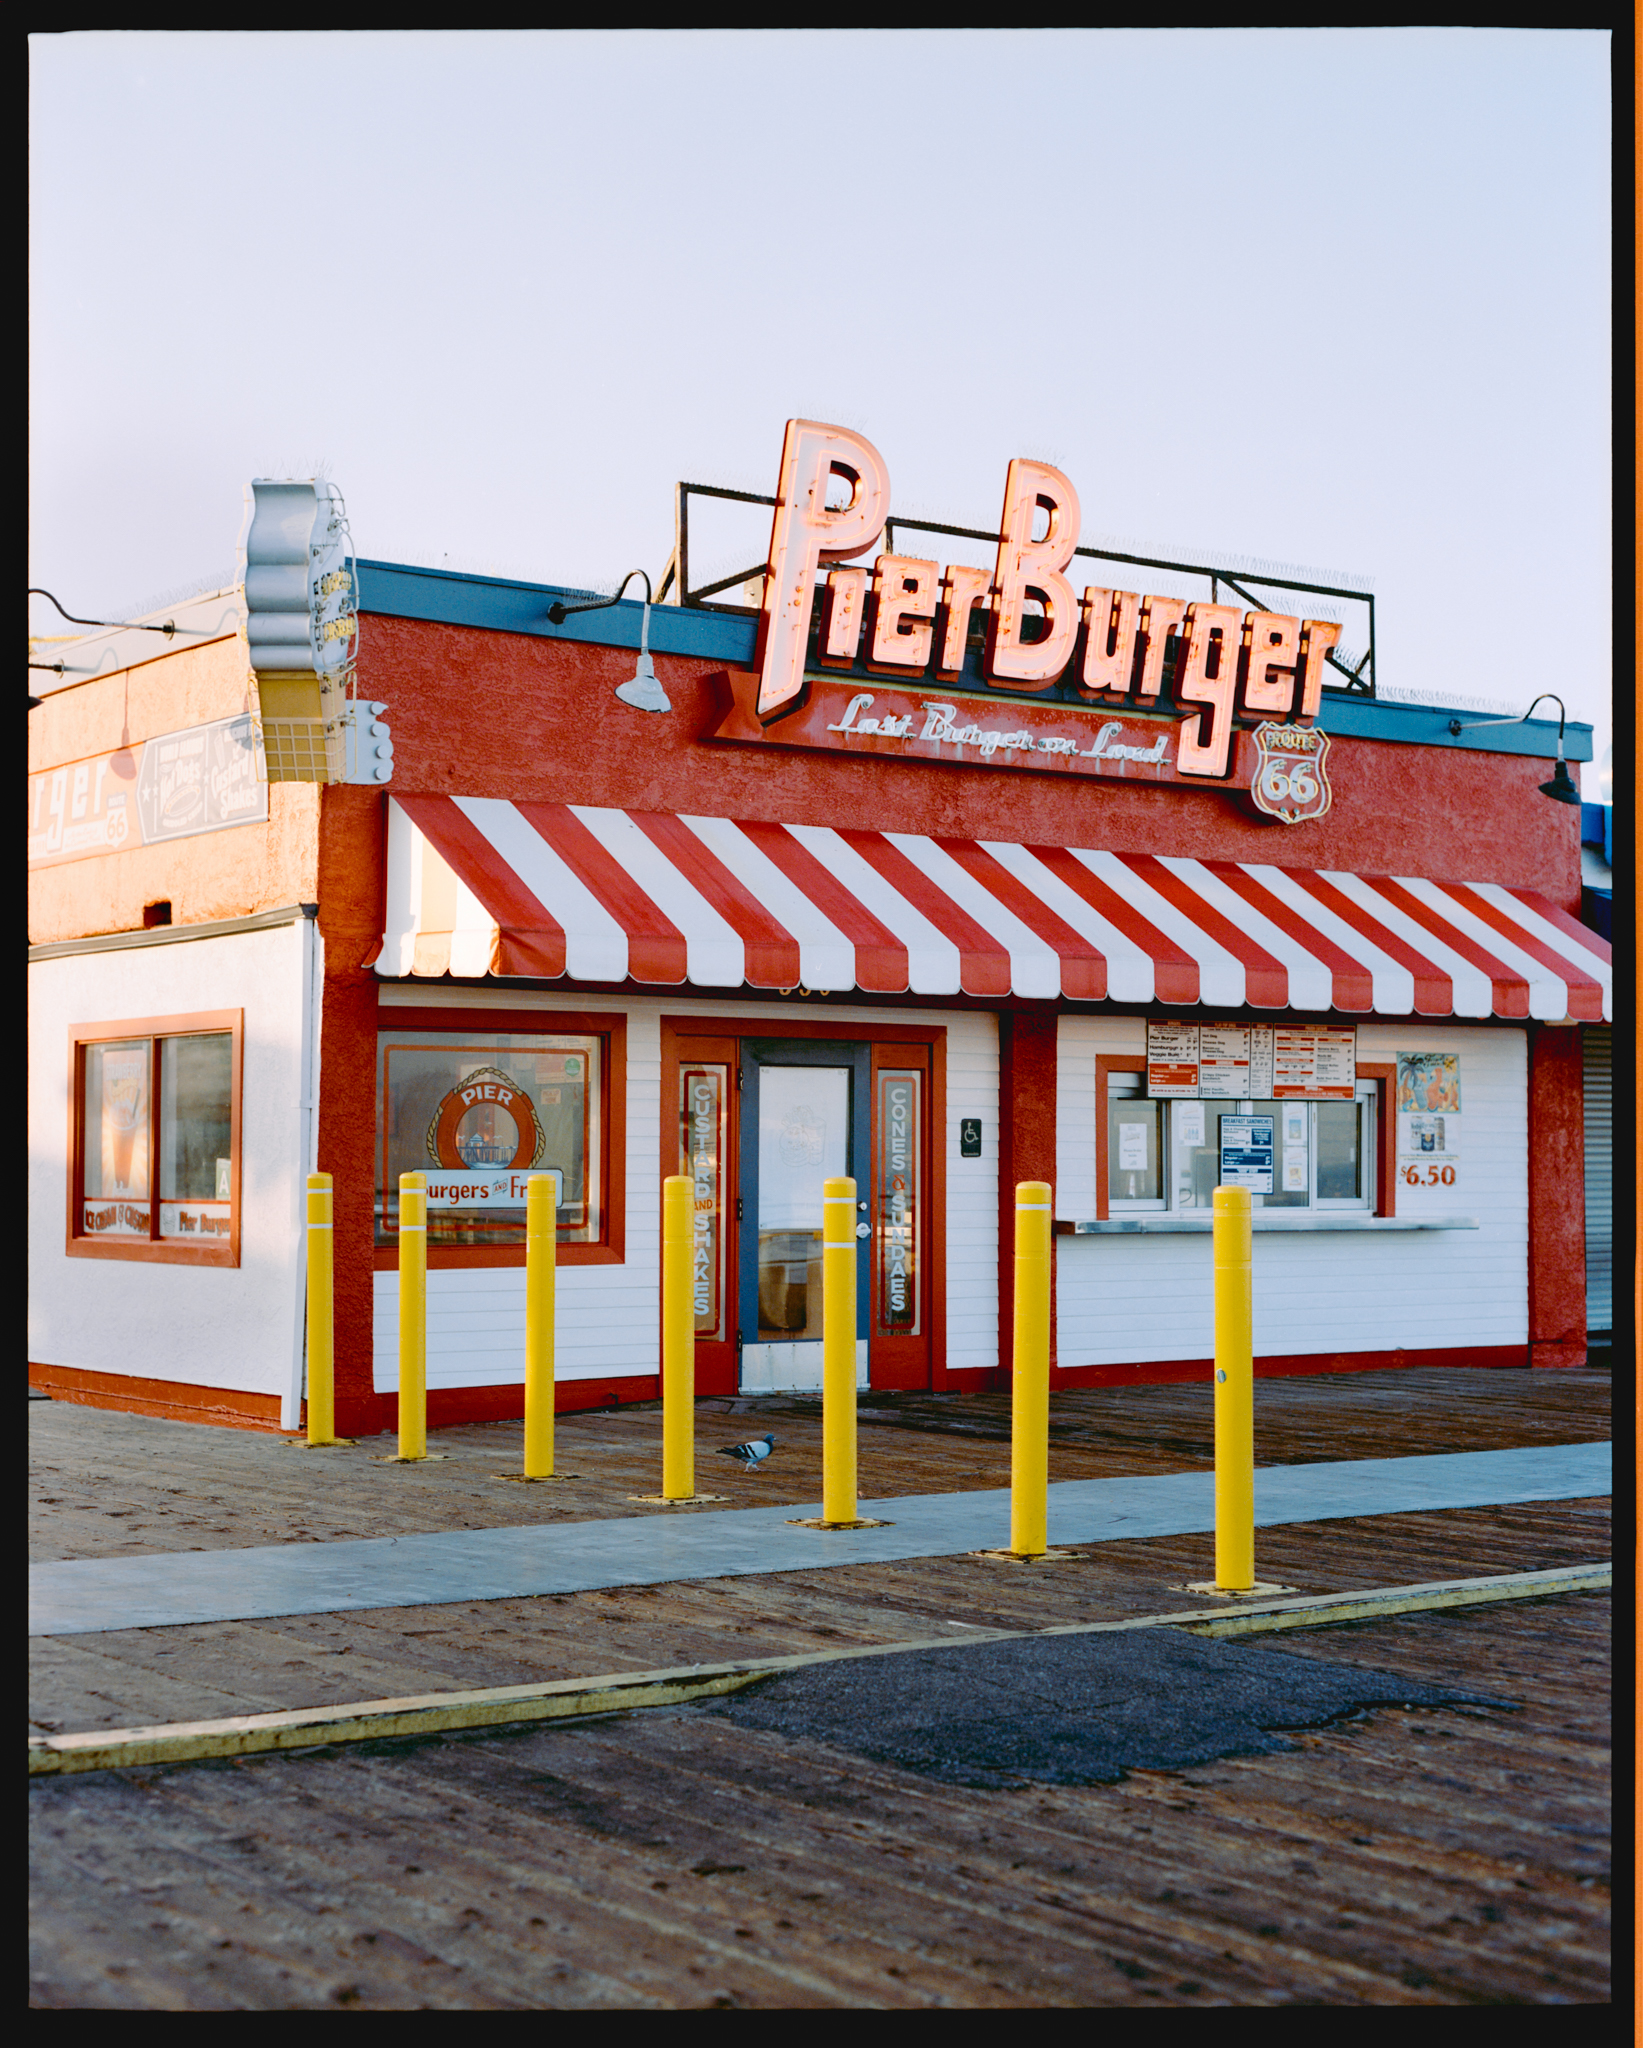
I guess if I stayed far away, I could shoot landscapes. This shot looks beautiful from far away, right? But I just couldn’t help myself from wanting to get closer and closer.
What I’m doing is definitely not street photography. It’s portraiture. Often I want them to look at the camera, so I’m taking a very intentional, very “posed” photograph of a person. I feel like holding a huge camera like this somewhat gives me a little more courage to direct my subject a bit more. “I’m a serious photographer,” “I must carry myself as a serious photographer.” I keep saying this to myself because now I’m holding such a dramatic camera. Besides, with the 67 format, you only get 10 shots per roll, so you really need to make it count.
And maybe for the same reason, I had more patience with these photos.
There were a lot of surfers doing their morning surfing. I wanted to take a photo of one of them. So I waited for one surfer for a good half an hour, but it looked like he wasn’t coming back up. Then I waited for another one; they walked away too fast. Then I waited for another one…

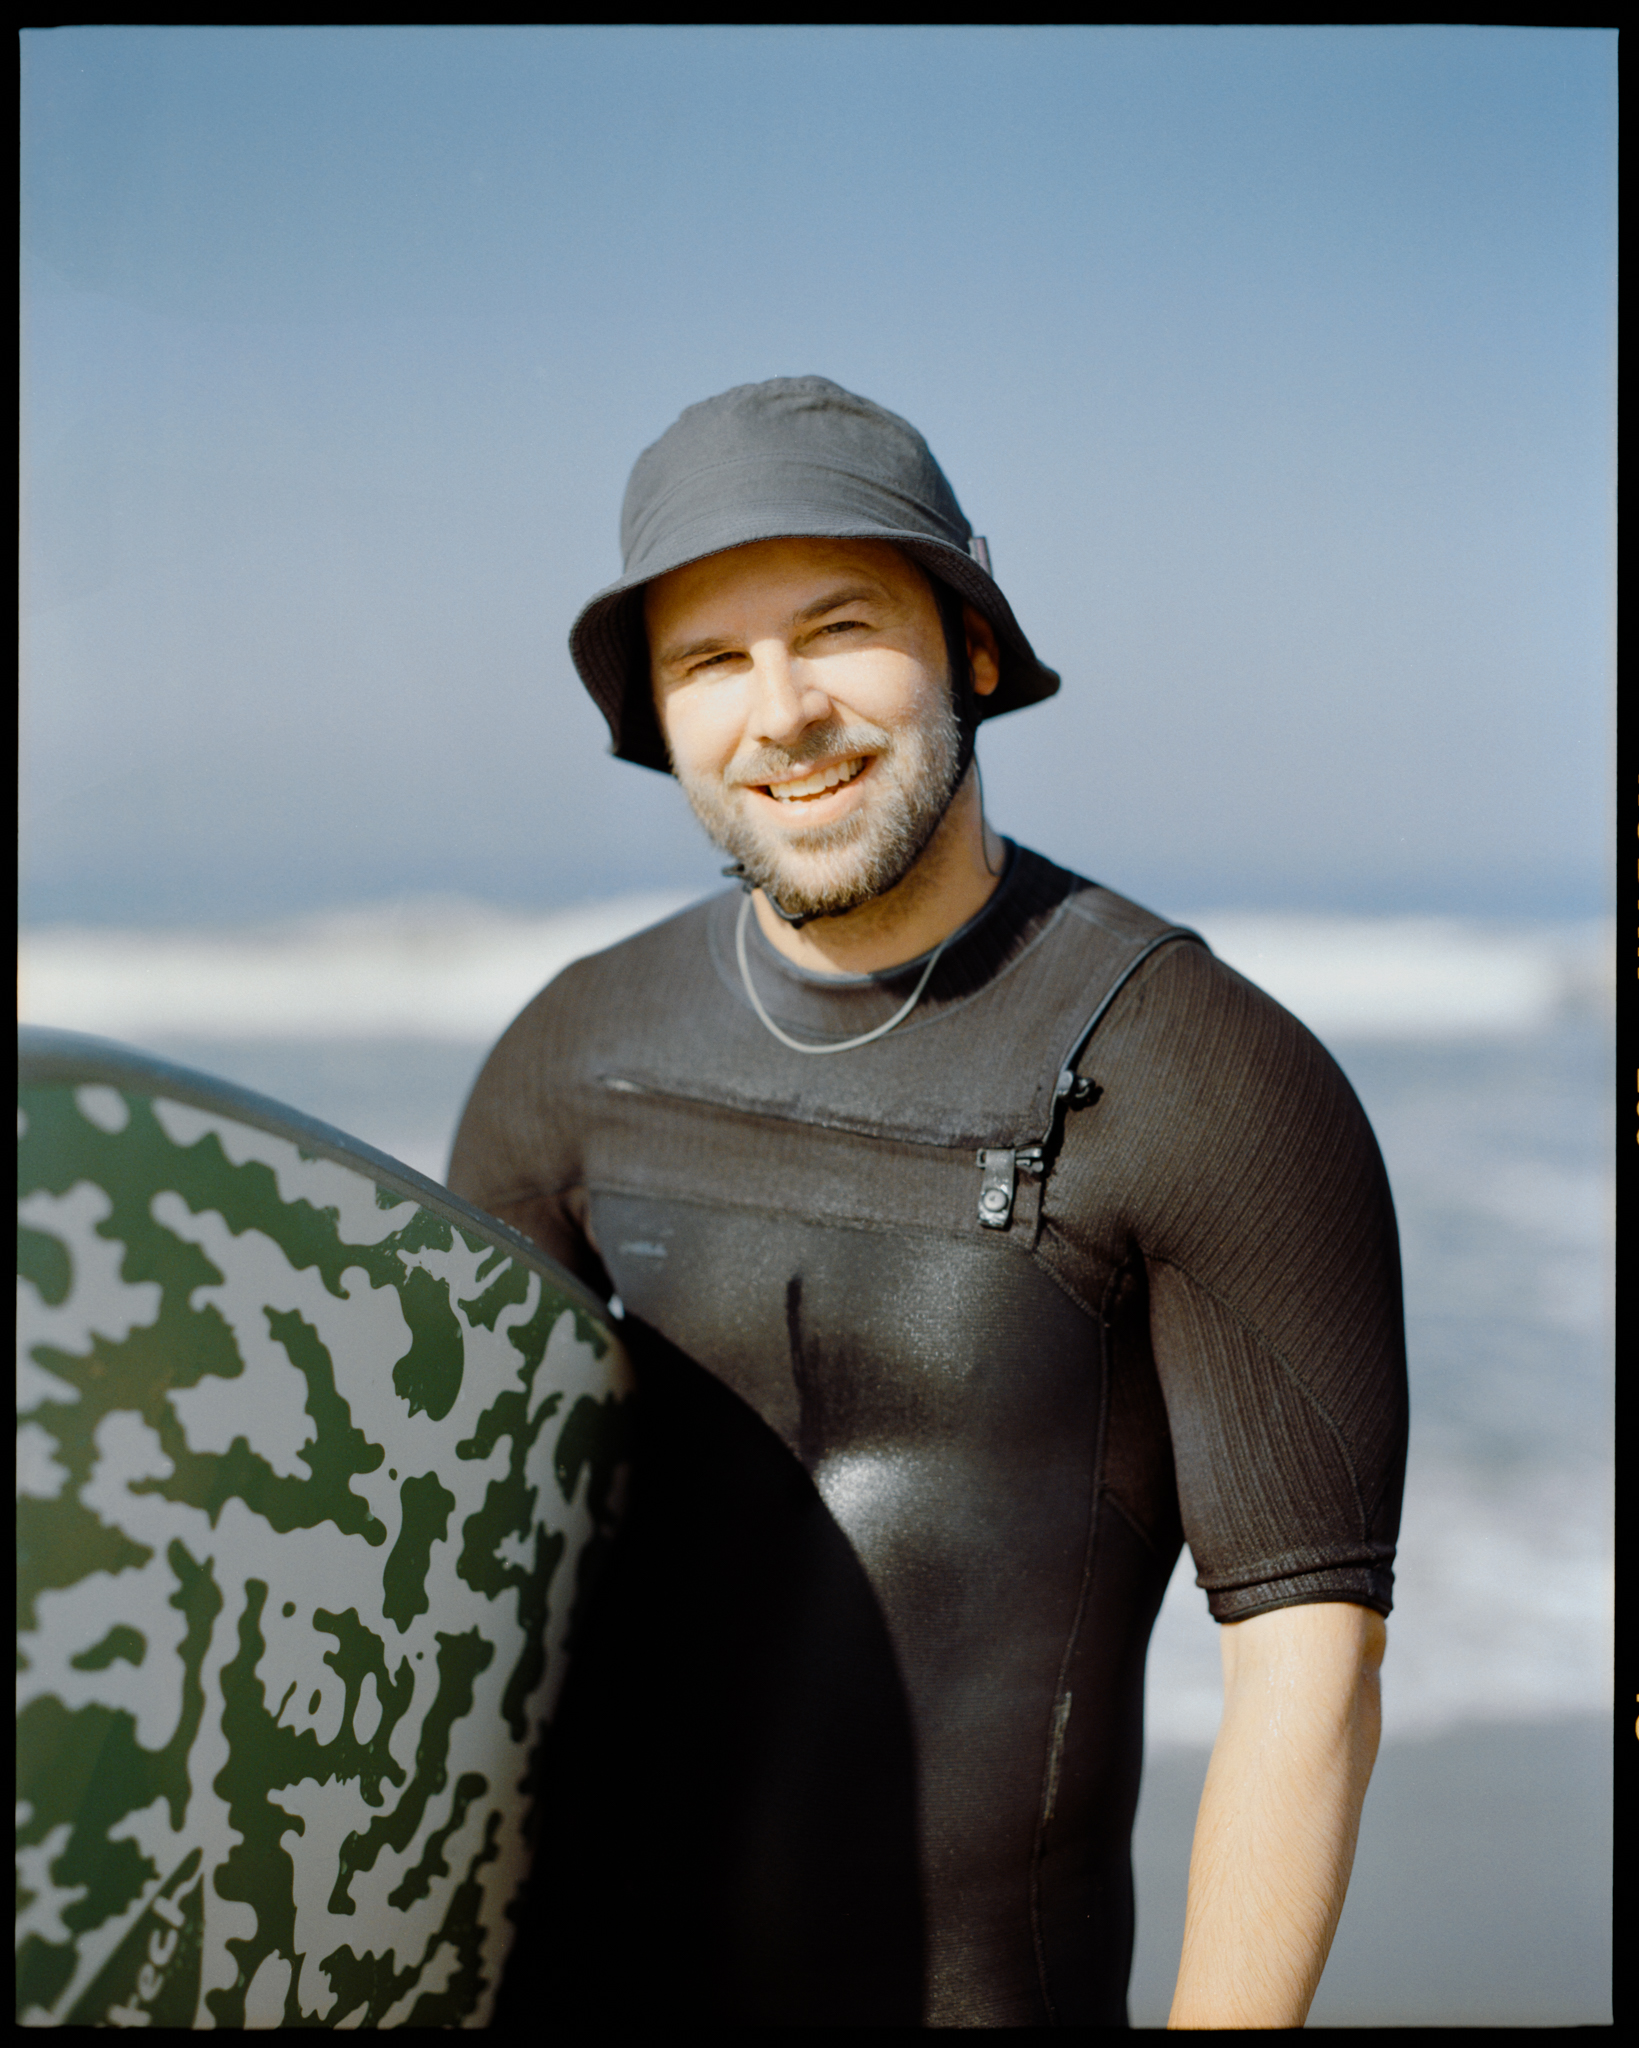
These two shots are not bad, but they were actually way overexposed. I was too excited when I finally caught one surfer leaving and misread the exposure. Oh well, next time I know. Just calm down, Sam, calm down…
The sun was getting too hot, so I was walking back to the car and saw these two lifeguard trucks. It was a nice-looking scene, so I asked if I could take a photo of them. They said a quick one because they were leaving. Then I stepped back to start adjusting the camera, but I wasn’t fast enough, and they had to go… I missed the shot.
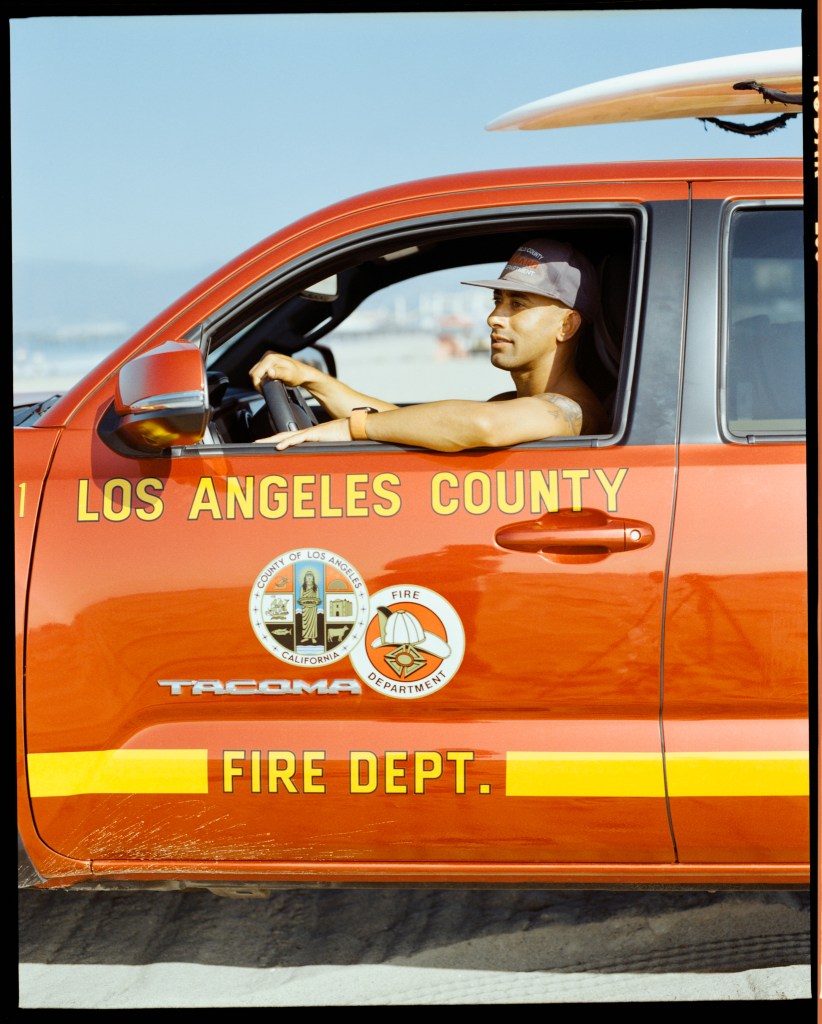
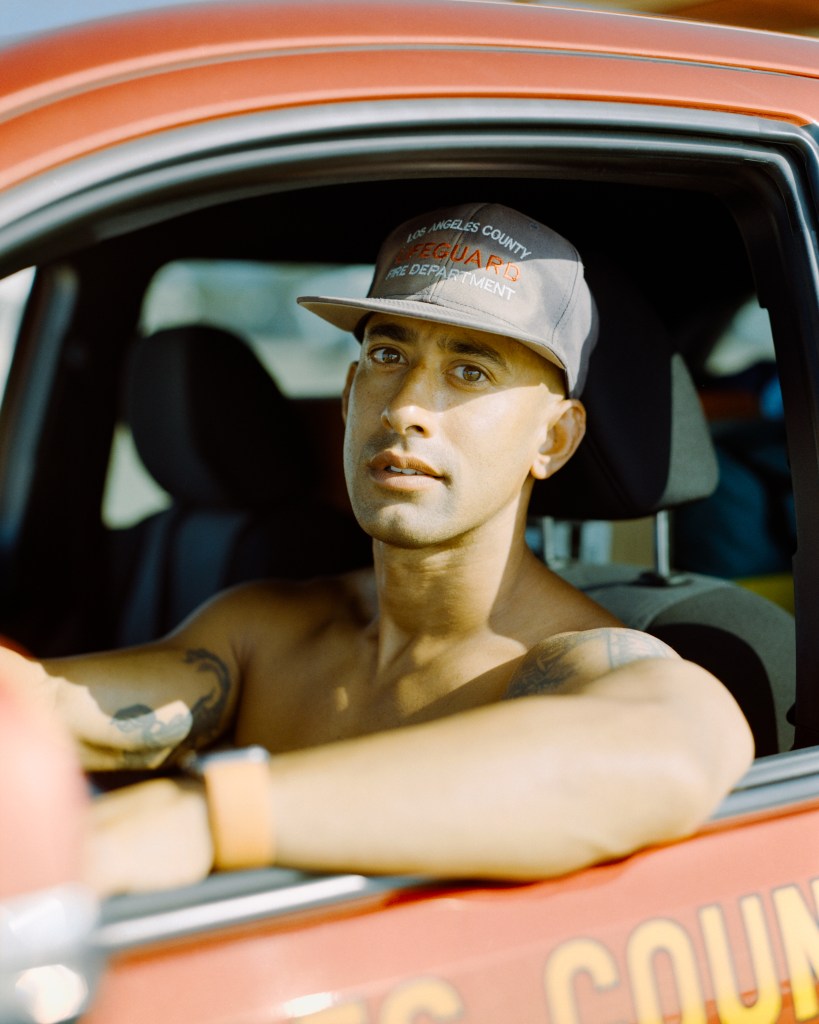
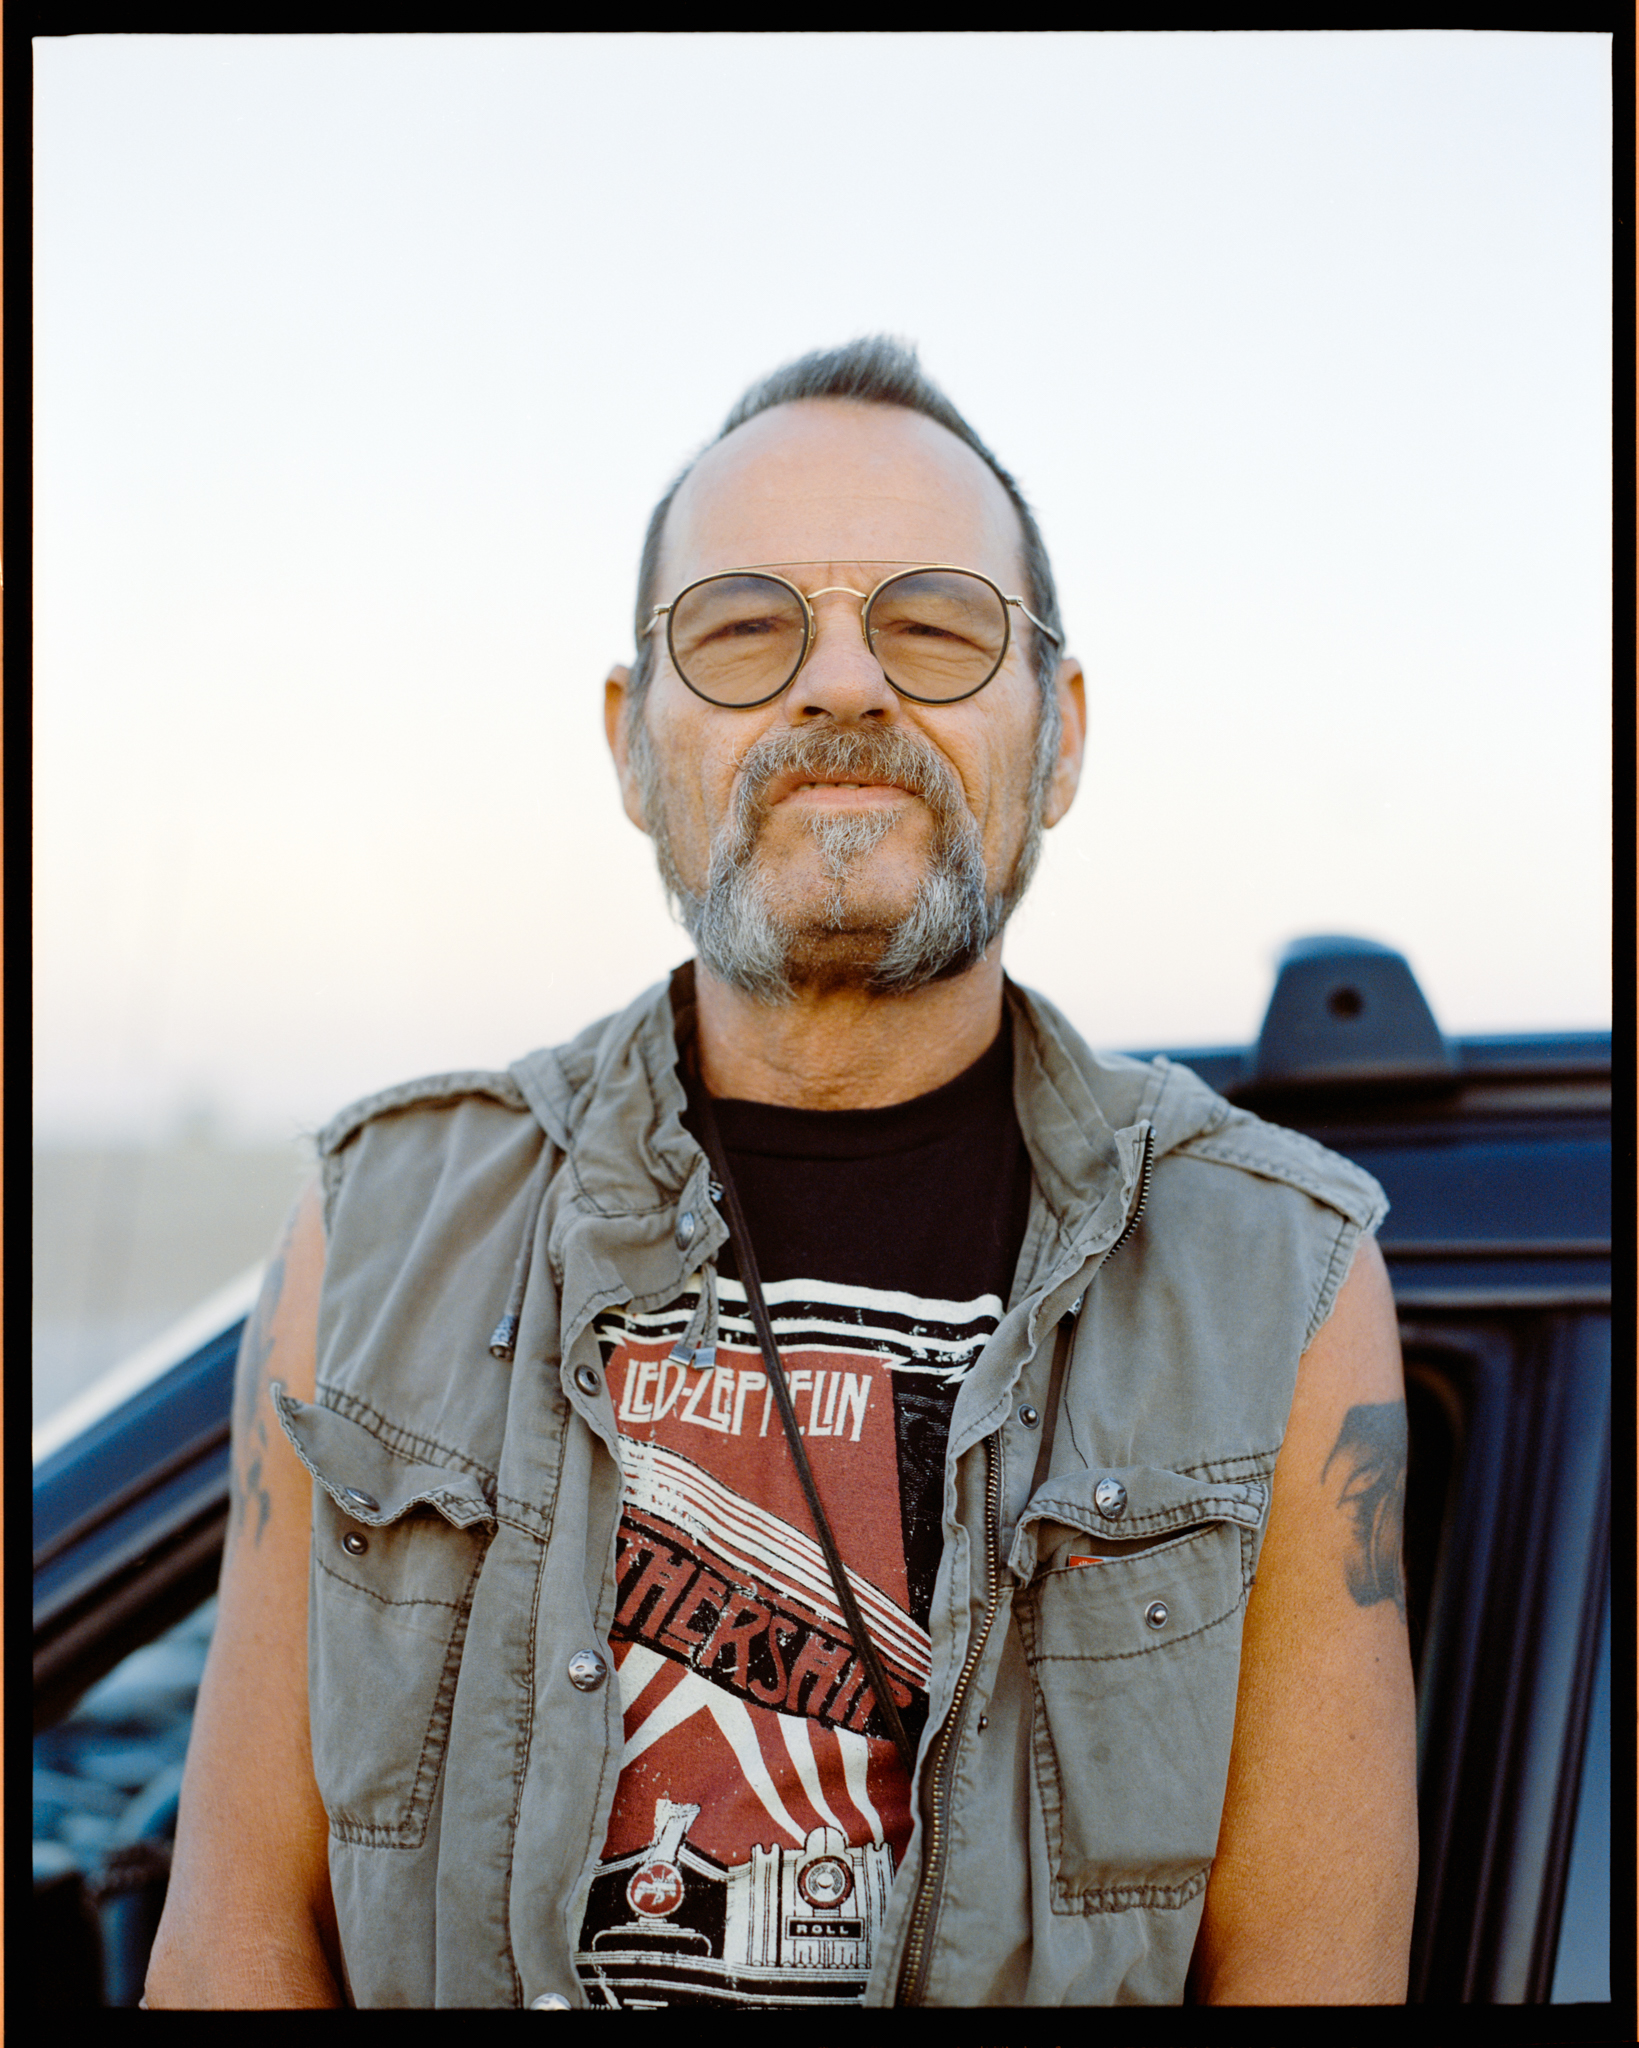
But one person stayed, so I walked up to him and asked if I could photograph him. He said yes, and I took two shots; the second one ended up being one of my favorite shots from these two photowalk sessions.
And that’s it. For the first couple of rolls I shot with this camera, I’m very happy with the results. When I first saw the scans, I really liked them. Three weeks later, as I’m making the video, I still very much like them. This doesn’t happen all the time.
LIKE AND DISLIKE
Despite only using this camera for a short time, there are many things I like about it. First of all, the viewfinder is pretty big and incredibly bright. I was a bit concerned about the super shallow depth of field of the 67 format, especially with the lens that opens up to f/2.4, coupled with the manual focus system. However, this viewfinder actually makes focusing pretty smooth. I mean, I don’t nail focus 100% of the time, but that’s on me; I need more practice. However, I can say that, out of all the manual focus cameras I have used so far, this is definitely the easiest one.
The Pentax 67II, being the latest version, has a very modern and well-thought-out design. If you have used any SLR camera, film or digital, you can get a hold of this camera pretty easily.
I shot all of the photos with the internal light meter, which is pretty accurate and reliable. And for how big and bulky it is, it’s actually very easy to hold, with or without the grip. I can tell you that every single person I know who owns this camera has warned me about how heavy this camera is, and seriously, it’s really not that bad. If you compare it to some of the digital cameras and lenses I work with…
The weight doesn’t bother me; it’s the size of it that I’m not used to yet. And since the mirror inside is bigger, it also makes it more difficult for handheld shots at lower shutter speeds.
One other thing I dislike about this camera is the strap. Both of the hooks are on one side, which means you can only hang it vertically. It feels awkward when taking a photo.
Another thing I wish it had, which I also like about my Pentax 645NII, is the imprinted camera setting data. I really like this function with the 645; when I get the scan, I can look at the photo and figure out what I did right or wrong with the settings. It’s really nice, especially when you’re still learning… but sadly, the 67 does not have this function. I guess it’s time to start bringing a notepad.
OVERALL
Almost a year ago, when I just got my first Hasselblad, I talked about how the shooting experience made me feel like I was taking an important photo, how the Hasselblad made me see the beauty of the mechanical design of a camera. The waist-level viewfinder, the unique winding crank, the nice-sounding shutter, etc., made the Hasselblad a fun and cool camera to shoot with. At some point, I wanted to play with the Hasselblad more than making photos.
Now I have the Pentax 67, this camera drags me all the way back to using the camera as a tool. It’s still beautifully designed and nice to shoot with. Maybe because I have been shooting SLRs for so long, this camera makes so much sense to me. Everything feels so natural to me; I don’t feel the camera, I don’t think about the camera, all my focus is in my viewfinder, and what’s in front of the camera becomes the most important thing again.
When I first picked up the Hasselblad, I said a good camera will inspire you and make you want to take more photos, but now with the Pentax 67II, I think the right camera will make you forget about the camera and only think about the photo in front of you. And for that reason, I think the Pentax 67II is my dream camera, and now it’s the right camera.
Alright, this is it for this week’s video. What is your dream camera, and have you found the right camera for yourself yet? Leave me a comment down below and let me know. I hope you enjoy this long video. I’m definitely going to shoot more with this big boy. If you want to see more videos about this camera or other cameras, please subscribe to my channel and let me know what you think about my photos, videos, English, or anything. I always appreciate any feedback. And this is Sam; I will see you next time. Bye.


Leave a comment