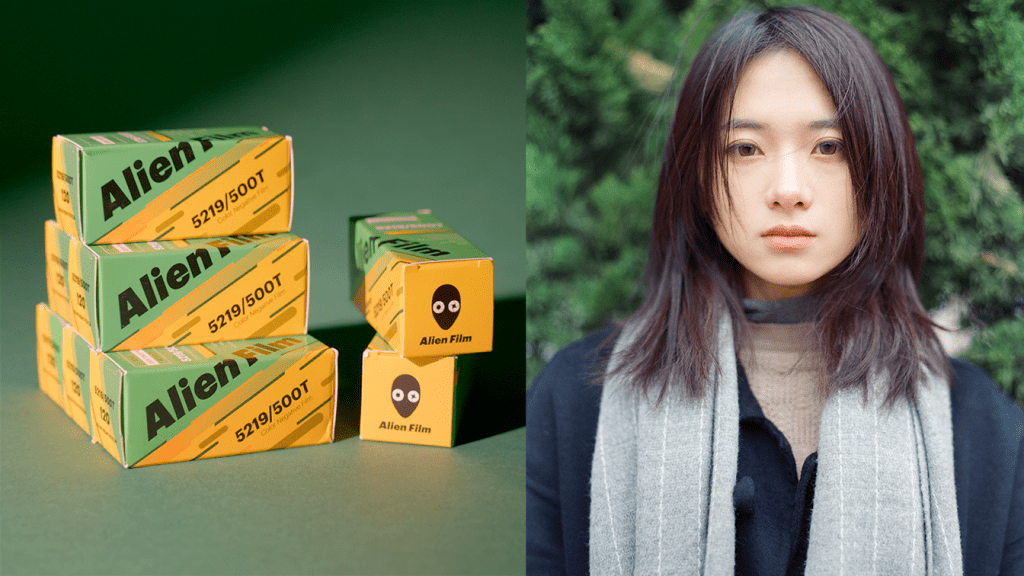
Hey guys, this is Sam. Welcome back to another episode of “it’s all about trying and failing and learning and trying again,” aka “Aputure sent me a very colorful light to play with.”
I love working with natural light, either sunlight, streetlights, house lights, any kind of environmental lights… and I love high key, soft, and even all-around balanced lighting when I’m taking portraits… that’s because I don’t have a whole bunch of lights. I shoot with natural light the most, so I’m mostly familiar with natural light…
Therefore, when Aputure reached out to me and asked if I want to try their LED light for a photo shoot, I was like “perfect timing”!! Time to try something new again!! You guys know how much I love trying new things!!
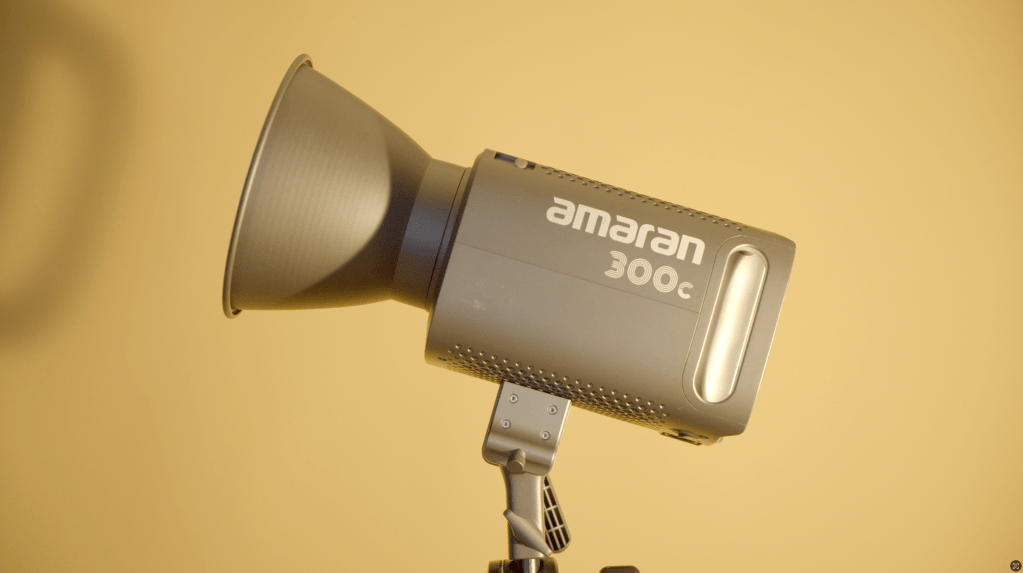
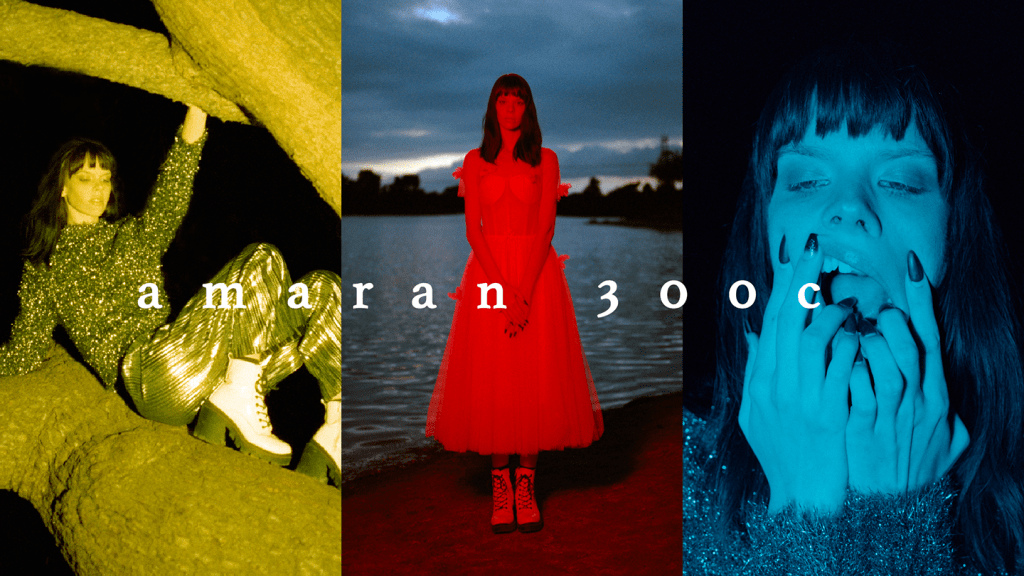
They sent me this! This is the Amaran 300C. It’s not just an LED light; it is a full-color LED light. Isn’t that cool??
On paper, it is a 300W RGB with an output of 26,000+ lux at 1m… but what does this mean though? What can it actually do? Let’s just jump right into a photo shoot and find out.
Spoiler alert. This is not a light review video; I’m sure there are many videos out there that tell you the output, the color accuracy, and all that good stuff. I just simply want to share my experience with the light. I will show you the photos, the scan, and converting process, since I shoot film, in this case, it’s a little tricky, then we will talk about the mistakes I made, and what I learned from it.
SHOOTING AND THE PHOTOS
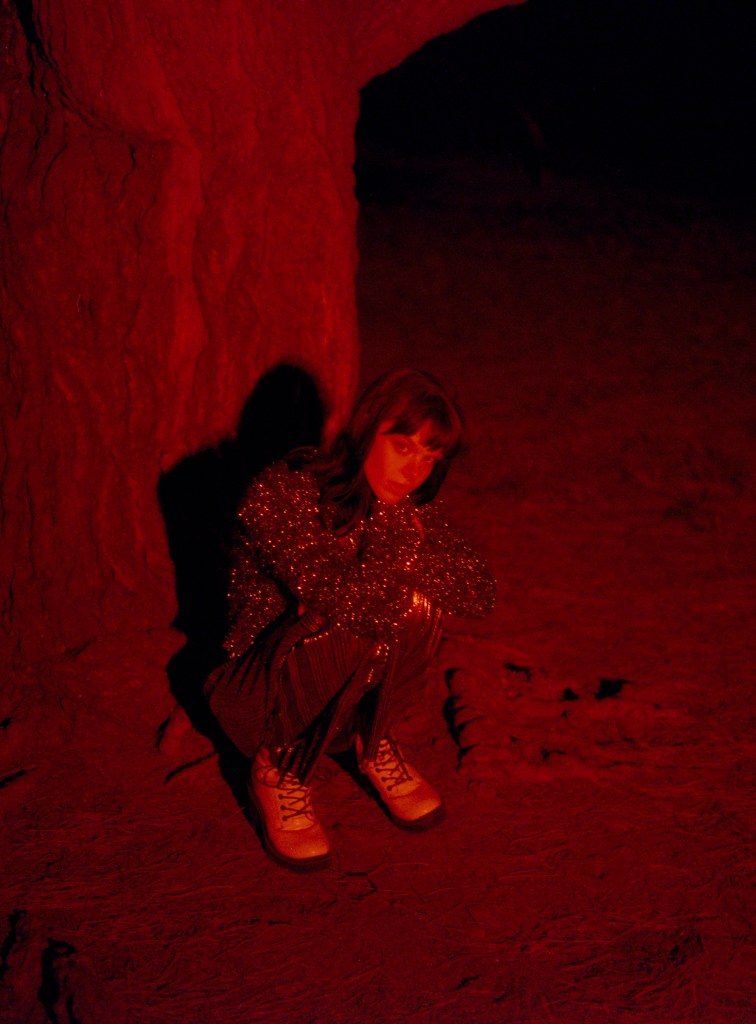
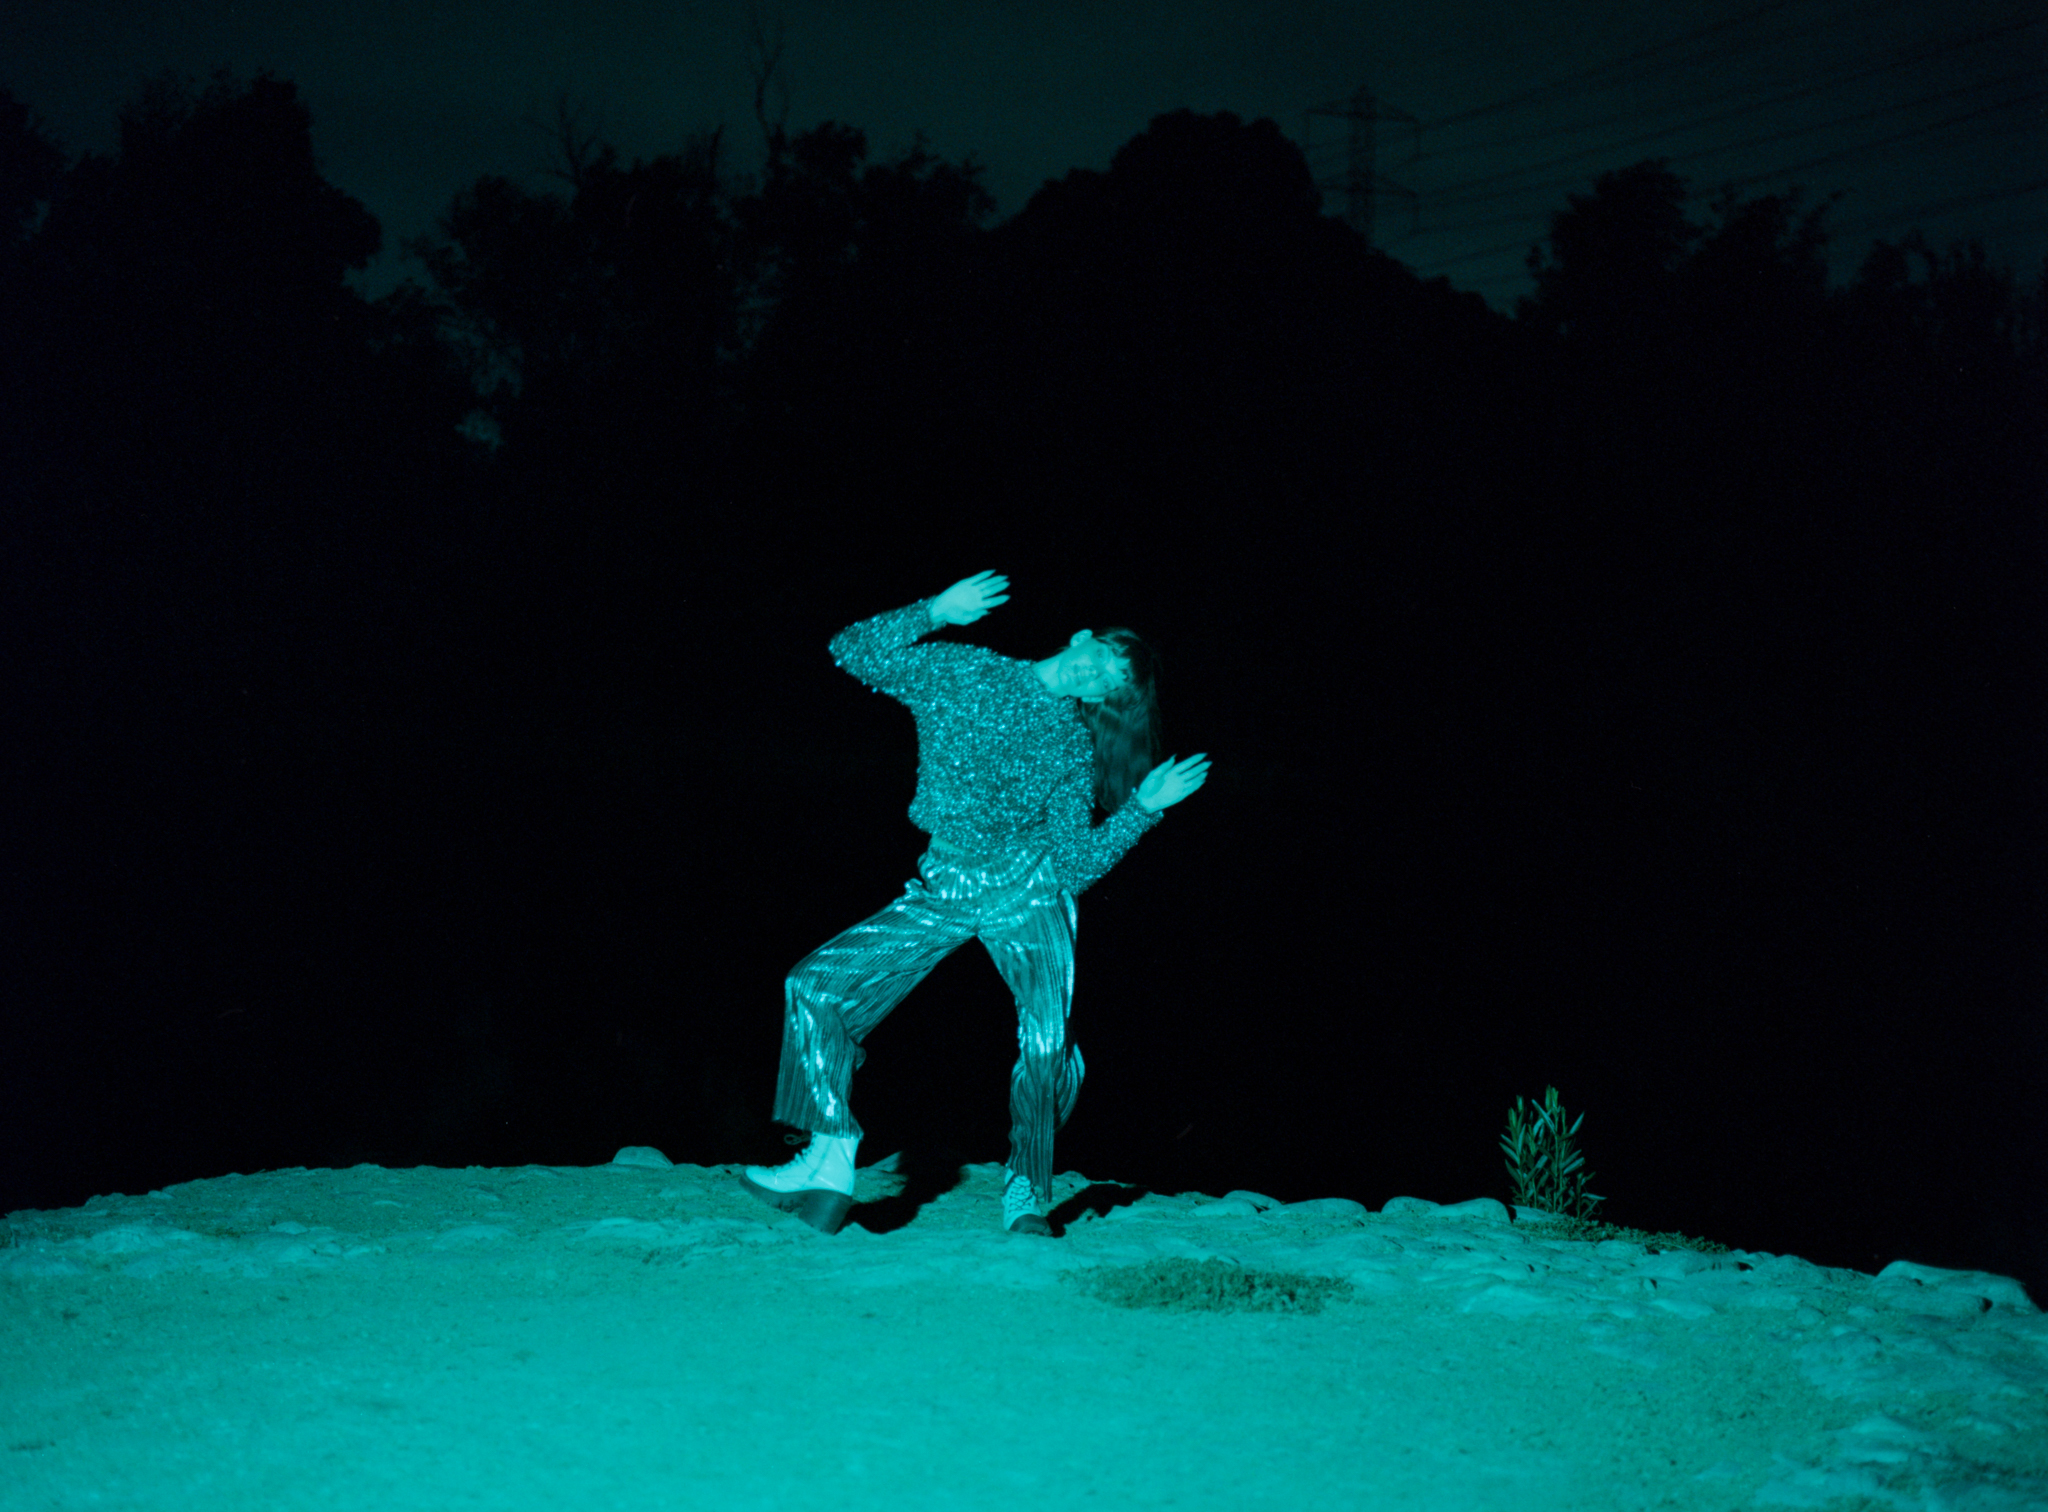
I met up with our model Rosey, and we headed to the same park where I shot the Fuji400H test. I really like the water element there; this is the location I had in mind. You have the lake, the grass…
However, when we got there, the whole park was blocked off for a Halloween pumpkin patch… you know nothing ever goes smoothly on this channel… Soon we found another spot; there is no grass, just dirt… but oh well… we work with what we got…
You can see from the video, it’s pretty cloudy, there is really not much of a sunset either…
This light is not battery-powered, so I brought a small battery for it. I wanted to start with regular LED daylight, but at full blast, my battery can’t handle the output, so I only tried the color light this time. The color light works just fine at 100% brightness. I didn’t know how long it will last us; it’s adventure time.
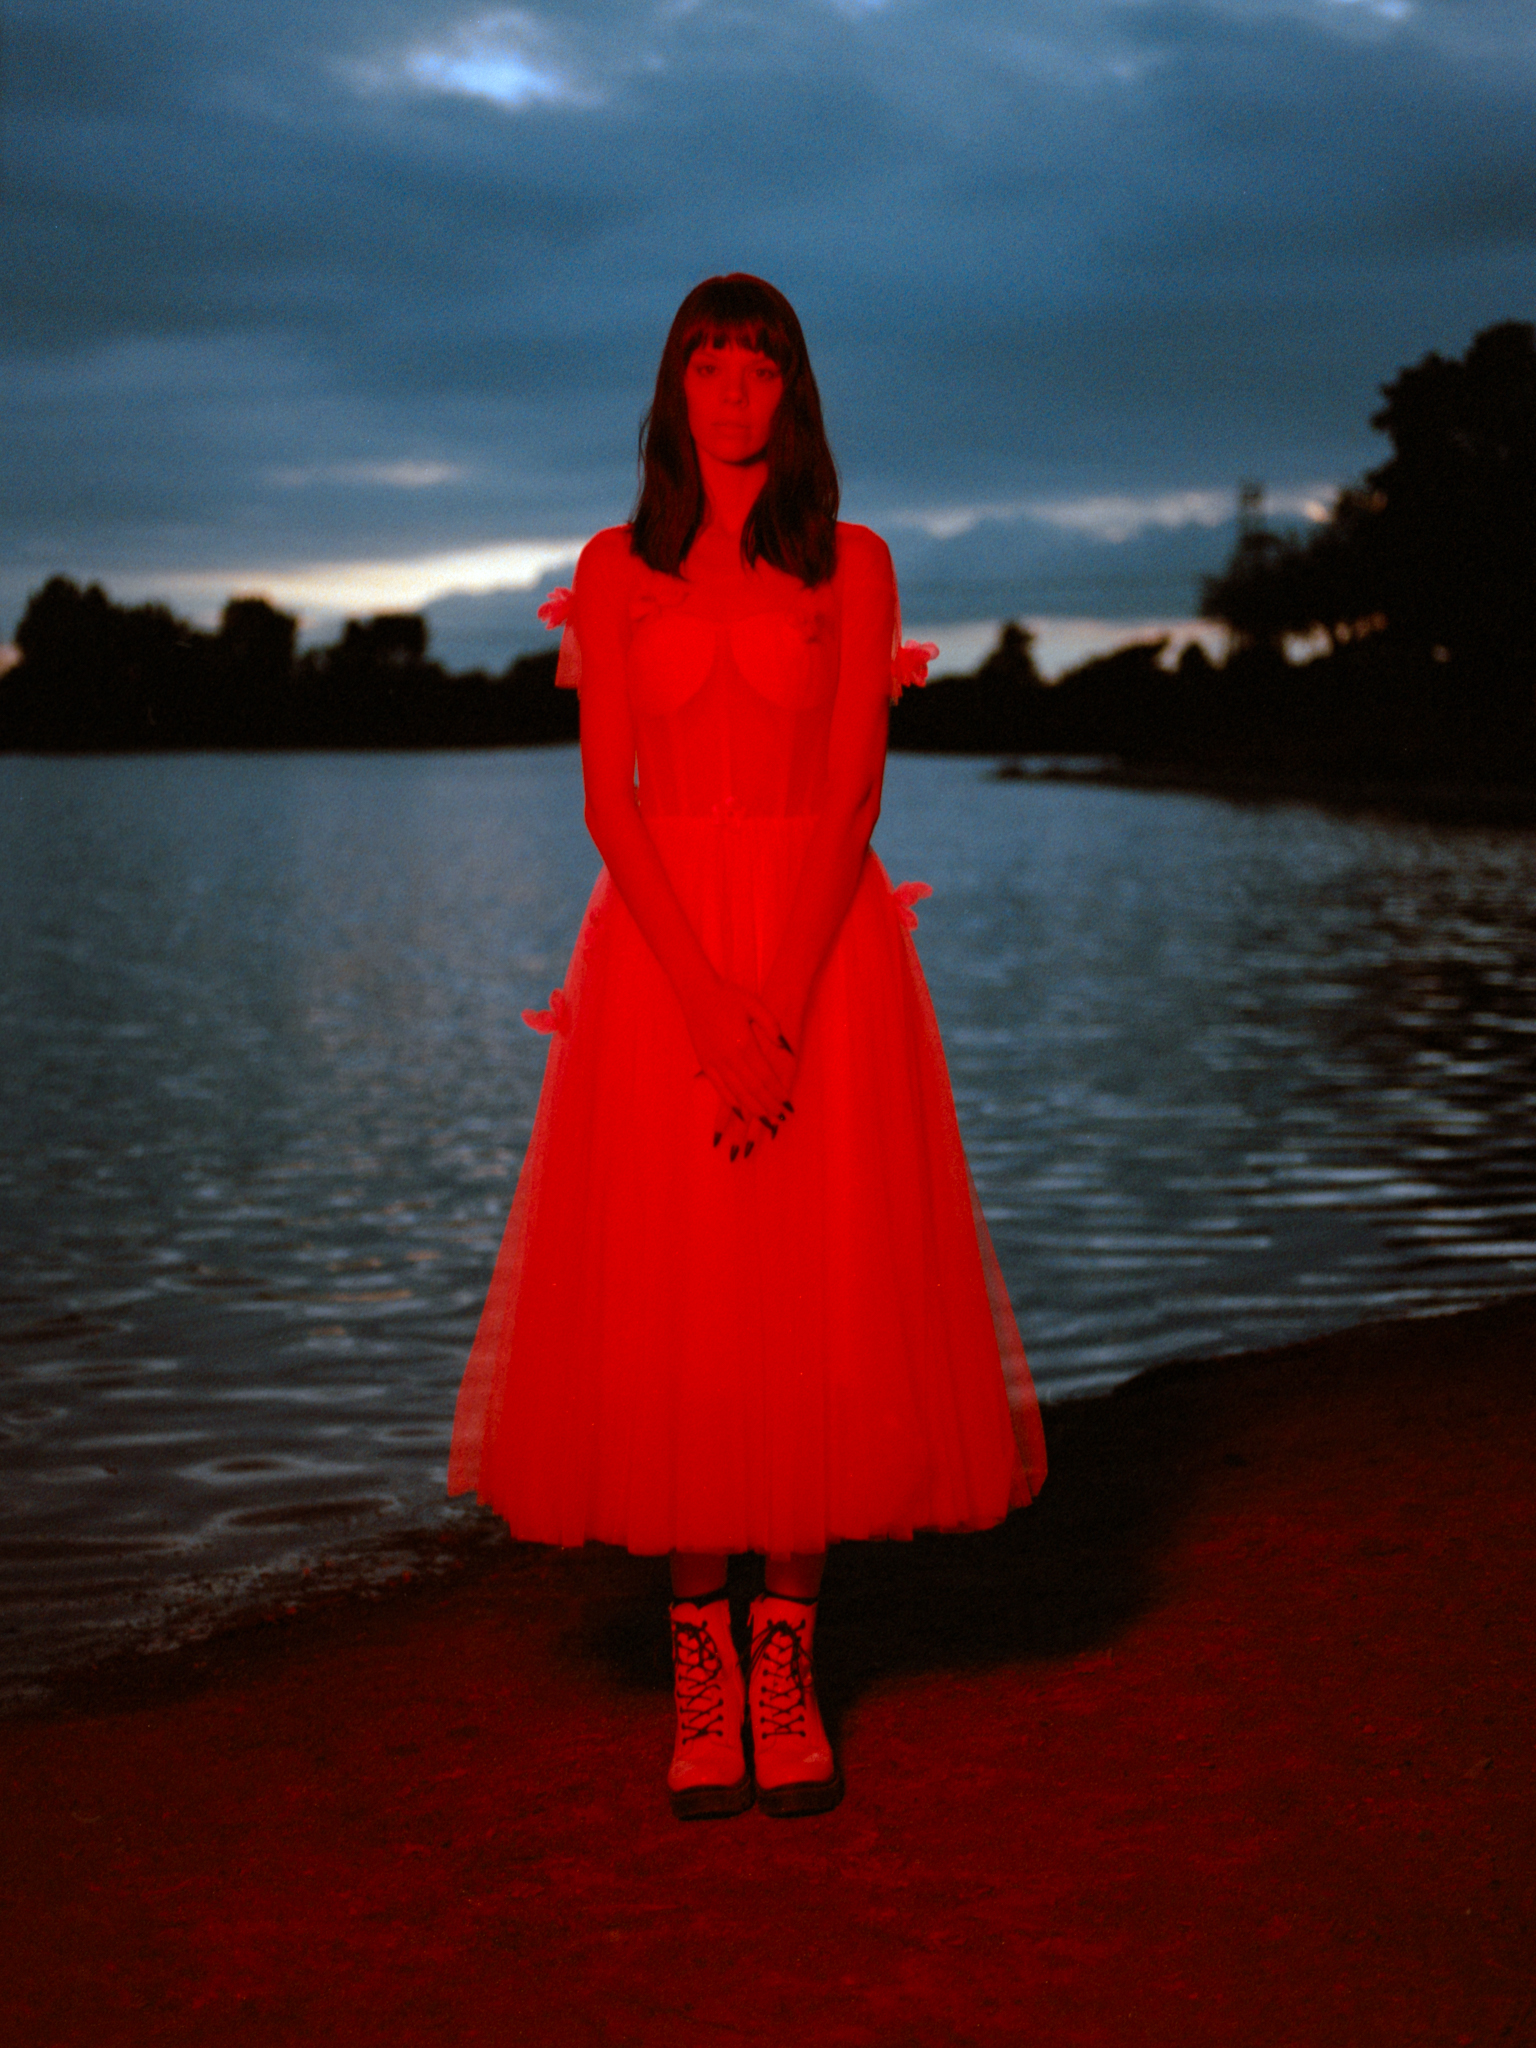

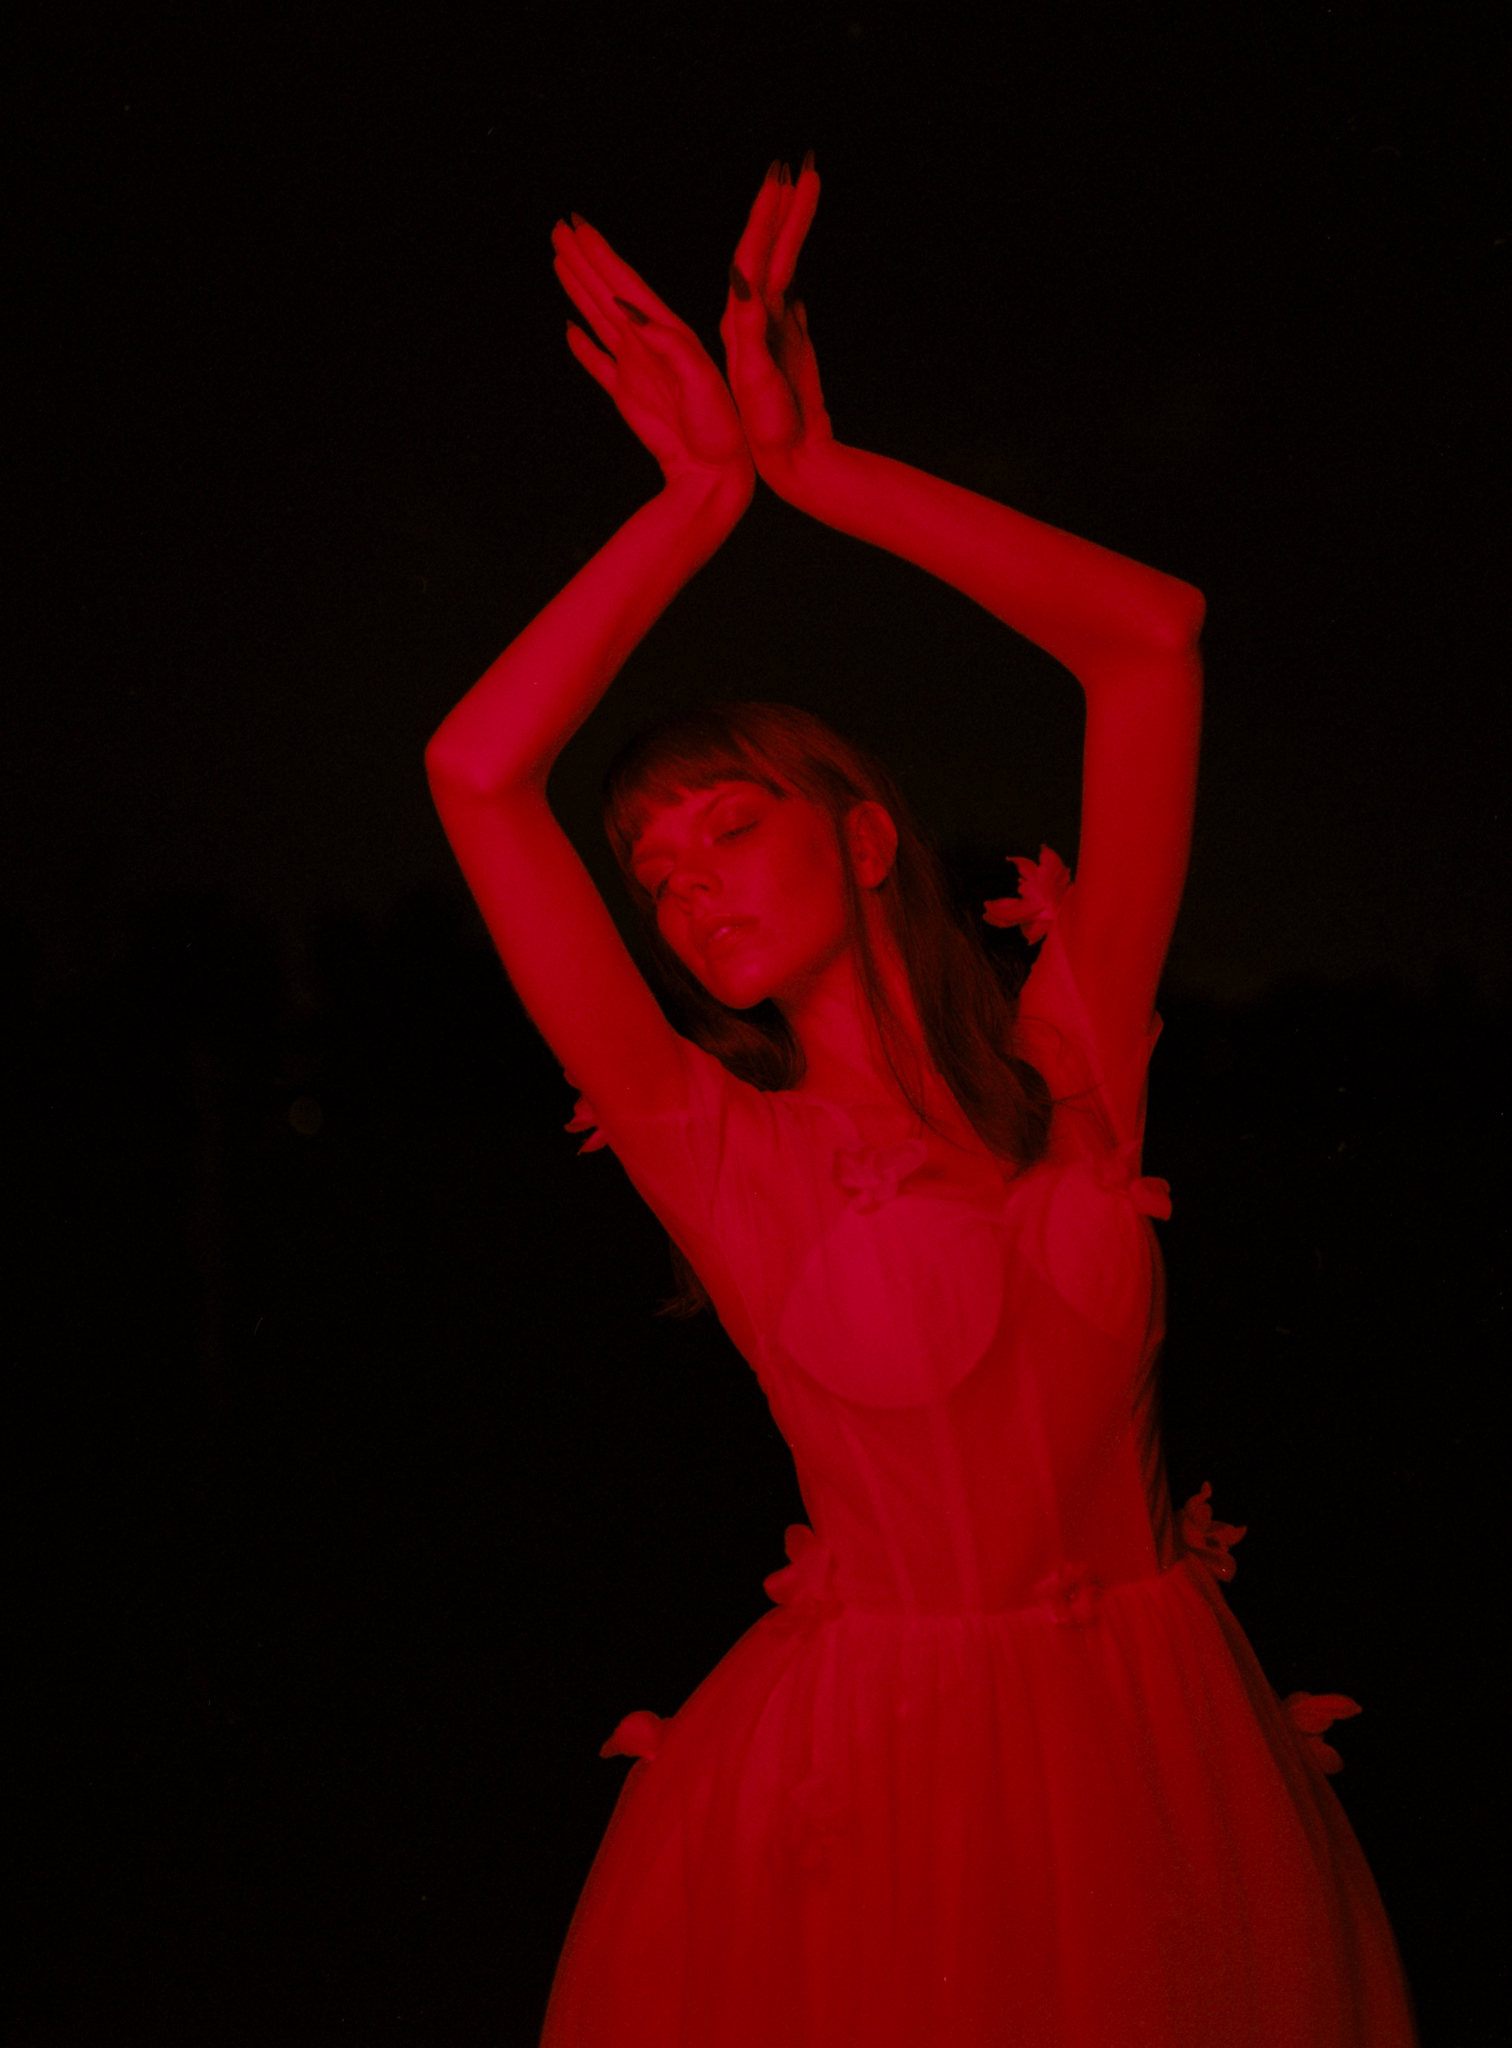
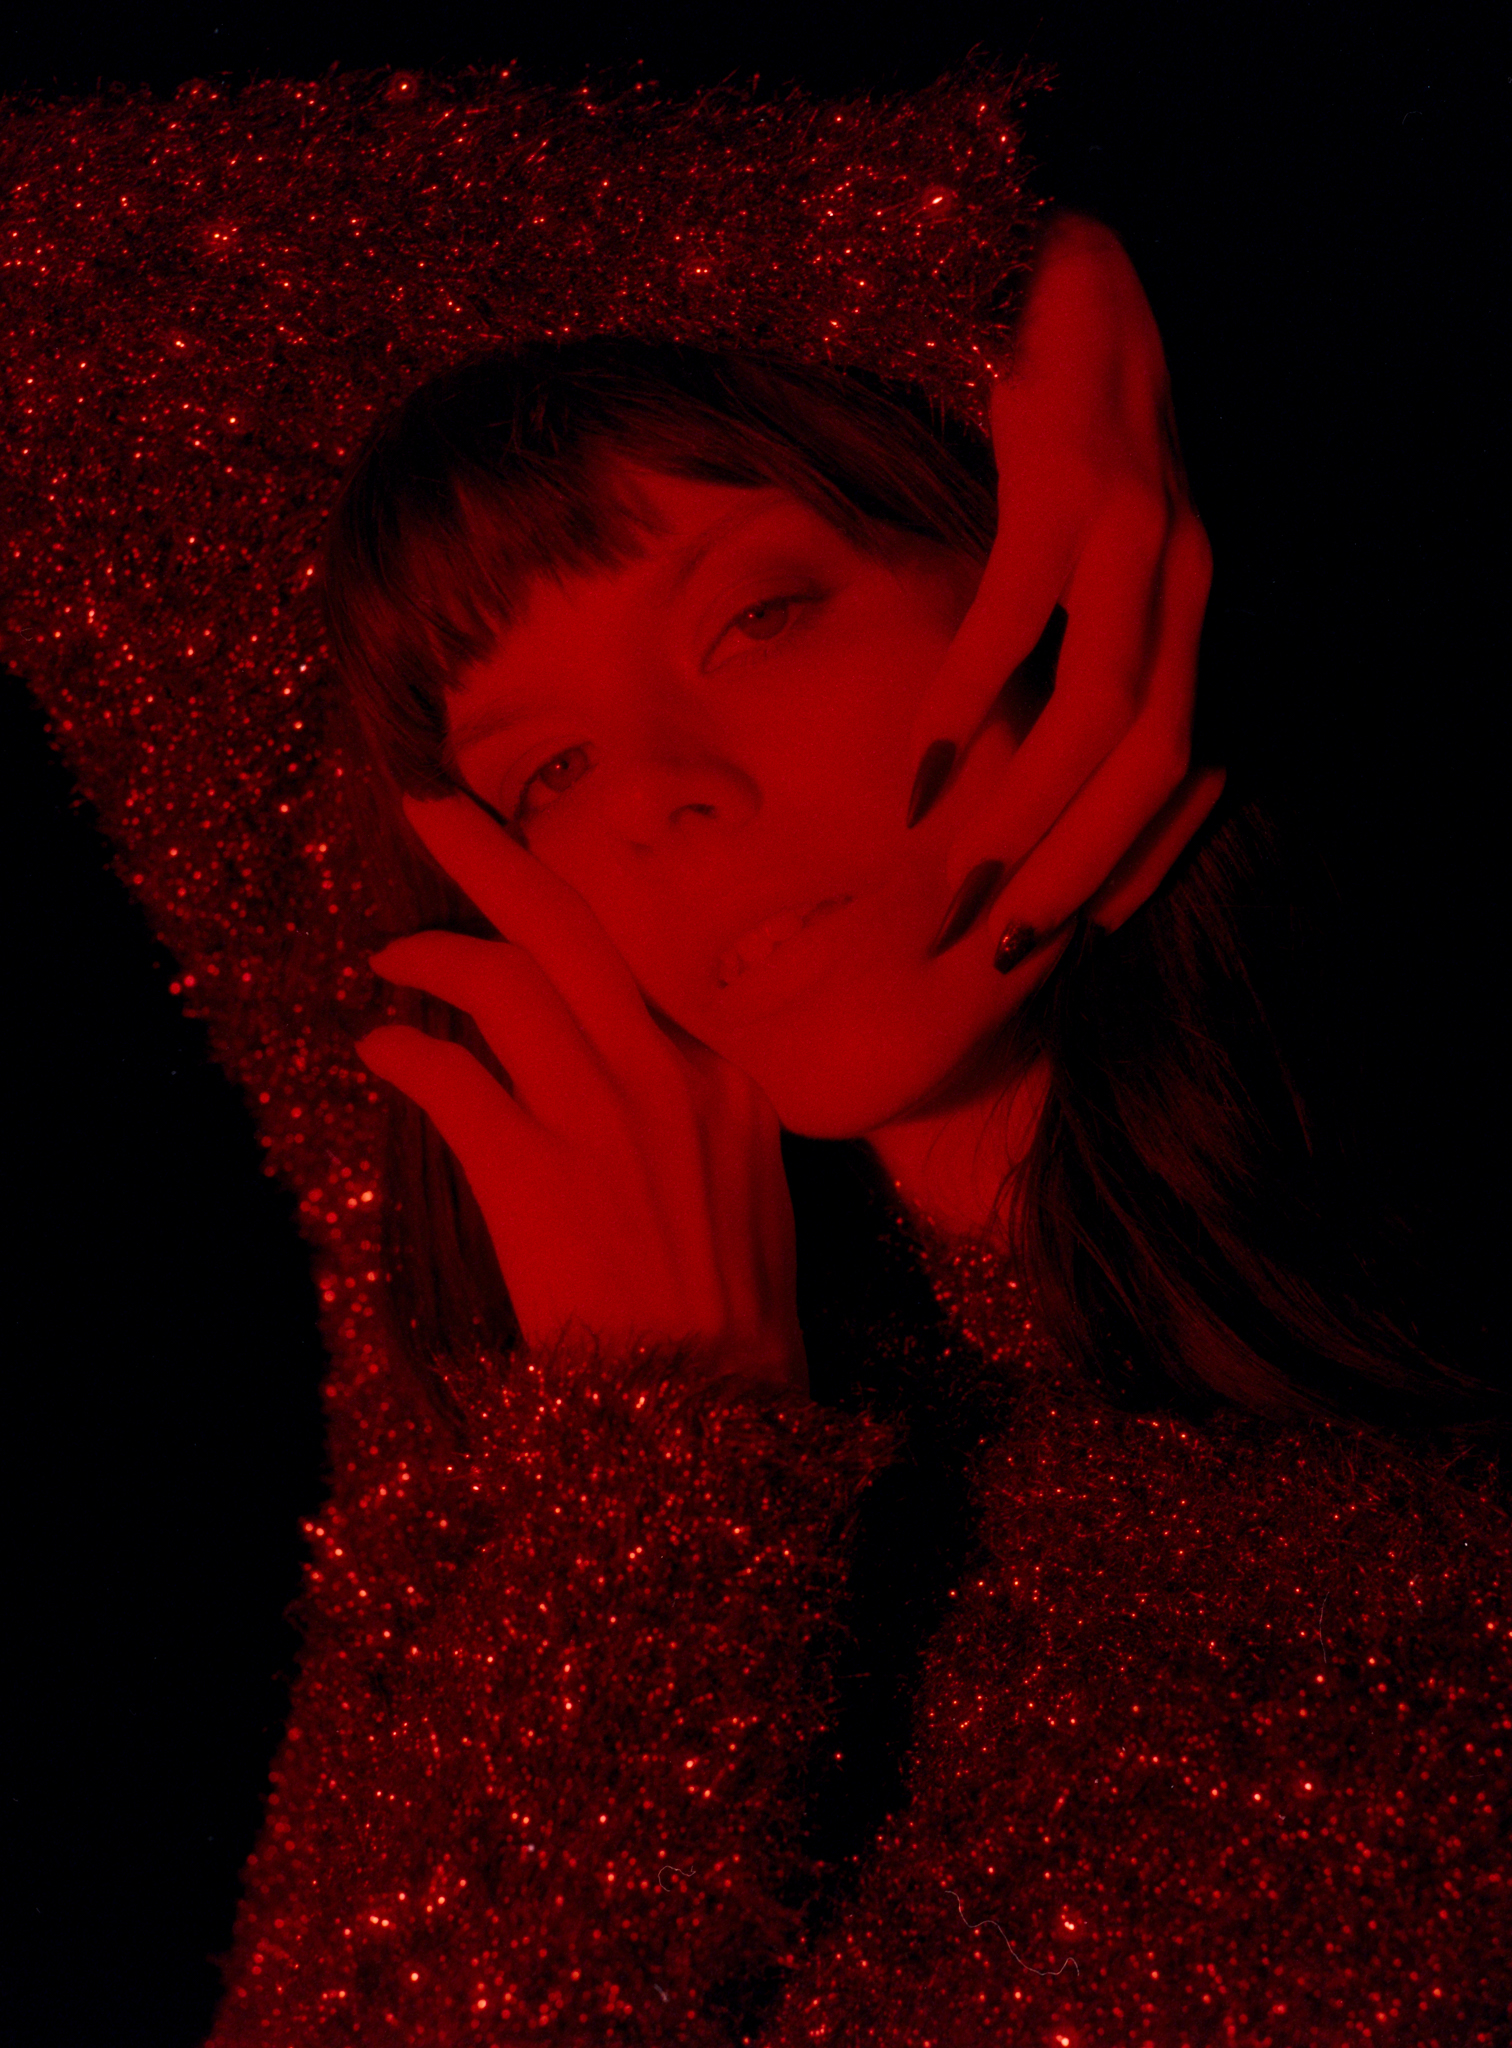
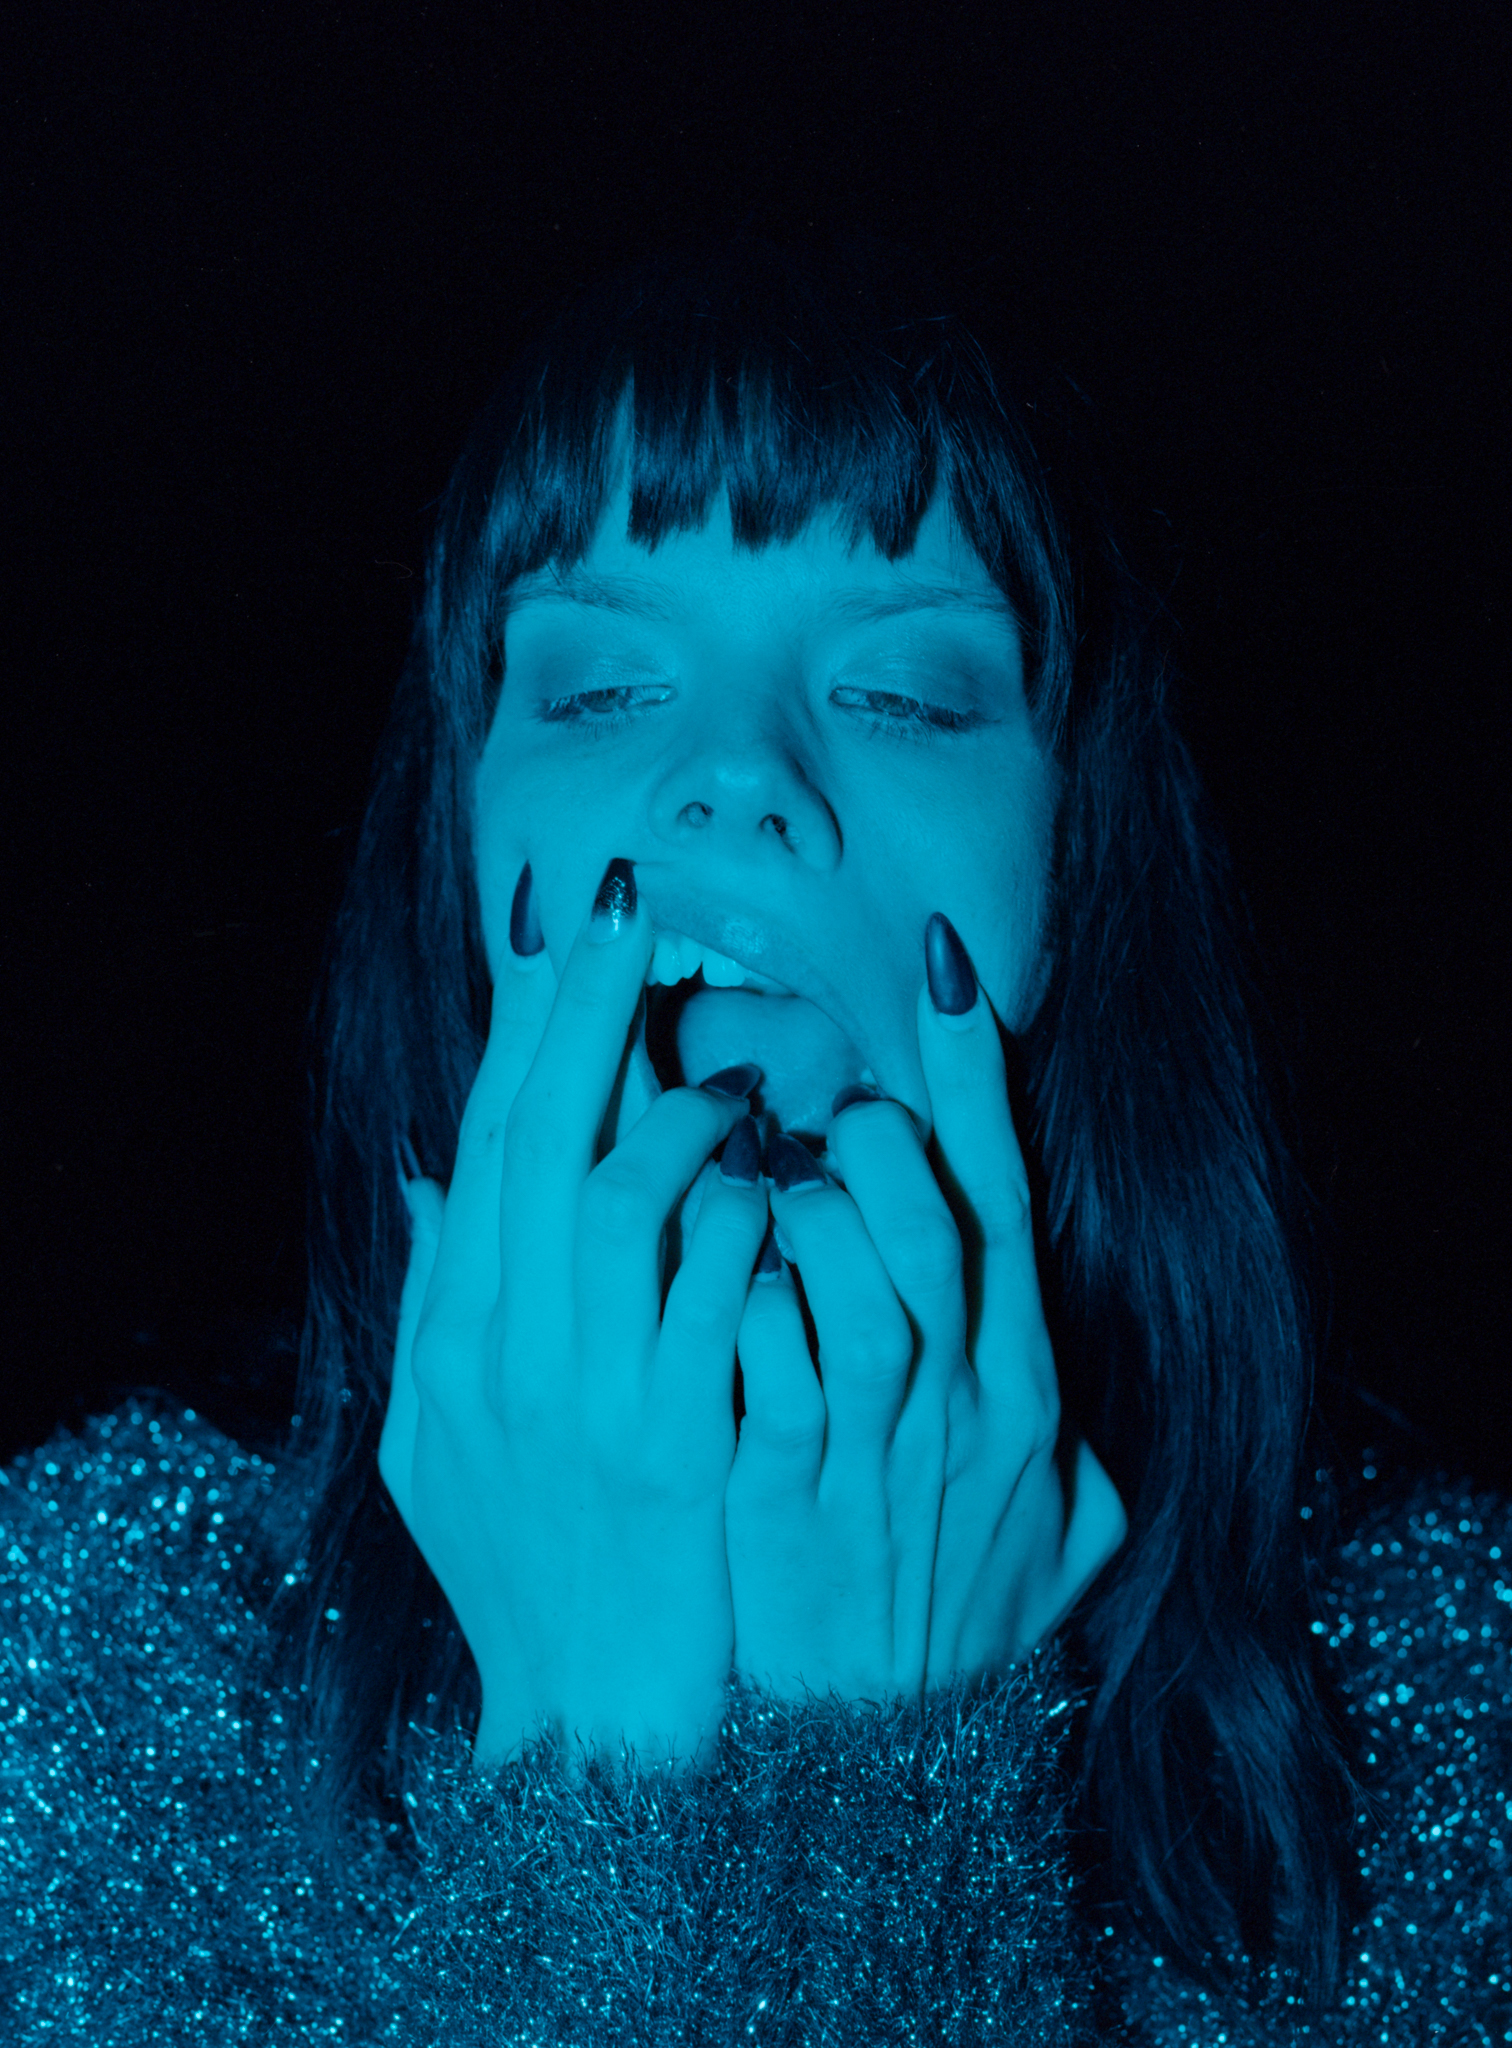
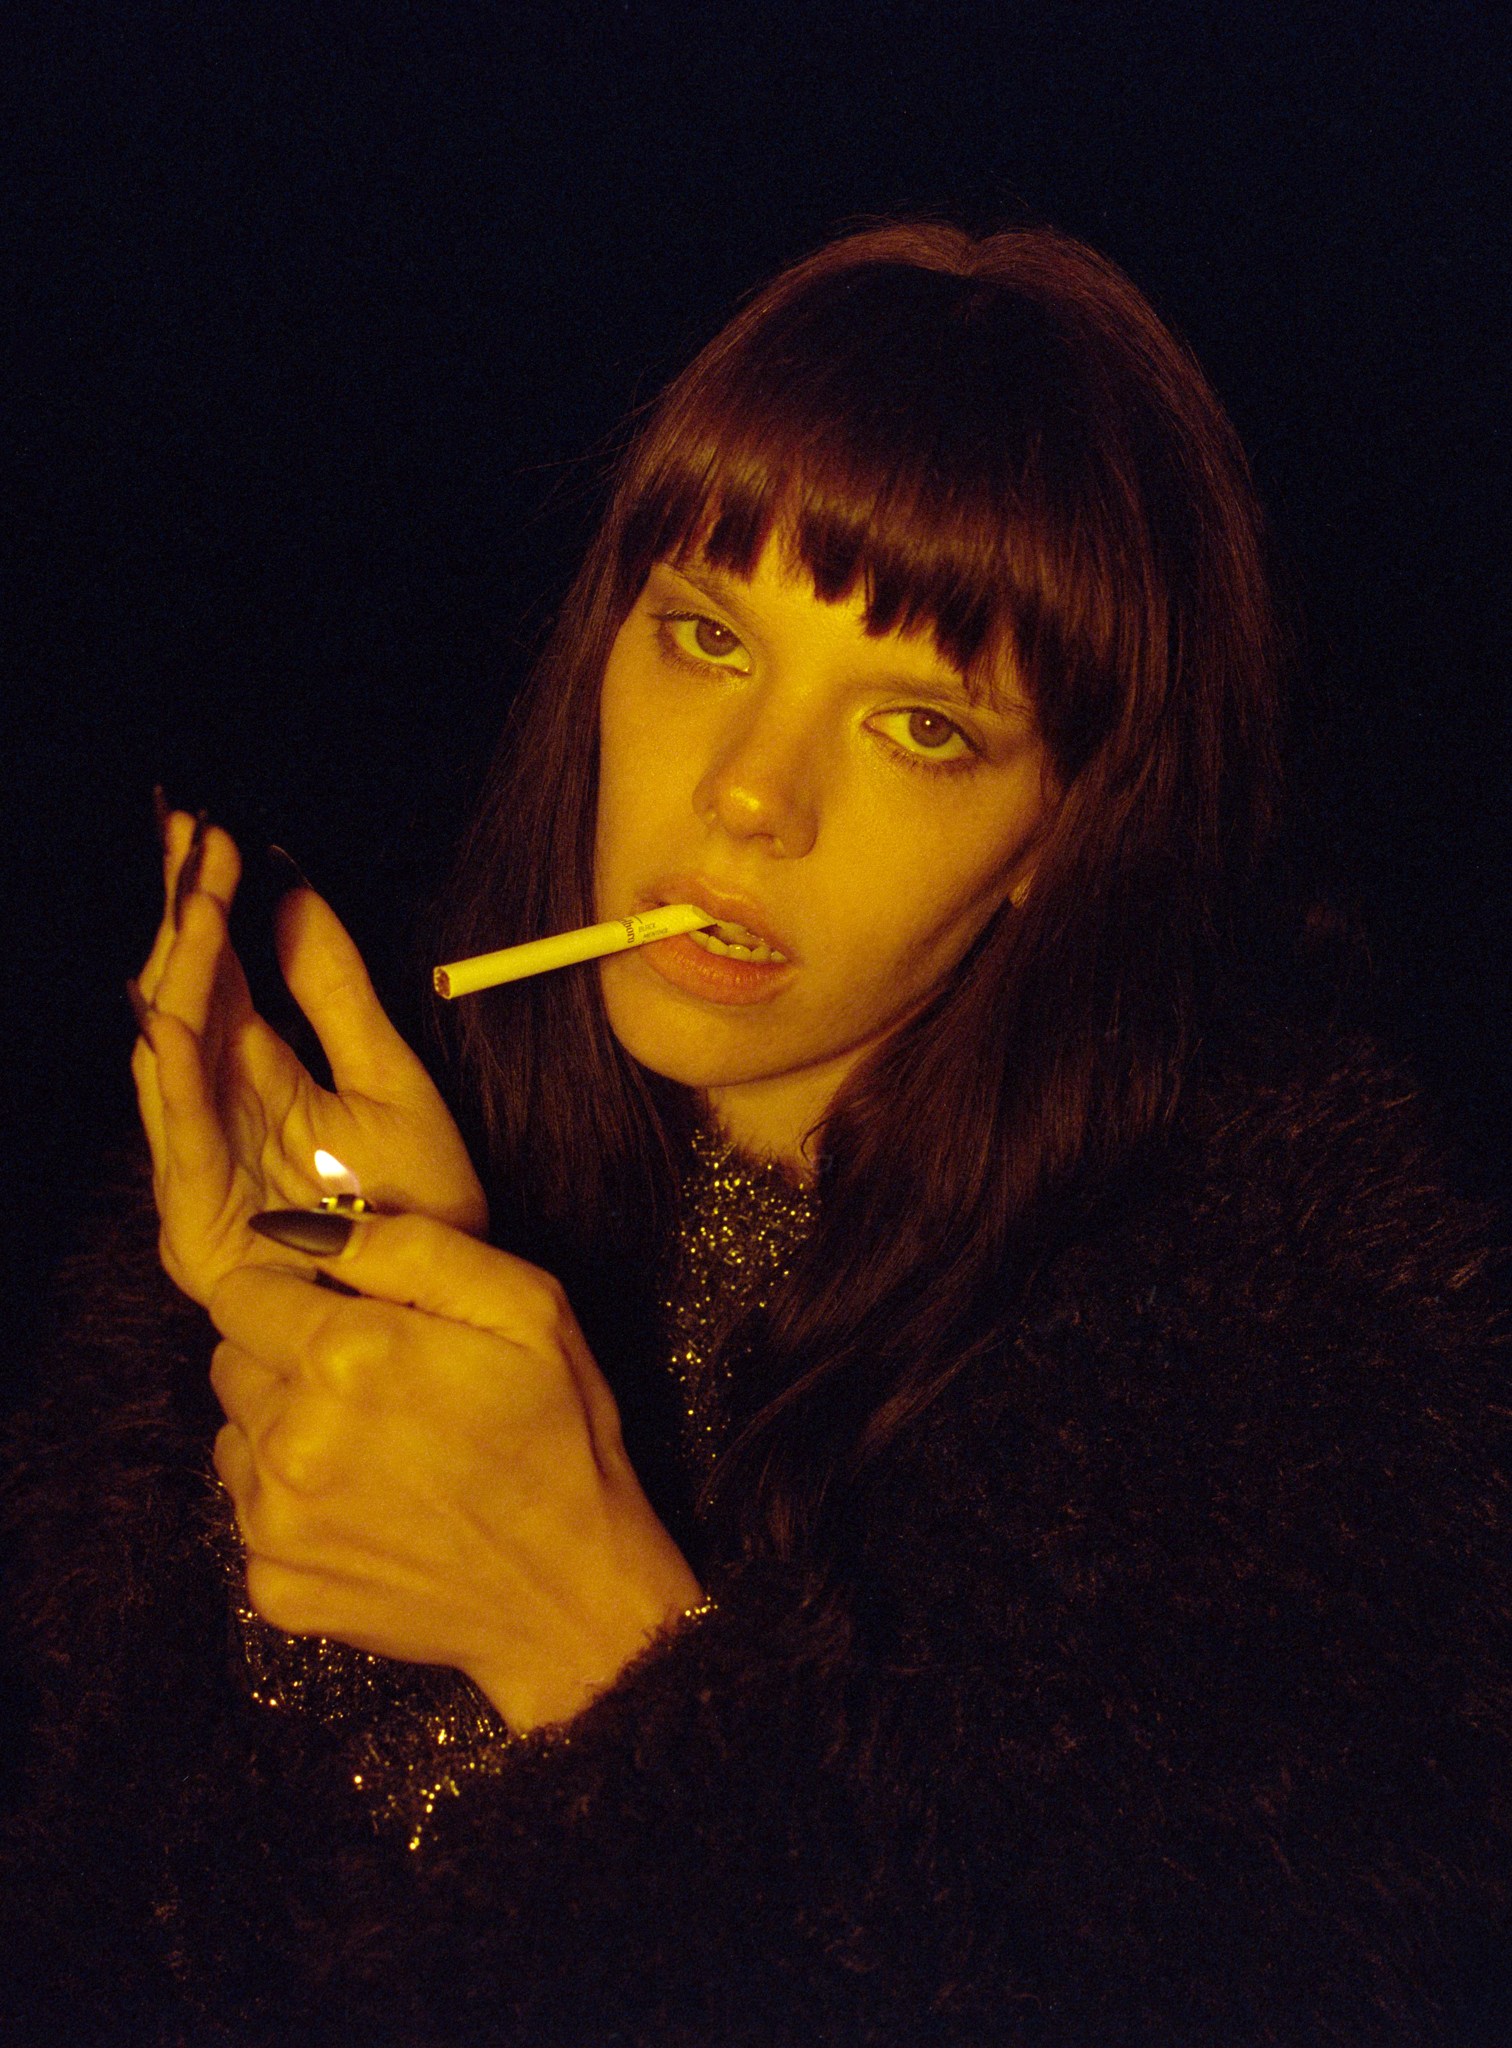
The first setup, I used a small softbox, and the first shot turned out really nicely. I’m surprised by how dense the red is; there are still some lights cutting through the cloud. You see the sky, the water, and her in this highly saturated red light… I really liked it… and then it’s all downhill from here… because the skylights were gone… so fast… soon I lost all the background.

Now looking at the photo, I feel like I should have turned the light down, or moved the light further away, and tried to reduce the light ratio, and use a slower shutter speed, to capture more background. Even though there is really not much to work with…
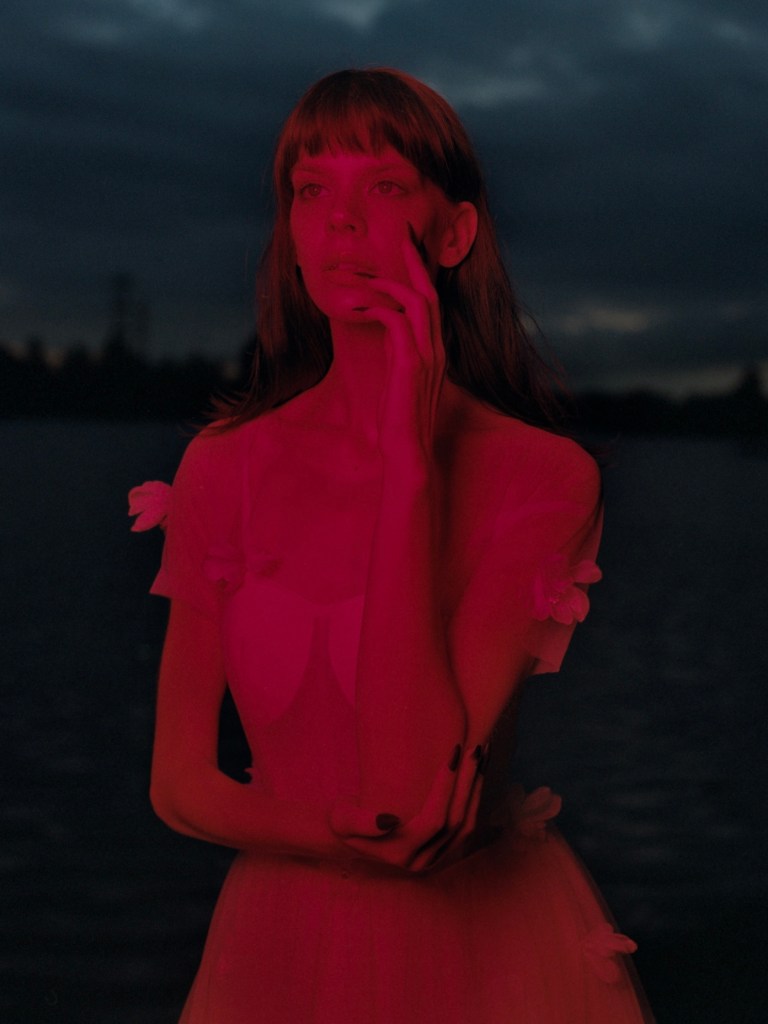
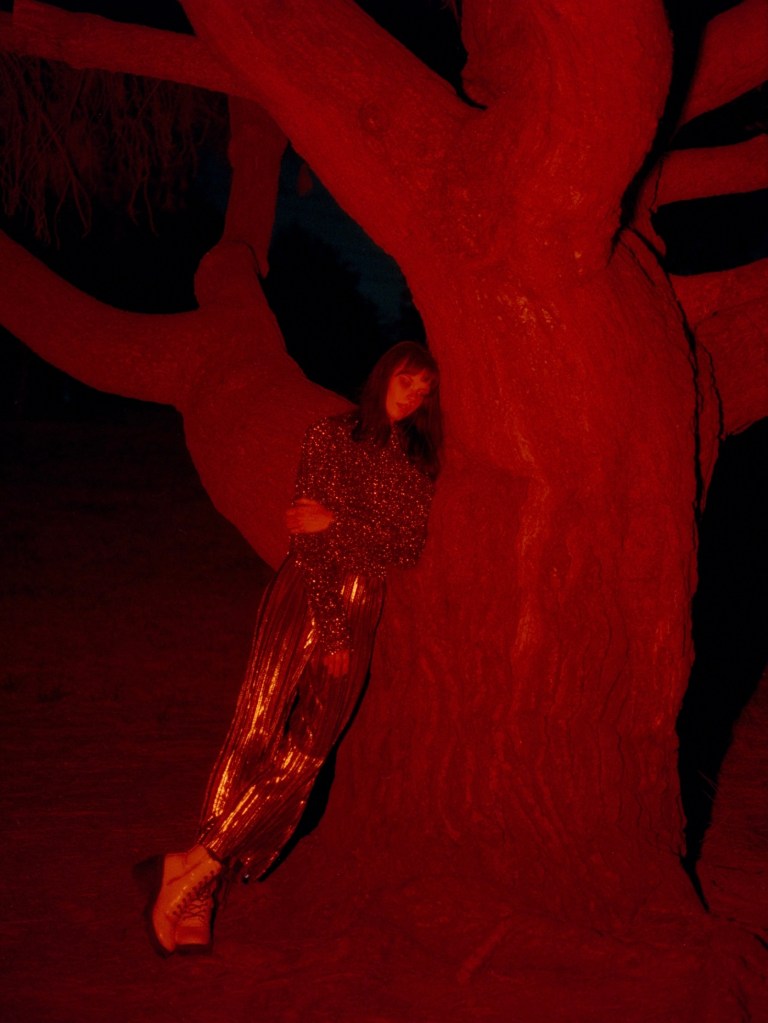
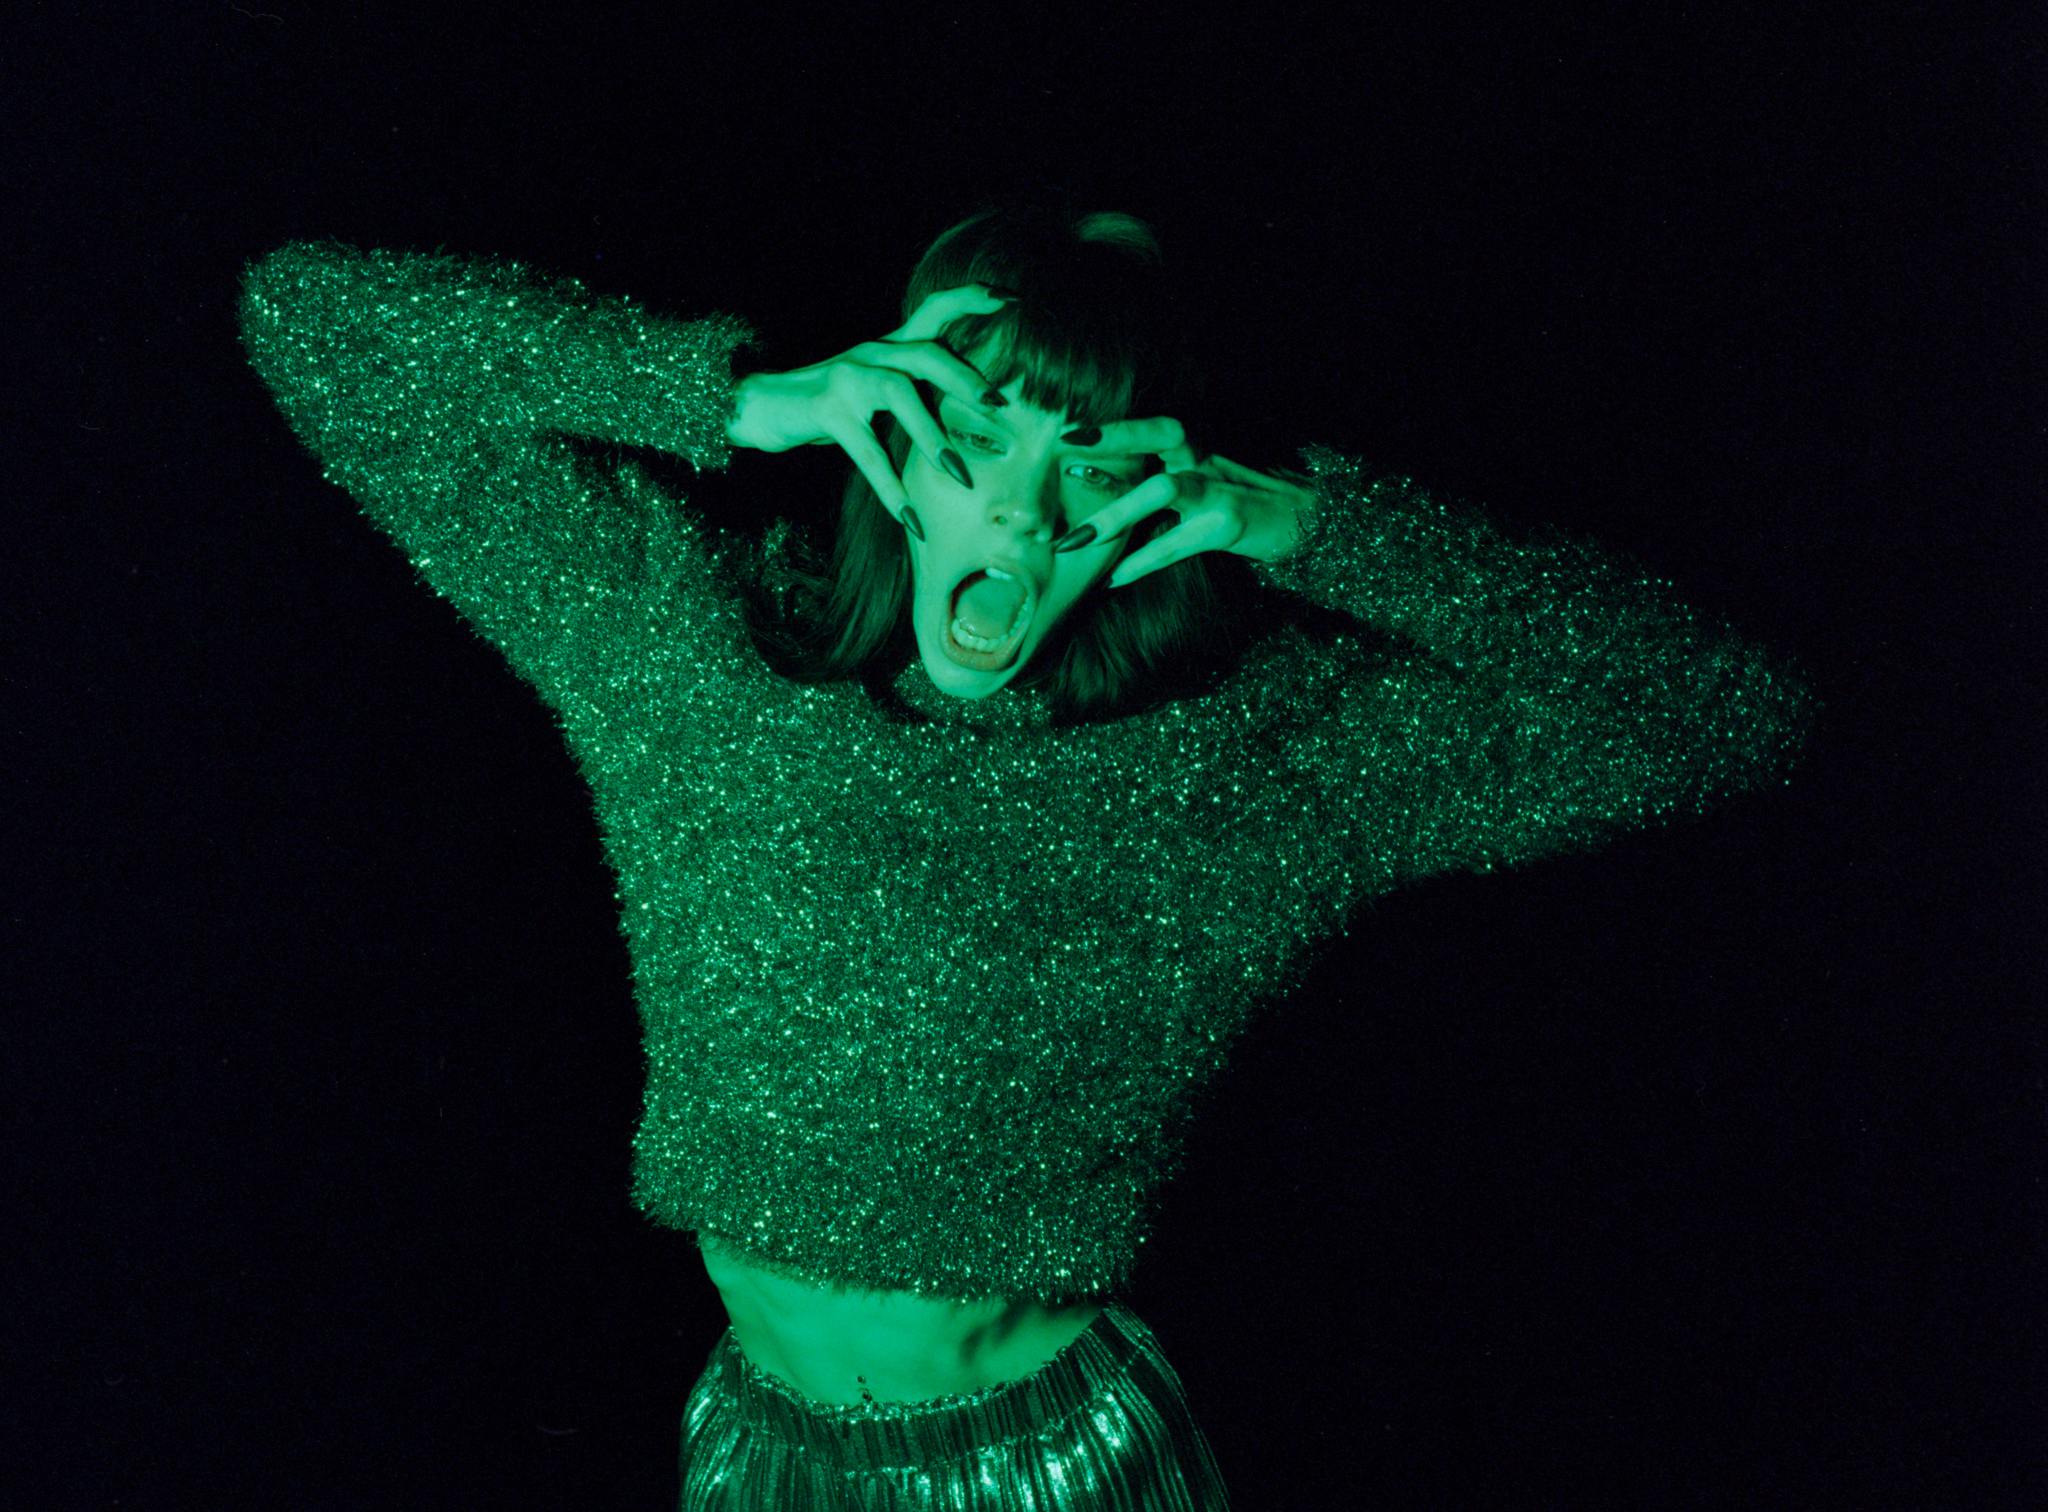
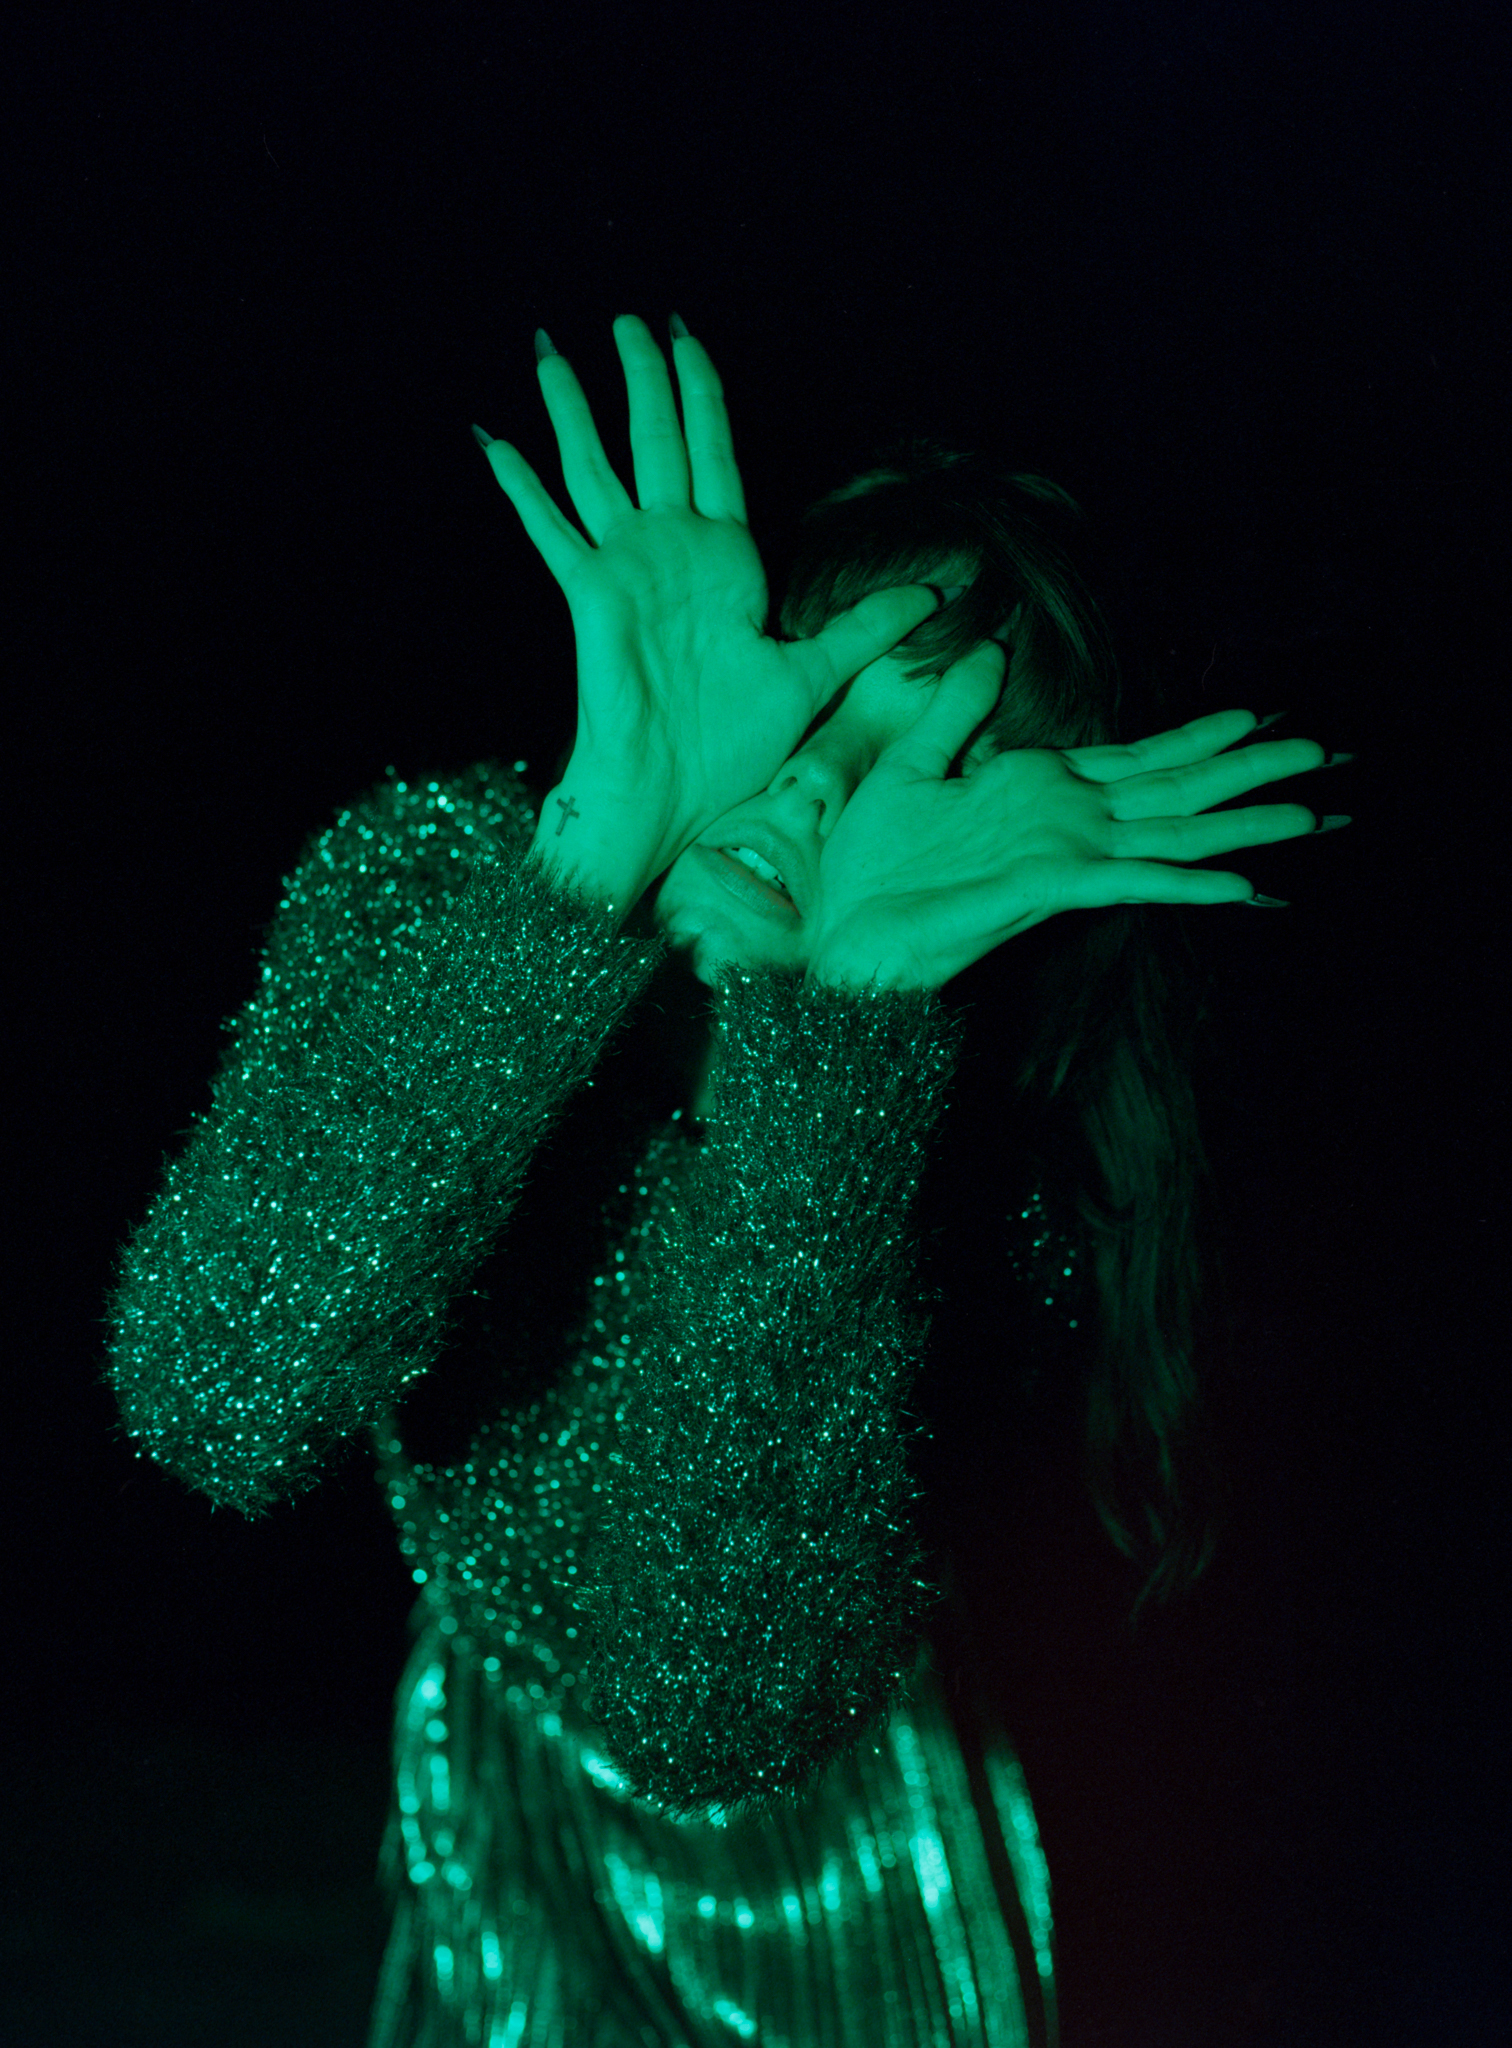
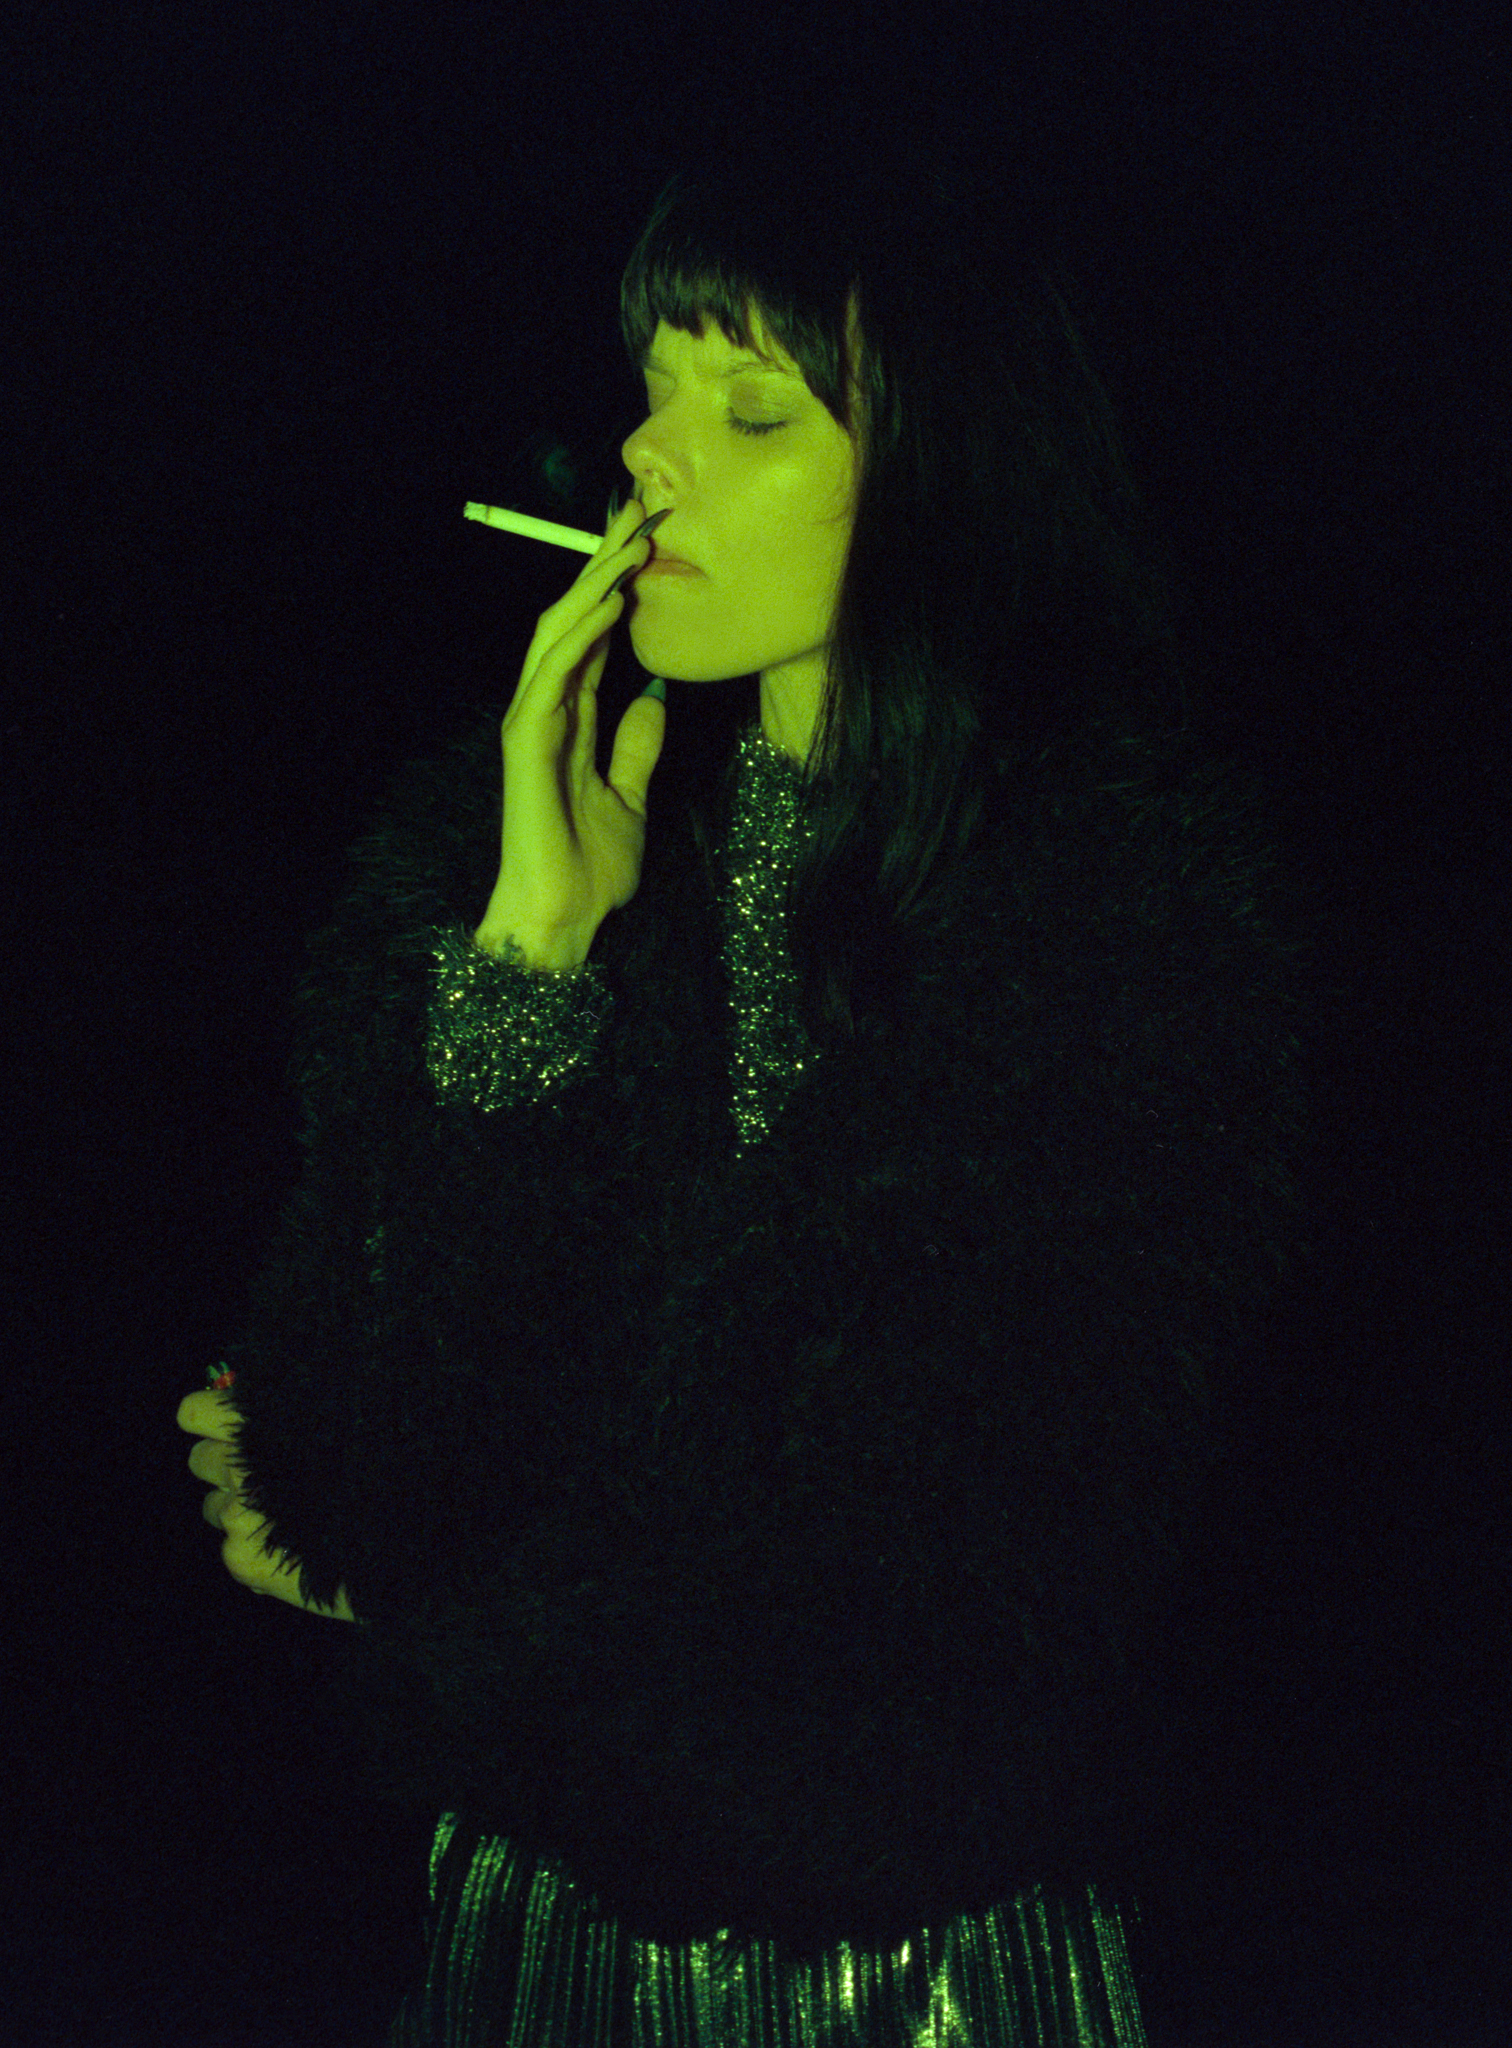
And then I experimented with different colors, different light angles, some works, some don’t work.
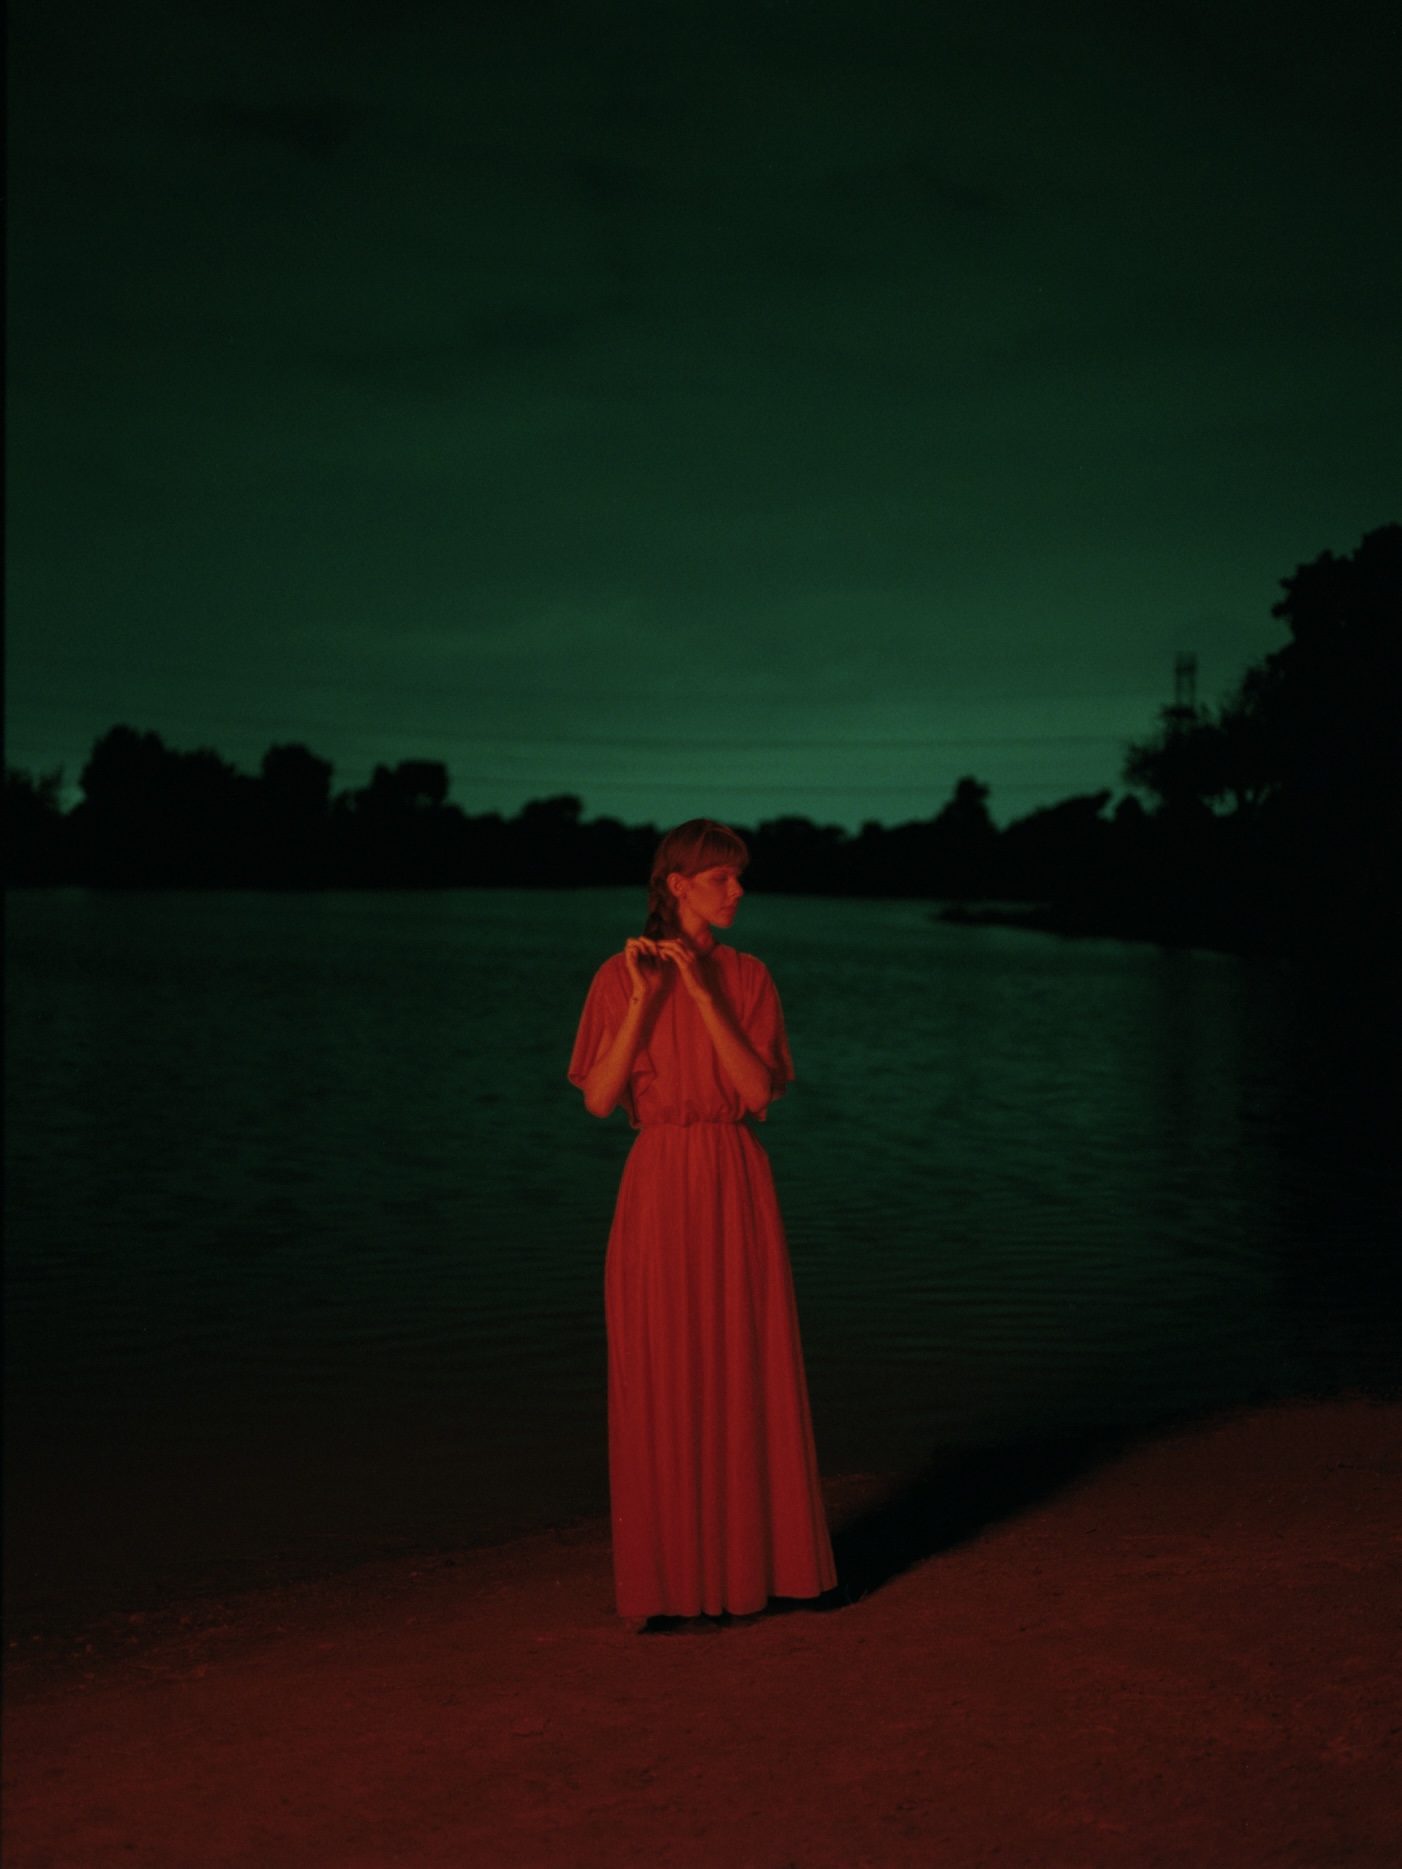
This one was shot at 1/4 second, the bottom of the dress is blurry in the wind, almost look like she is flowing… which is kinda cool…
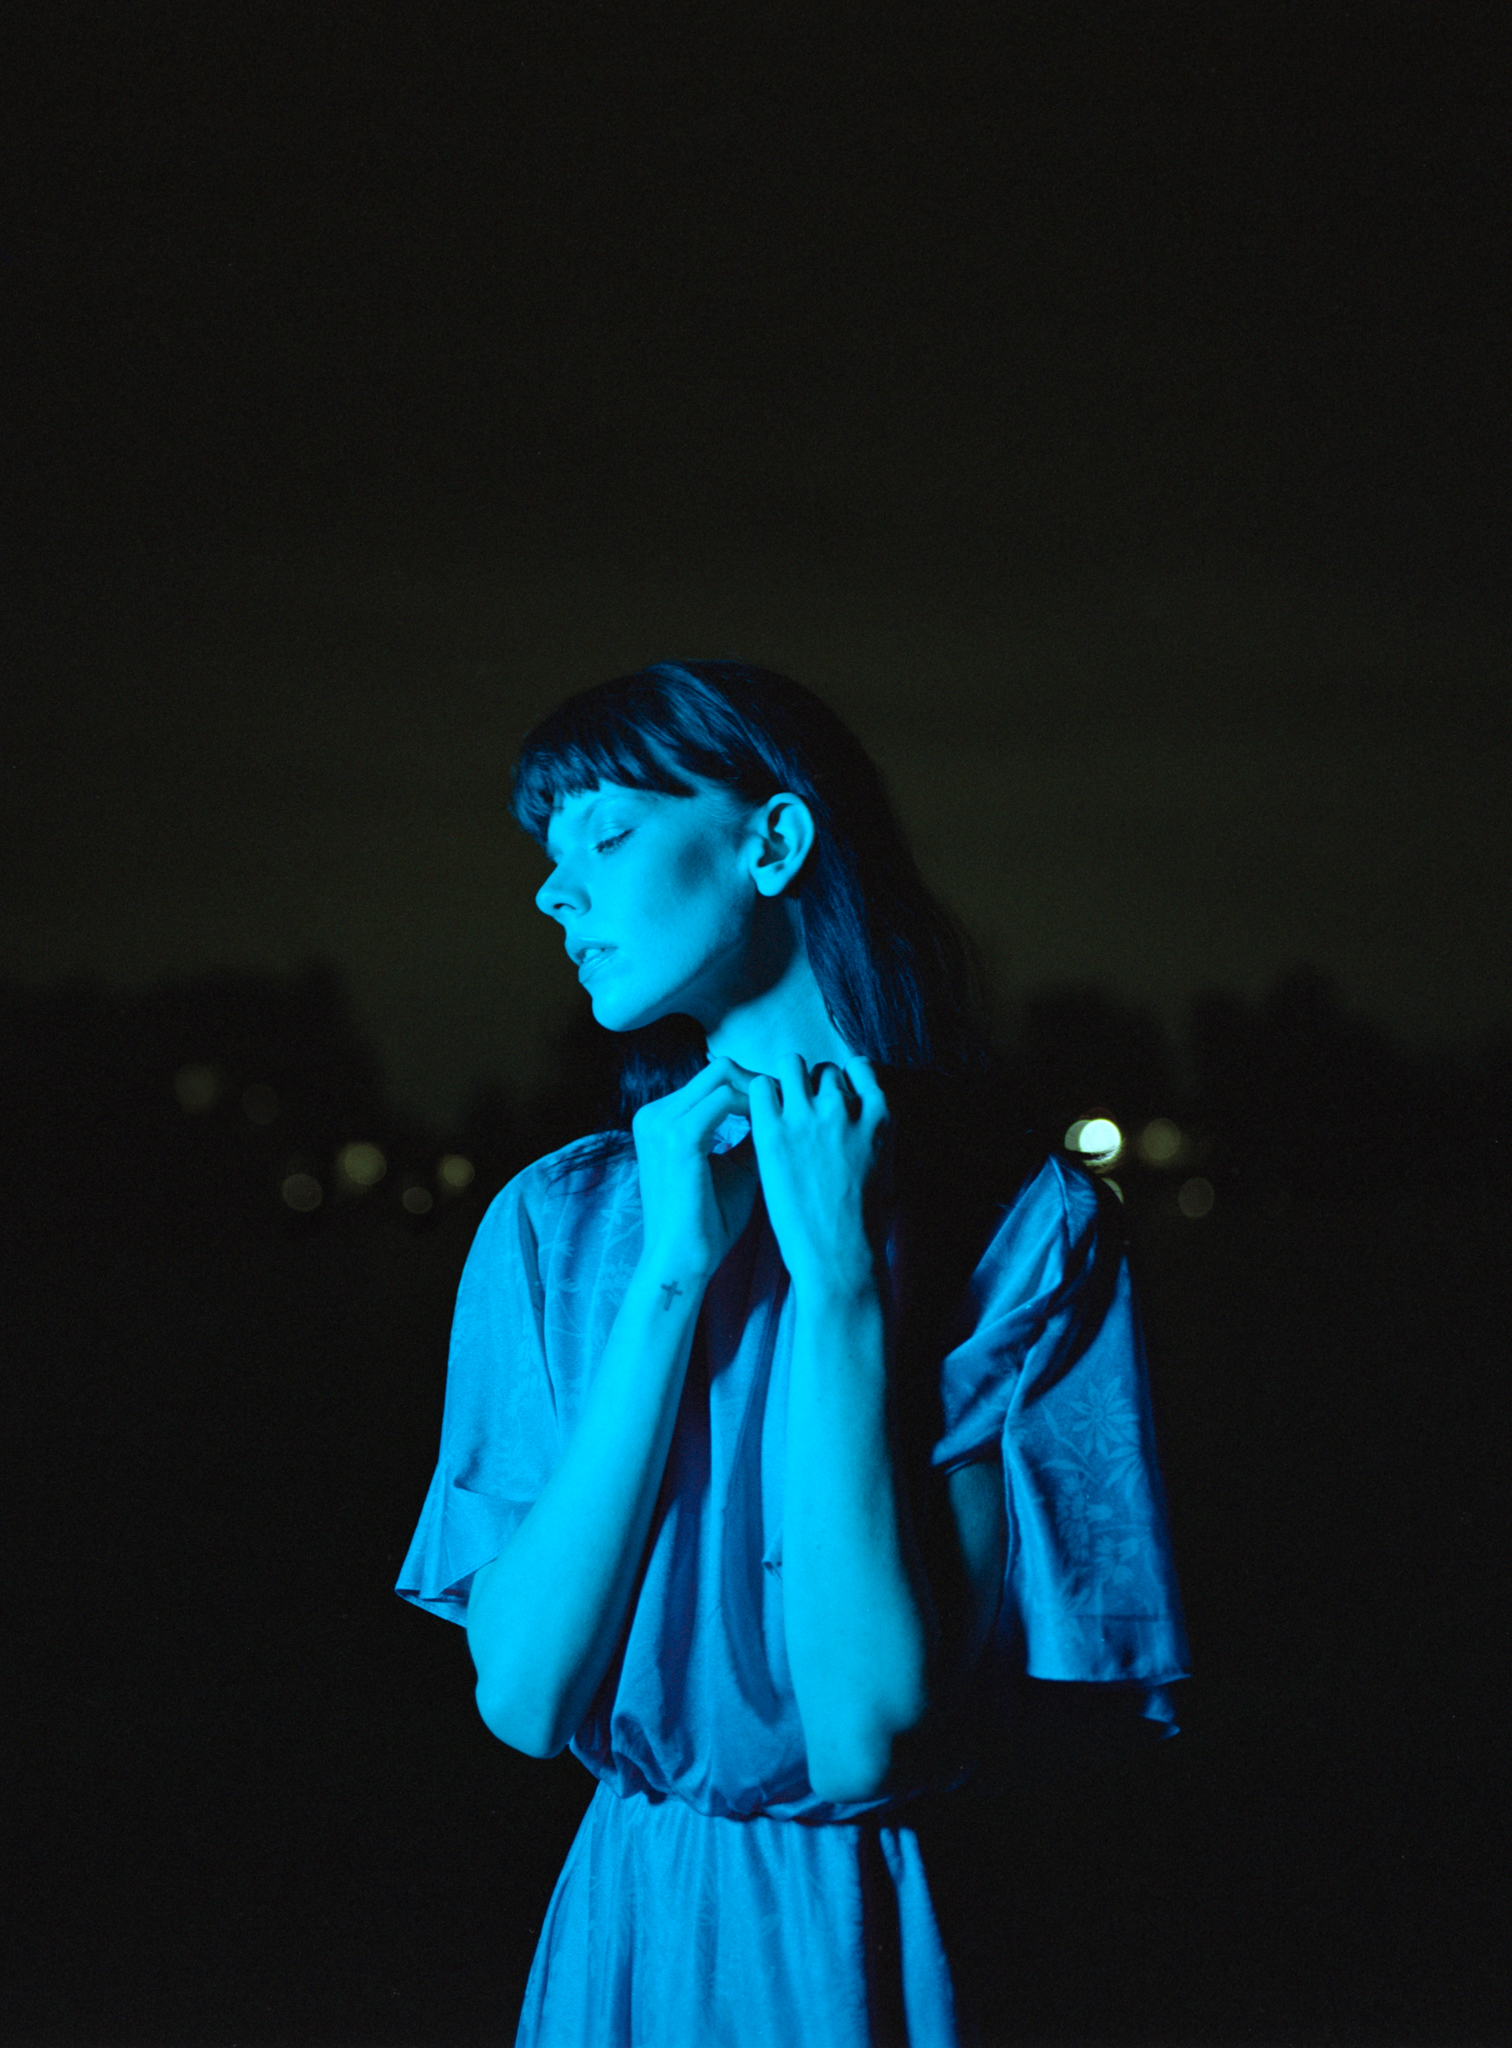
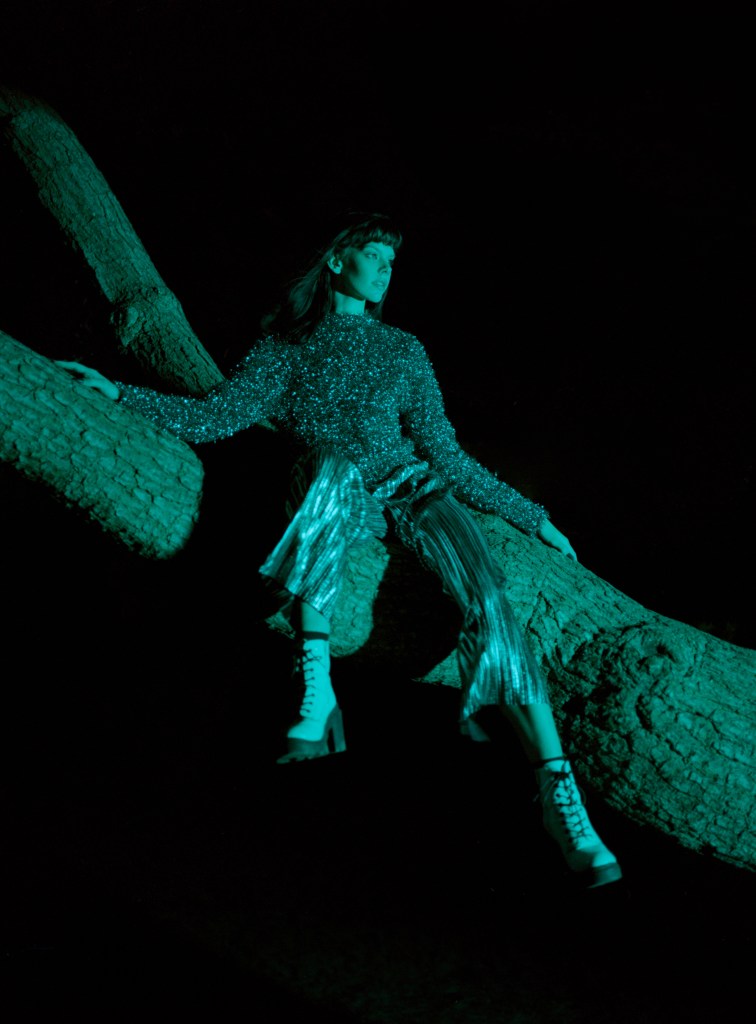
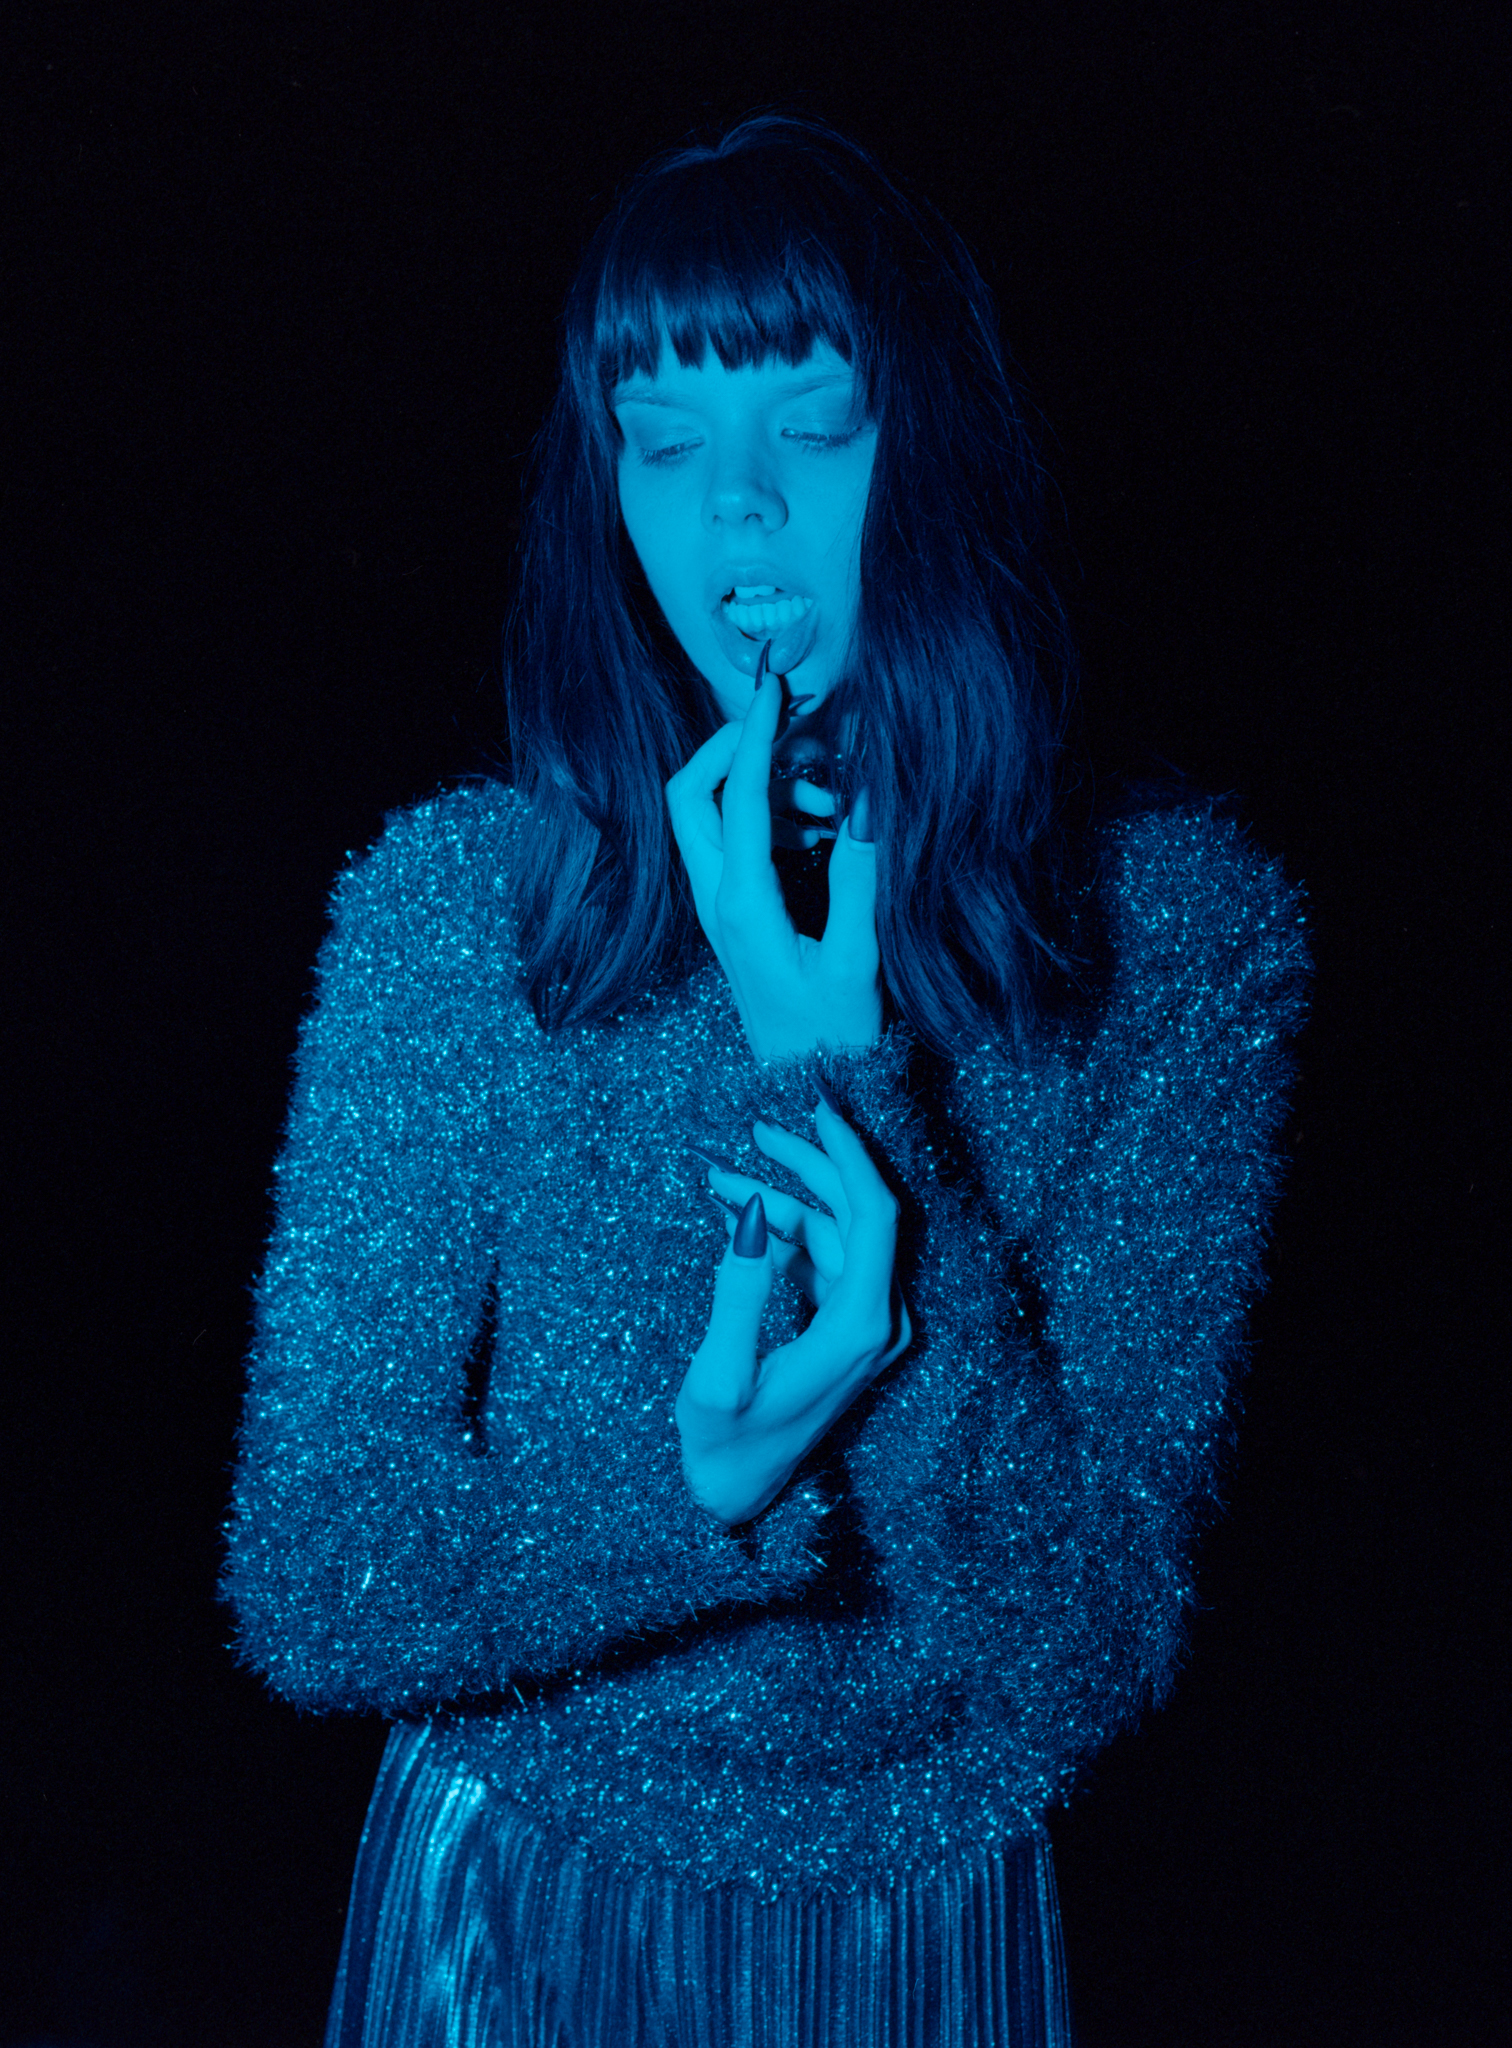
Starting the 2nd roll, I tried to light up the whole tree and have a wider shot. I made the mistake of keeping the softbox on; it turned out very dark and very muddy. Then I removed the softbox, and changed it to a standard reflector that came with the light, and moved the light a lot closer to the model; now we got some nice bright hard light. It definitely works better with this silver metallic-looking outfit.
To change the color, you simply need to turn the hue knob on the back of the light; otherwise, you can also download the control app to choose the color more precisely… I already have so many things in my hand; I just don’t want to pull out my phone again.
Now with the reflector, the light is brighter and a lot more harsh, and also now we have some closer background to work with, the light ratio is smaller, it’s much easier for the camera to meter the scene as well…


What’s interesting about the color is that, for example, this shot, I used slightly yellow-colored light, but since we were shooting on Cinestill 800t, it is a cooler temperature stock, the warm light canceled out the blue tone, makes it look like daylight balanced. Does that make sense?


Another example, depending on how I convert the negative, the photo can look like this: low saturation, a bit purple cast in the shadow, I kinda like this funky color, but the shot was actually lit like this… this is why I want to talk about the conversion process as well.
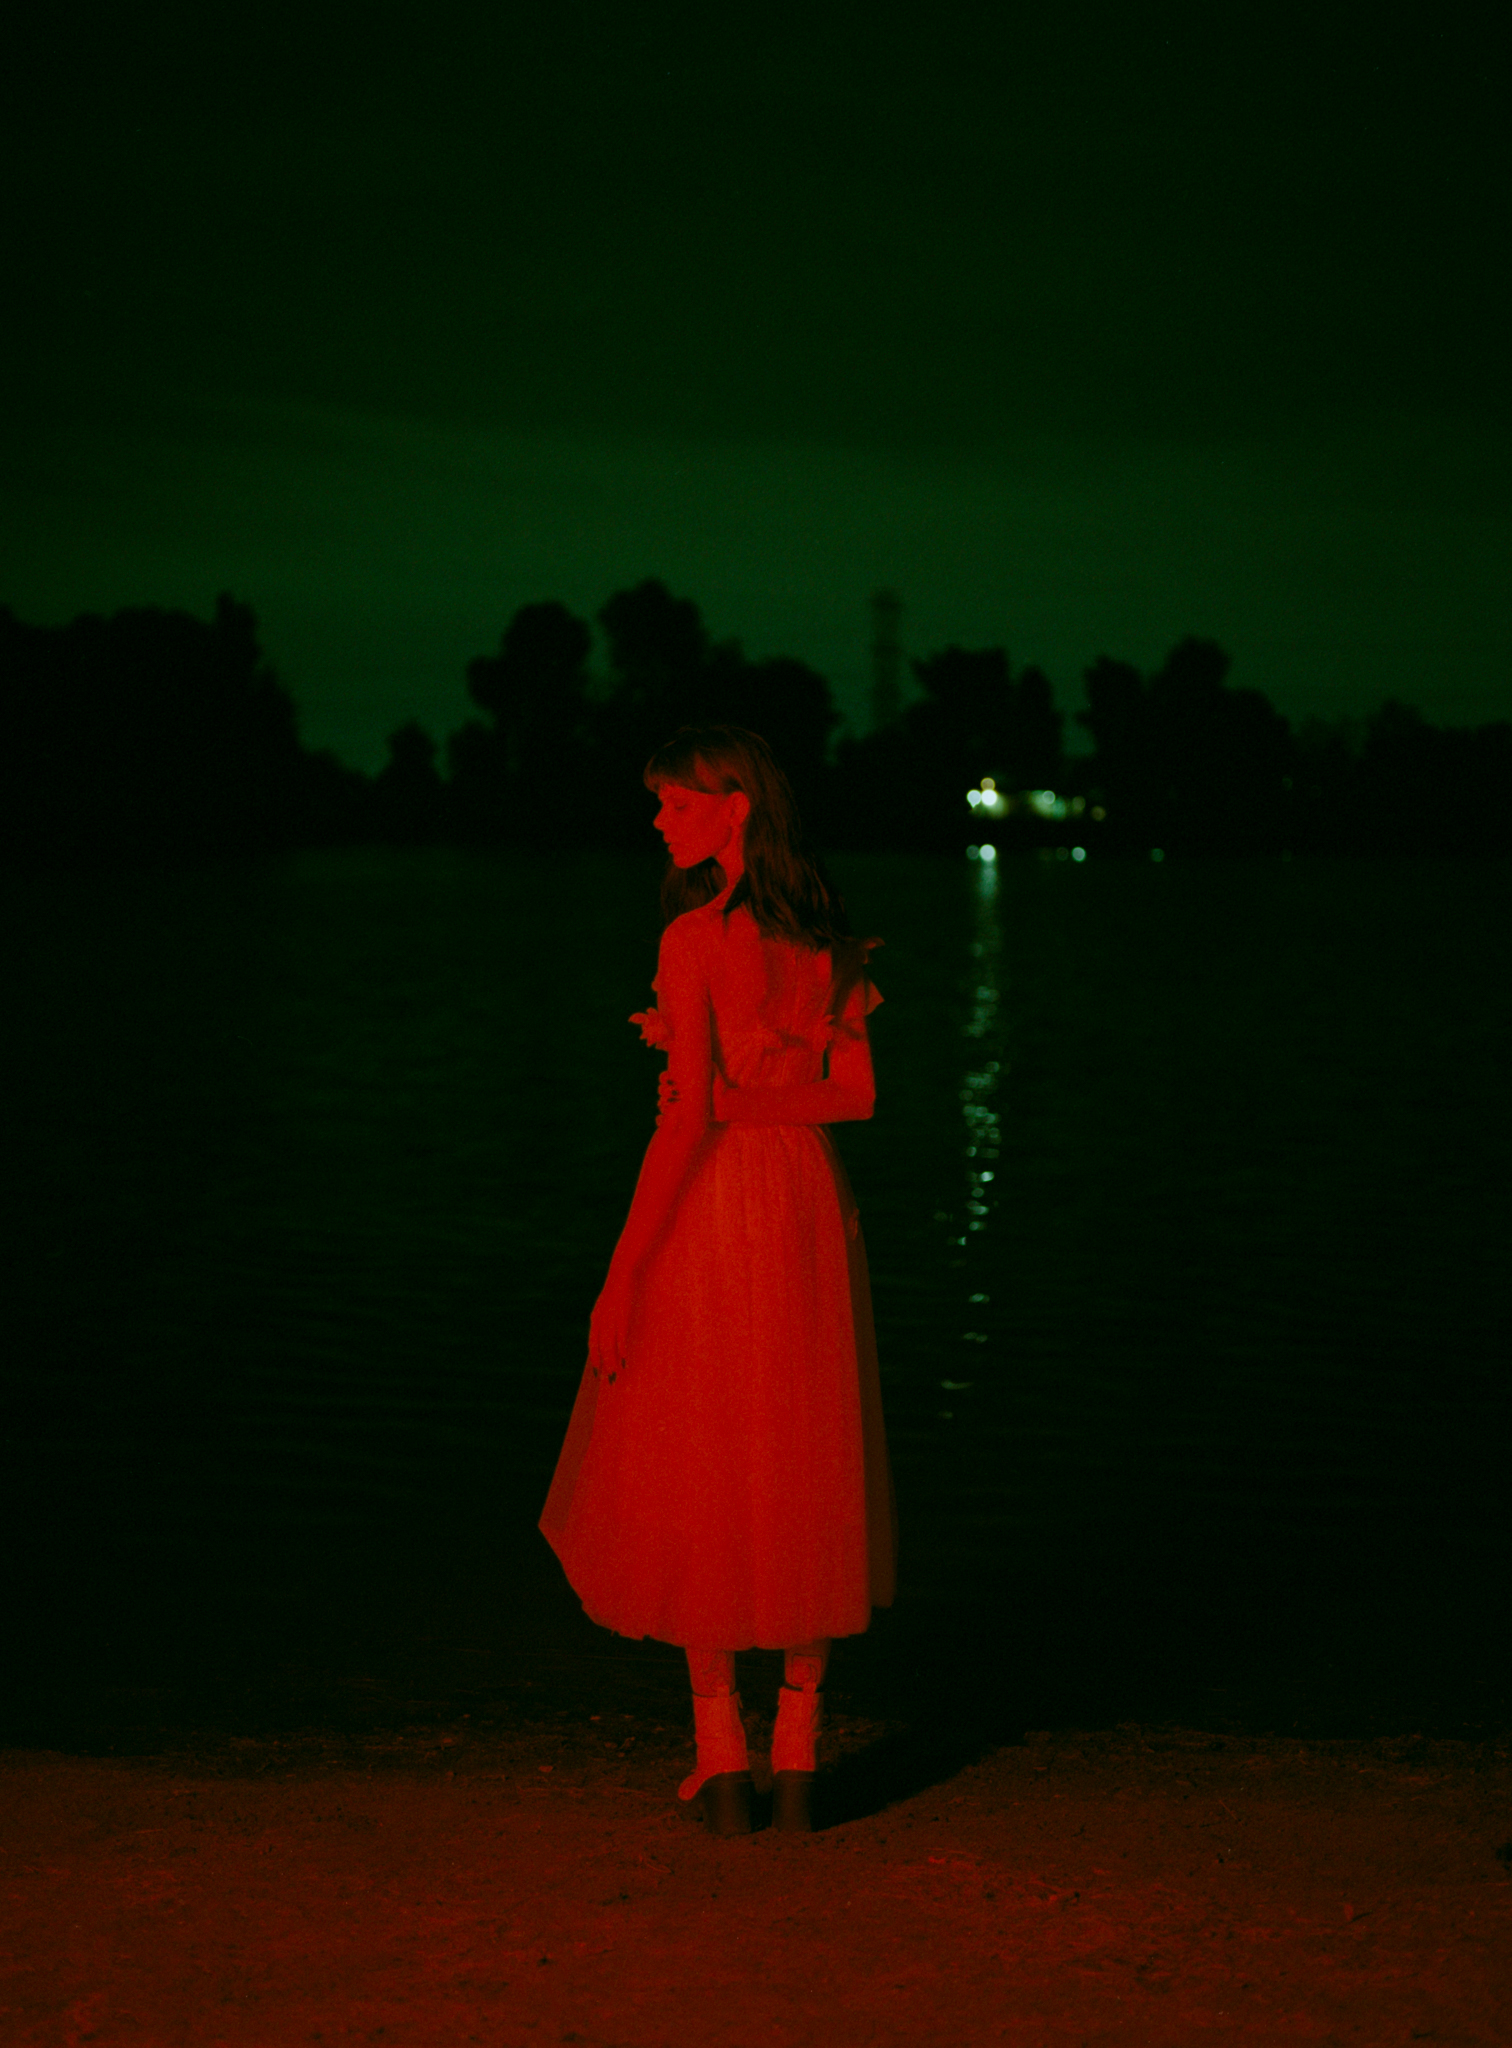
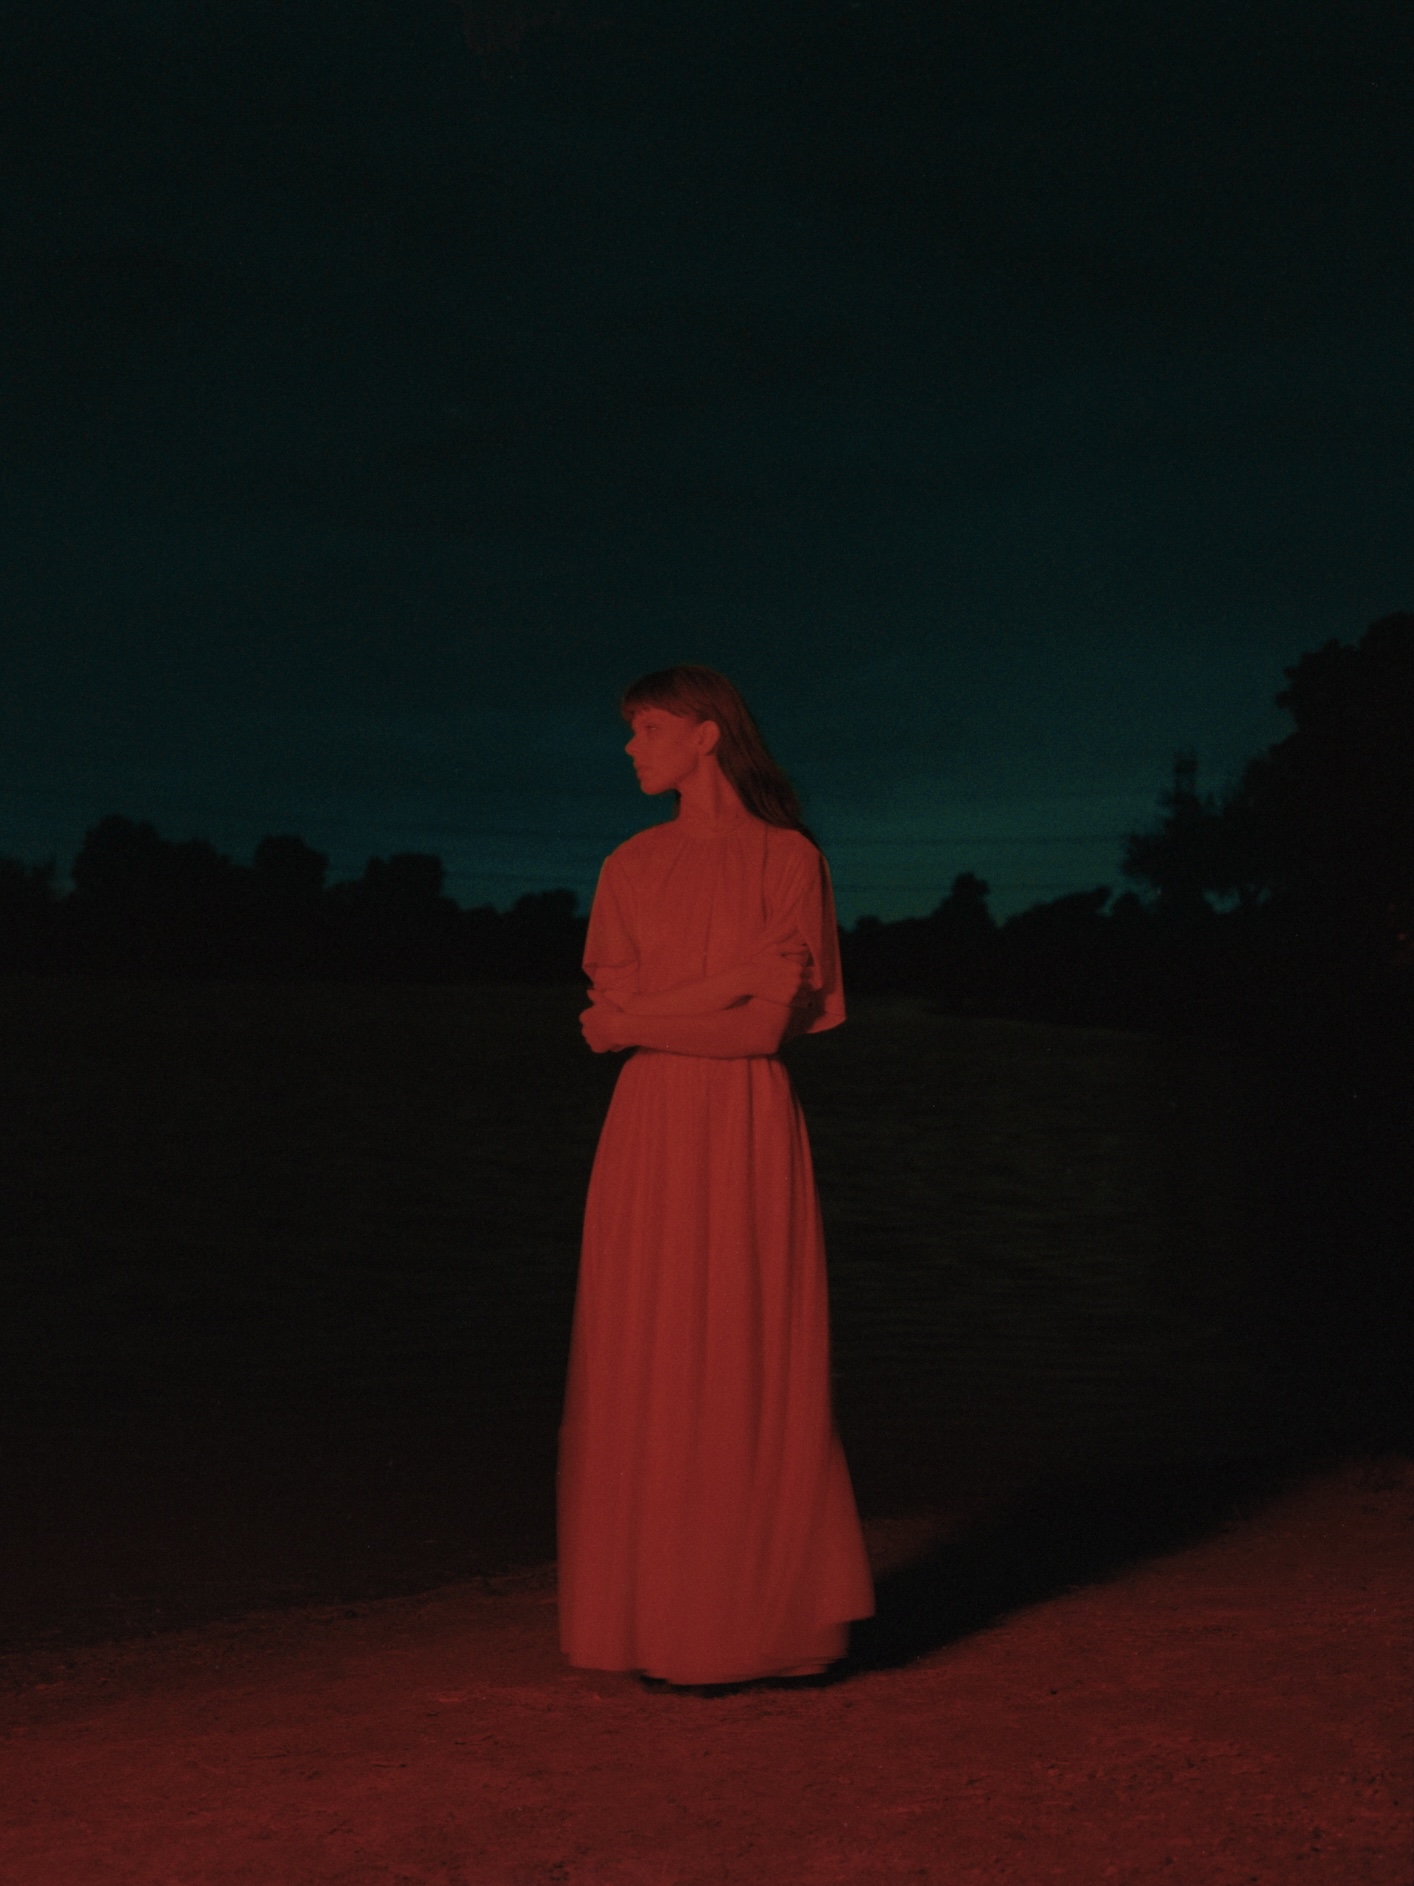
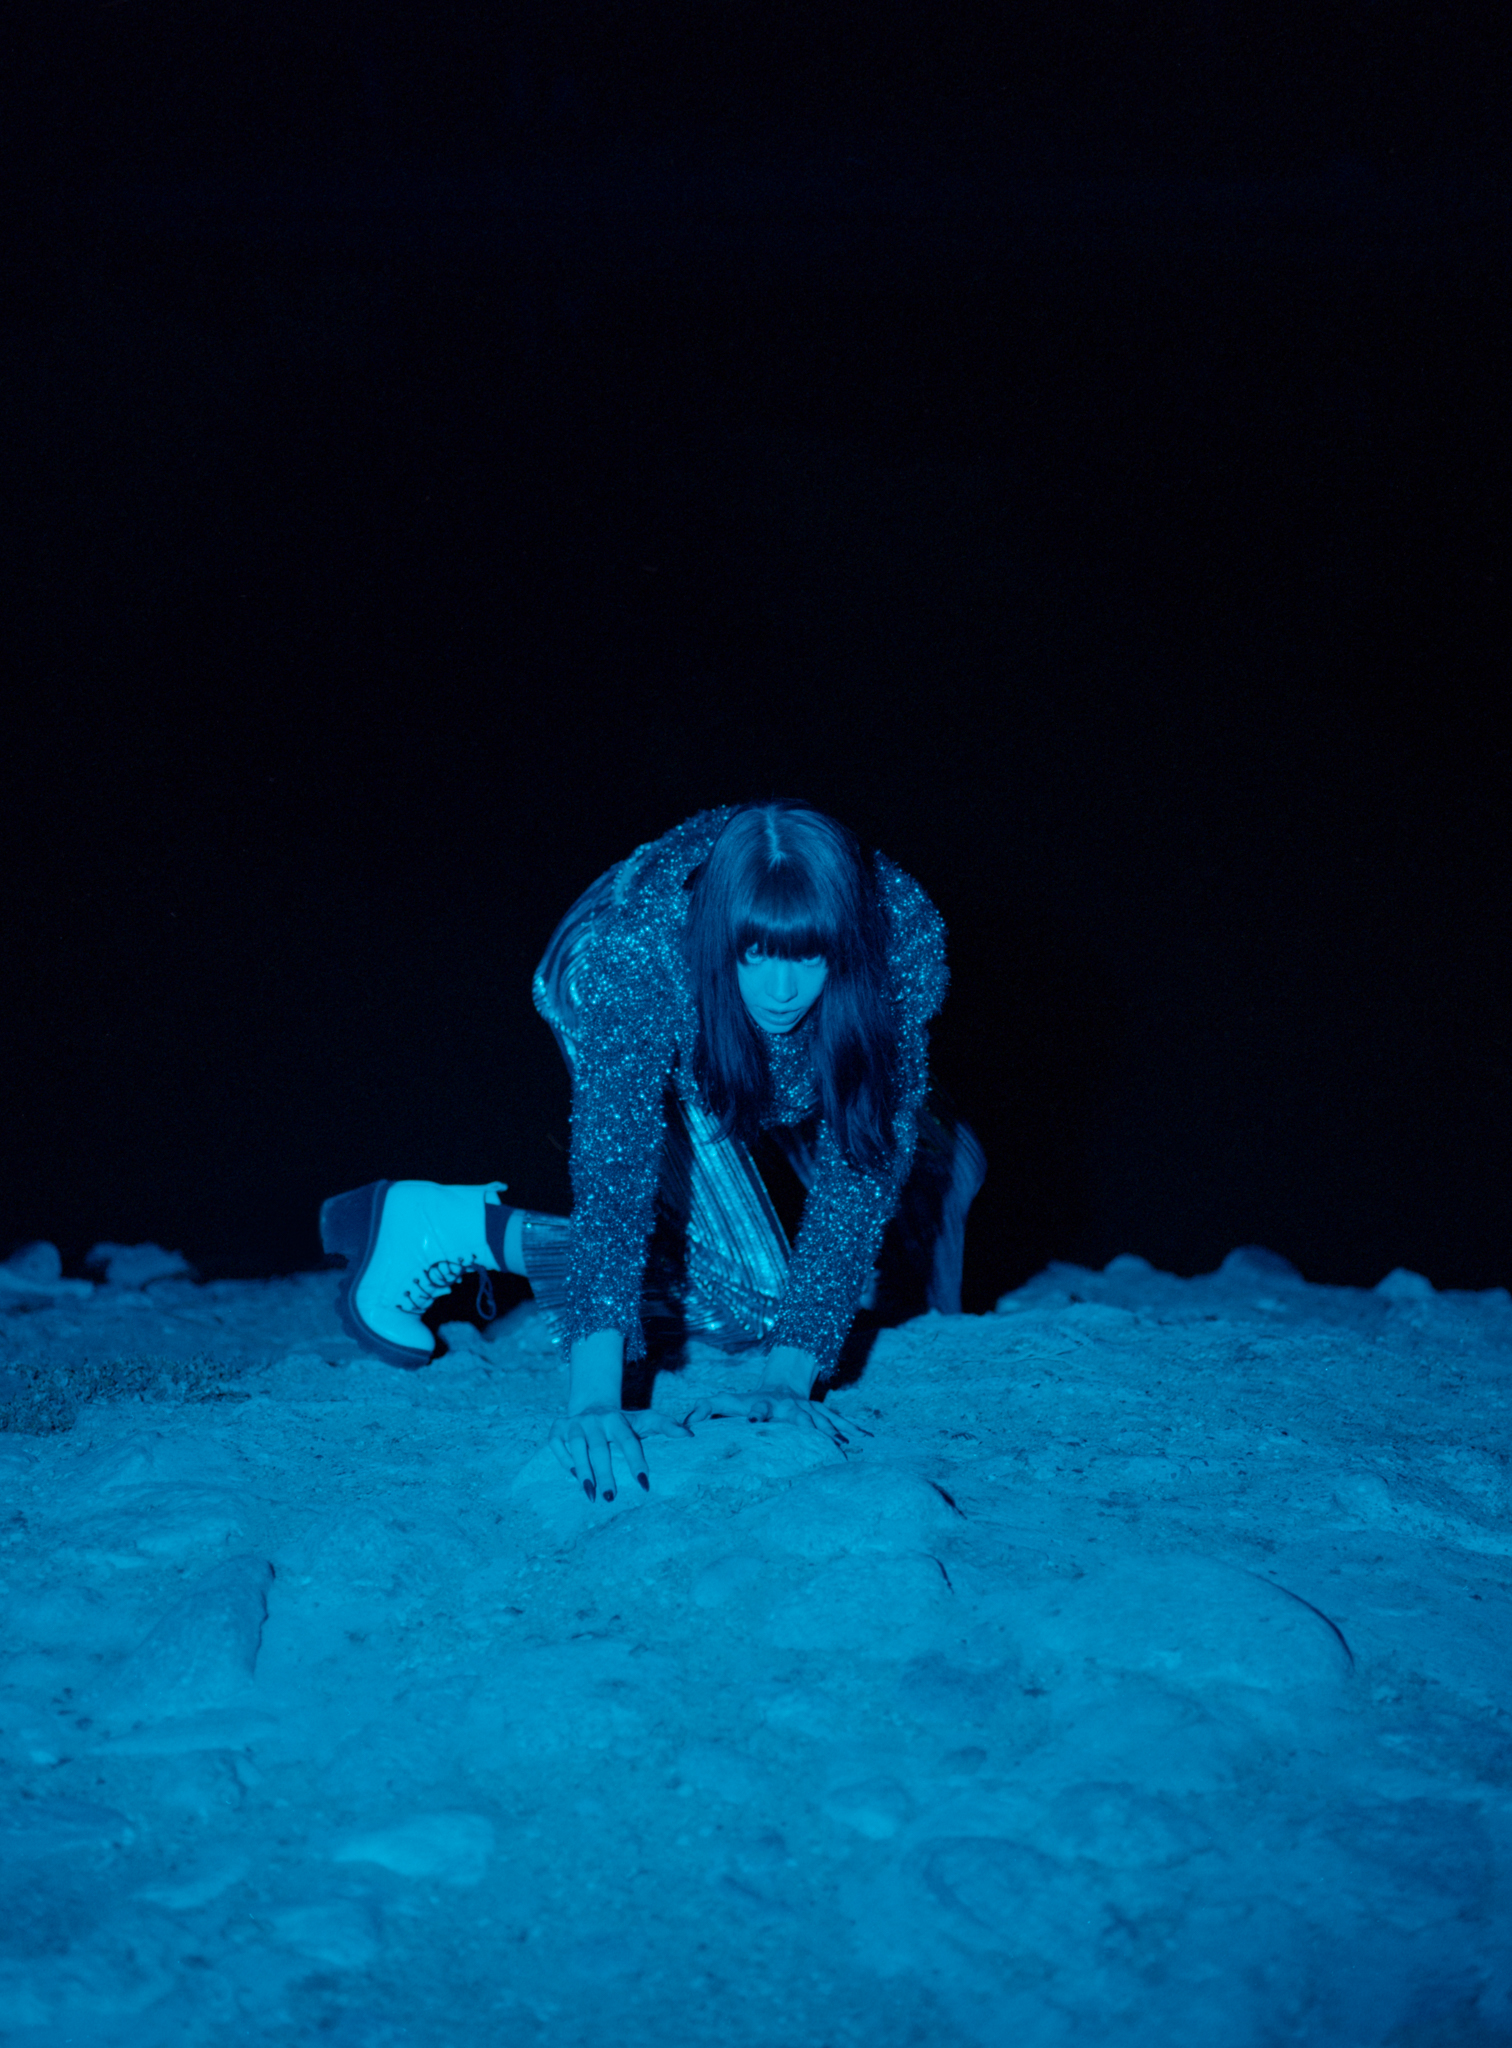
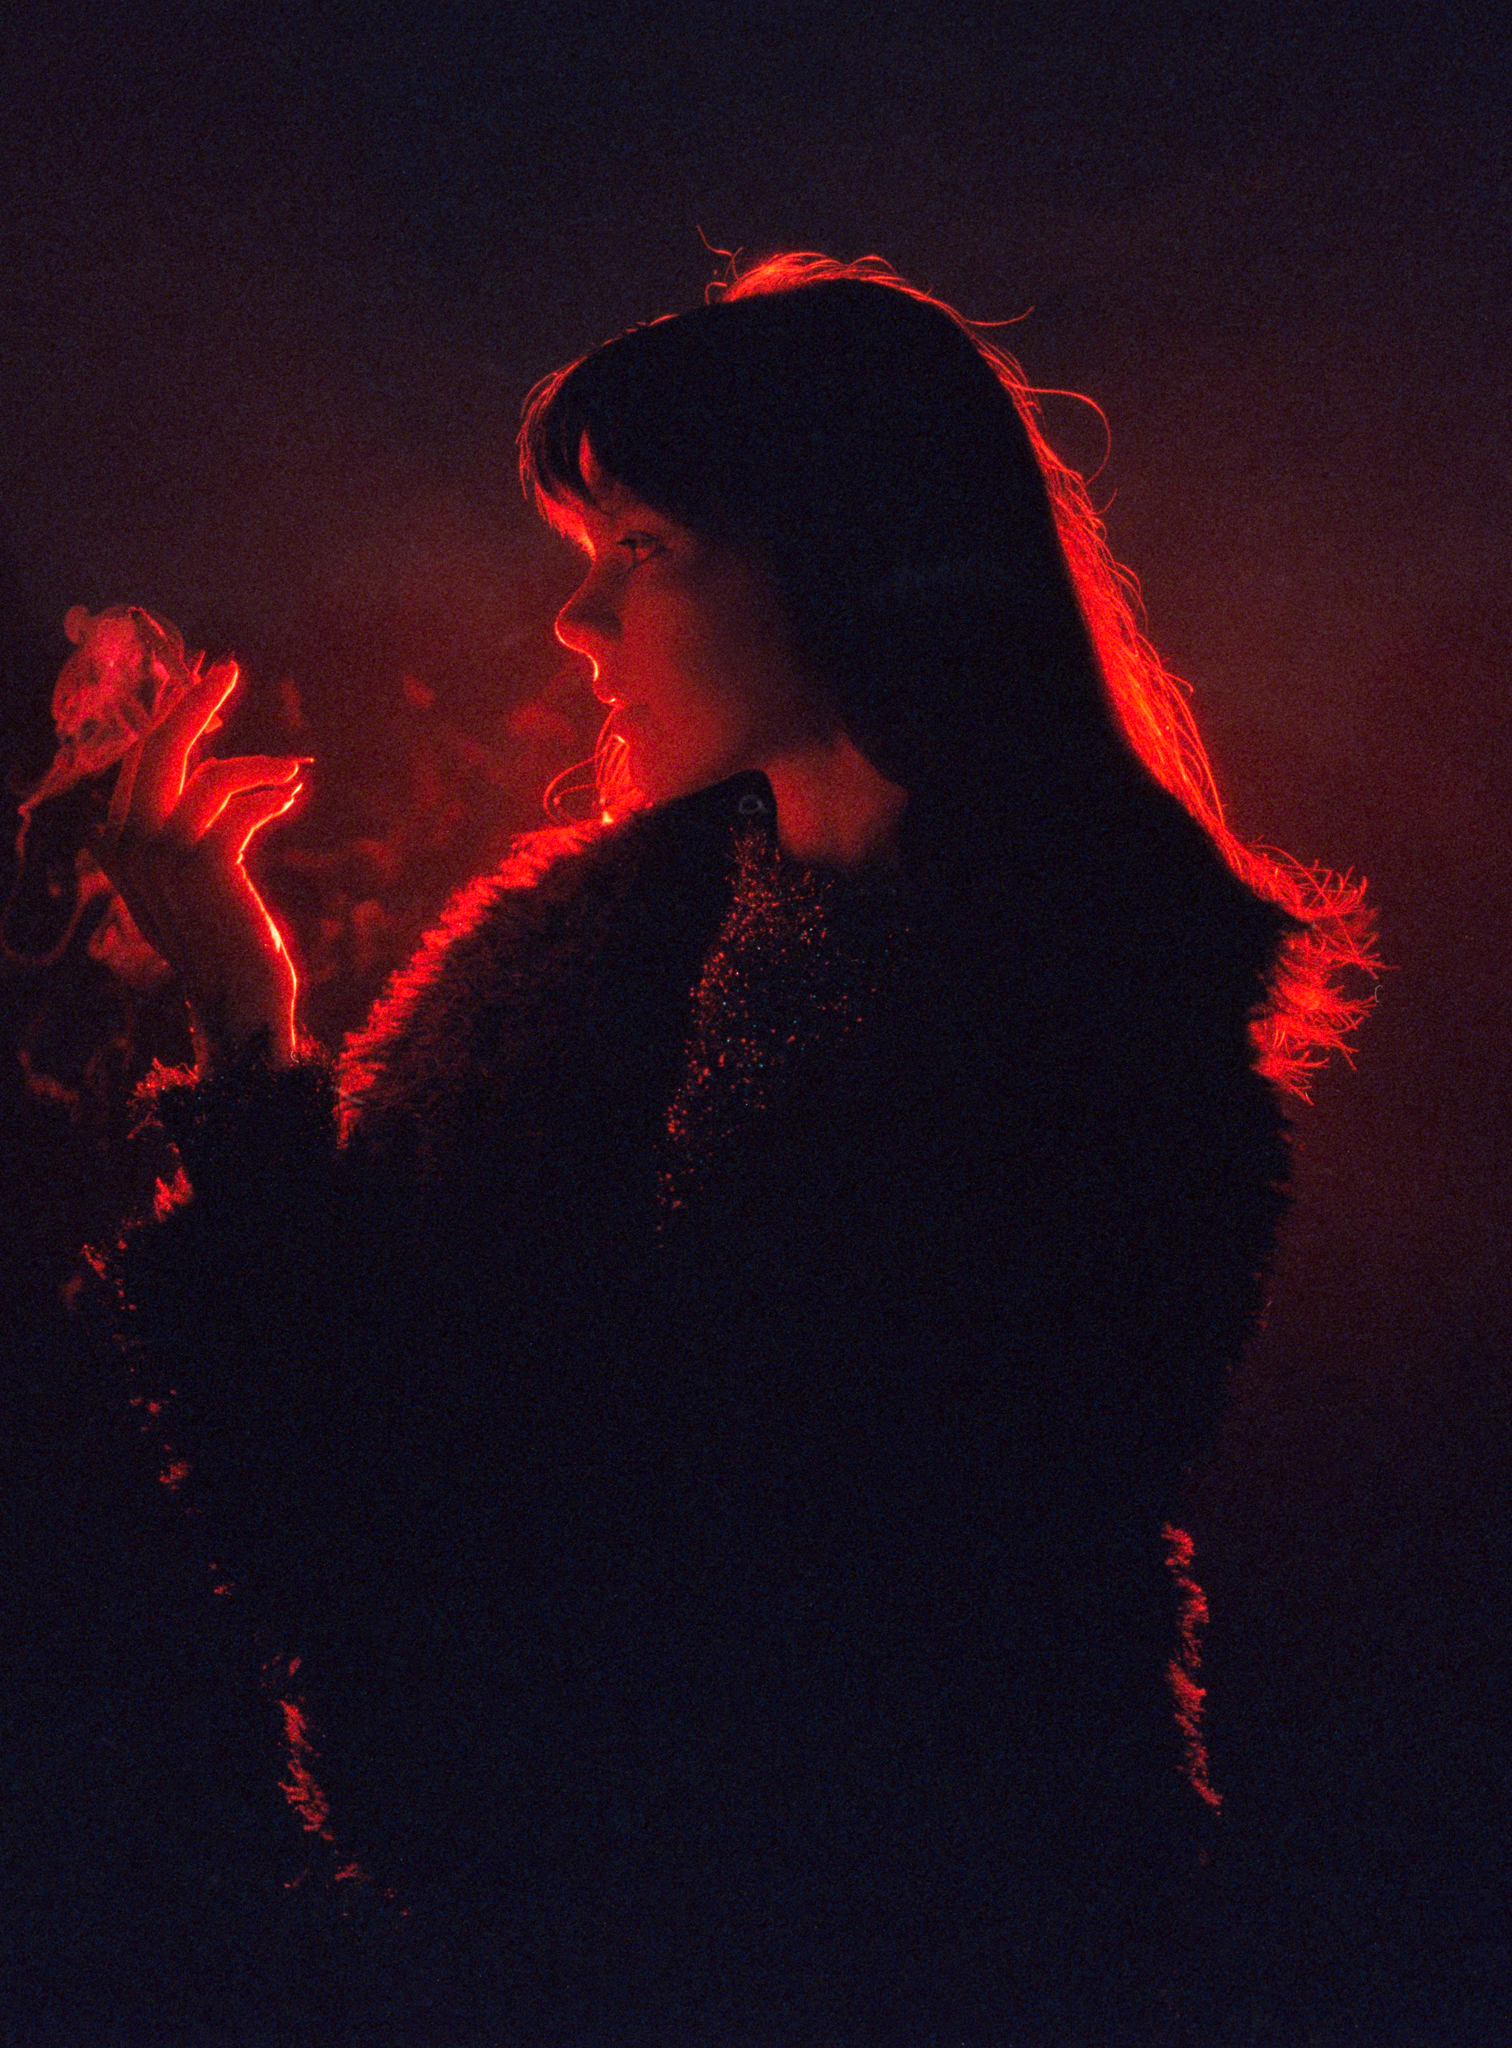
By the end of this roll, we moved to another spot; again, the light contrast is too high, we can’t see the water at all… but I still like this shot, I like the vibe, her energy…


And at this point, I realized that I was so overwhelmed by the light and the color, I was having so much fun with it, I was trying to figure out the technical things, the correct measuring of the light. No matter what color the light is, the brightness should read out the same to the camera, but for some reason, the color just threw me off, I wasn’t sure if my settings were correct… I was overthinking things… so on and on…
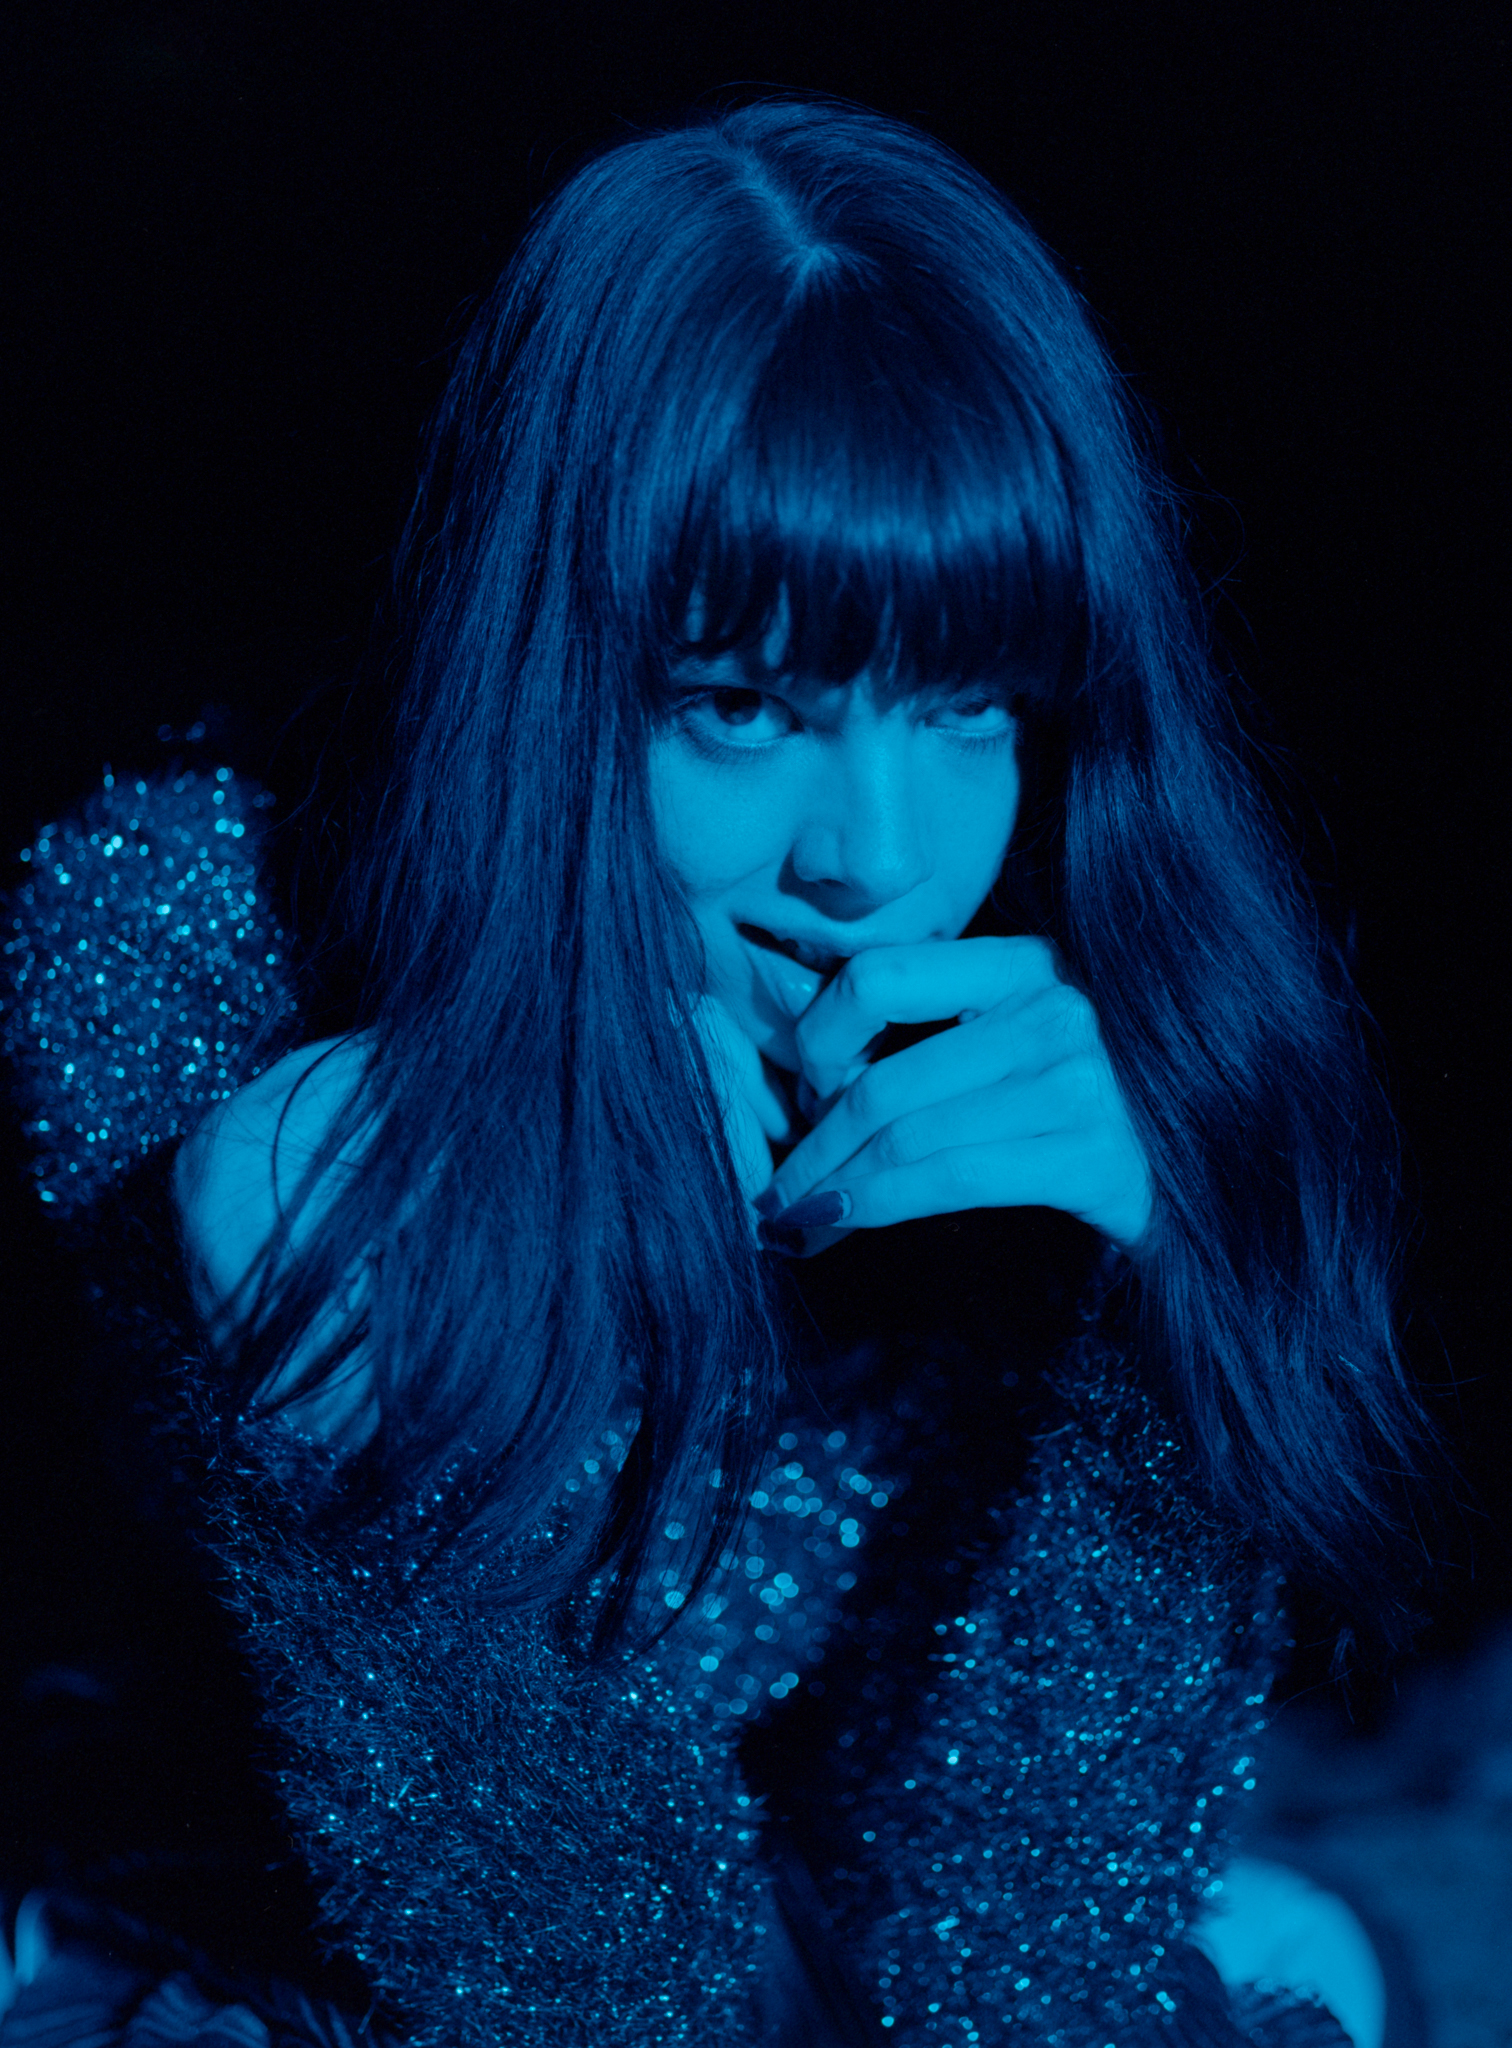
After these 2 rolls, I decided to shoot another roll, keep it simple, keep the light close, don’t worry about the background or anything, just focus on the model. I really like how the last set turned out, even though we don’t have much layers, you could say these are shot with a black backdrop, but I still really like the emotions, and the aesthetic. Our model Rosey did a great job.
Over all, this is a really fun test, I was able to shoot something I’ve never shot before, and learned something new. Thanks to Aputure again for sending me this light, I’ll definitely be using it more and see what else I can do with it.
And this is it for this weeks entry, I hope you enjoy it, please click the like button if you do and consider subscribed to my channel to see more Sam try photography stuff video.. and this is Sam, I’ll see you next time.. bye~


Leave a comment